

- Understanding the Need for a Water Softener
- Gathering the Right Tools and Materials
- Preparing for the Installation
- Step-by-Step Water Softener Installation
- Finishing Touches and Testing the System
1. Understanding the Need for a Water Softener
Before diving into the installation process, it's important to understand why a water softener is necessary. Hard water, which is high in calcium and magnesium, can cause damage to pipes, appliances, and even your skin and hair. Installing a water softener helps to eliminate these minerals, making your water "softer" and better for your home and health.
In the U.S., hard water is a common issue, affecting homes across many states. Hard water can cause scale buildup in your plumbing system and on household appliances, leading to inefficiency and costly repairs. A water softener is the ideal solution, helping to extend the life of your plumbing and appliances.
For a wide selection of water softeners suited to your needs, visit Plumbers Supply Hub for expert advice and high-quality products.
2. Gathering the Right Tools and Materials
To ensure a smooth water softener installation, you'll need the right tools and materials. Here's a list of essentials to gather before starting:
- Water softener unit
- Wrenches and pliers
- Pipe cutter
- PVC pipe and fittings
- Teflon tape
- Drill and screws (for mounting)
- Water flow meter (optional)
Make sure to check your water softener's instruction manual for any specific requirements. Having these tools on hand will make the installation process easier and more efficient.
3. Preparing for the Installation
Choosing the right location for your water softener is crucial. It should be installed near the main water supply line, typically in a basement, utility room, or garage. The location should be accessible for maintenance, and there should be enough space for the system and any required pipes or drains.
Before beginning, turn off the water supply to your home and drain the pipes. This will prevent any water from spilling during the installation process. You will also need to determine whether you want a manual or automatic water softener system, as the installation steps may vary slightly based on the type you choose.
If you're unsure about the best model or installation location, Plumbers Supply Hub can help guide you in selecting the right system for your home.
4. Step-by-Step Water Softener Installation
Now that you're prepared, it's time to install the water softener. Follow these steps for a successful DIY installation:
- Step 1: Shut off the main water supply and drain the system. This step is crucial to prevent water spills and ensure a safe installation environment.
- Step 2: Cut the water supply pipe where the softener will be installed. Use a pipe cutter to ensure a clean cut.
- Step 3: Install the bypass valve on the water softener. This valve allows you to bypass the softener when necessary, such as during maintenance.
- Step 4: Connect the inlet and outlet pipes to the water softener. Use PVC fittings and Teflon tape to ensure a secure, leak-free connection.
- Step 5: Install the drain line for the brine solution. This is essential to remove the waste from the water softening process.
- Step 6: Secure the water softener in place, either by mounting it on the wall or setting it on the floor. Make sure it’s level and stable.
Remember to follow the manufacturer's instructions during the installation. If you're unsure about any steps, it's always a good idea to consult a professional plumber to ensure a proper installation.
5. Finishing Touches and Testing the System
Once your water softener is installed, it's time to test the system to make sure everything is working properly. Turn on the main water supply and check for any leaks around the connections. You should also run water through the system to make sure it's softening properly.
After installation, it’s essential to follow up with regular maintenance. This includes checking the salt level in the brine tank, cleaning the system periodically, and ensuring the system is running efficiently. A properly maintained water softener can last for many years, providing you with soft water for all your household needs.
For ongoing support and quality products, visit Plumbers Supply Hub for all your water softener maintenance needs.


 Undercutters Plumbing3.0 (10 reviews)
 HEP is on the way4.0 (490 reviews)
 J.I.G. Plumbing, Inc5.0 (669 reviews)
 Lanier's Plumbing & Repipe Specialists4.0 (14 reviews)
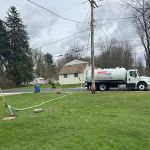 Rooter Man4.0 (476 reviews)
 Team Rooter Plumbing4.0 (581 reviews)
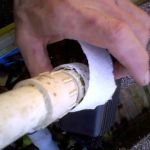 How to Repair a Crack in a Plastic Drain Pipe
 Why Your Water Bill Is High and How to Lower It with Plumbing Solutions
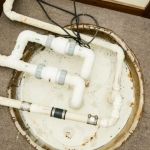 How to Reroute a Plumbing Run Over a Crawlspace: A Step-by-Step Guide
 How to Install a New Toilet: A Complete Step-by-Step Guide
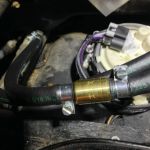 How to Replace an In-Line Check Valve
 How to Eliminate Odors Coming from Your Drains