

- Why Choose a Pot Filler Faucet?
- Tools and Materials Needed
- Step-by-Step Installation Process
- Common Mistakes to Avoid
- Final Thoughts
Why Choose a Pot Filler Faucet?
Pot filler faucets are becoming increasingly popular in modern kitchens due to their convenience. Installed directly above your stove, they allow you to fill large pots with water without having to carry them from the sink. This simple addition to your kitchen not only enhances functionality but also elevates the aesthetic of your cooking space. If you’re an avid cook, a pot filler faucet can save you time and effort, allowing you to enjoy your kitchen even more.
Tools and Materials Needed
Before starting the installation, you’ll need to gather some essential tools and materials:
- Pot filler faucet kit
- Adjustable wrench
- Piping and fittings (specific to your kitchen setup)
- Pipe cutter
- Pipe sealant or plumber's tape
- Drill and appropriate bits
- Level
- Shut-off valves (if needed)
Make sure to purchase a high-quality pot filler faucet that fits your kitchen's layout. At Plumbers Supply Hub, you can find a range of faucets that suit your needs perfectly.
Step-by-Step Installation Process
Here’s a step-by-step guide to installing your pot filler faucet:
1. Turn Off Water Supply
Before starting any plumbing work, ensure you turn off the water supply to avoid any accidents or leaks during the installation process. If your kitchen doesn't have an isolated shut-off valve, make sure to turn off the main water supply.
2. Mark Faucet Placement
Next, decide where you want to install the faucet. The ideal location is directly above the stove, allowing easy access to large pots. Use a pencil to mark the area where you will drill the hole for the faucet.
3. Drill the Hole for the Faucet
Using the appropriate drill bit, carefully drill a hole in the marked spot. Make sure the hole is large enough to fit the faucet's installation base securely.
4. Install the Faucet
Once the hole is ready, insert the pot filler faucet into the hole and tighten the screws to secure it in place. Ensure the faucet is level using a spirit level, which will help maintain a proper flow of water.
5. Connect the Plumbing
Next, connect the faucet to the water supply pipes. Depending on your setup, you might need additional fittings or adapters. Use plumber’s tape to prevent leaks at the connection points.
6. Check for Leaks
Once everything is connected, turn the water back on and check the faucet for any leaks. If there are any issues, tighten the connections further or reapply plumber’s tape where necessary.
7. Final Adjustments
Make any final adjustments to ensure the faucet is functioning properly. Test the water flow and make sure the faucet rotates smoothly. You are now ready to enjoy your new pot filler faucet!
Common Mistakes to Avoid
While installing a pot filler faucet may seem simple, there are several common mistakes to avoid:
- Incorrect hole placement: Ensure the hole is positioned correctly to avoid misalignment with your stove or countertop.
- Improper connection of water supply pipes: Ensure all connections are secure and use plumber's tape to prevent leaks.
- Not testing for leaks: After installation, always test the faucet to ensure there are no leaks before considering the job complete.
Final Thoughts
Installing a pot filler faucet is a practical and straightforward project that can significantly improve the functionality of your kitchen. By following the steps outlined above, you can enjoy the convenience of filling large pots with water directly at the stove, without the hassle of carrying them from the sink. If you're looking for high-quality faucets, make sure to visit Plumbers Supply Hub for the best products and services to complete your kitchen upgrade.


 Norblom Plumbing4.0 (133 reviews)
 Alex & Sons Plumbers4.0 (88 reviews)
 H. Jack Langer Plumbing & Heating Western New York4.0 (75 reviews)
 Fast Water Heater 5.0 (78 reviews)
 Lake Norman Plumber On Call4.0 (68 reviews)
 Fresh Start Plumbing And Restoration0.0 (0 reviews)
 How to Test Pressure Drop in a Long Pipe Run: Effective Methods for Accurate Results
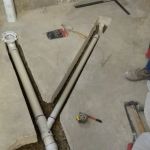 How to Ensure Proper Venting in Your Drainage System
 What Causes Discolored Water and When to Worry
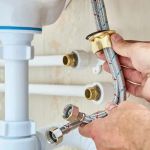 The Best Ways to Keep Your Plumbing System Efficient and Leak-Free
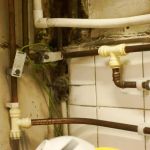 How to Troubleshoot Plumbing Issues in Older Homes
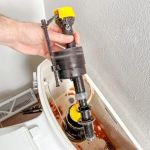 How to Replace a Toilet Fill Valve Quietly