
- 1- Understanding Why Your Showerhead Leaks
- 2- Tools You’ll Need for the Repair
- 3- Step-by-Step Guide to Fixing a Leaky Showerhead
- 4- Common Issues That Cause Leaky Showerheads
- 5- How to Prevent Future Leaks
- 6- Our Recommendation: Shop Plumbing Essentials at Plumbers Supply Hub
1. Understanding Why Your Showerhead Leaks
A leaky showerhead is more than just an inconvenience; it can lead to increased water bills and unnecessary waste. Understanding why your showerhead leaks is the first step in fixing the issue effectively. Most leaks happen due to worn-out parts, improper installation, or mineral buildup in the pipes.

Eco Plumbers, Electricians, and HVAC Technicians
428 Beecher Rd Suite C, Gahanna, OH 43230, USA
1.1- Common Causes of Leaks
There are several reasons why a showerhead may leak. The most common include:
- Worn-out washers or O-rings
- Corroded or damaged plumbing connections
- Build-up of mineral deposits from hard water
- Loose showerhead or arm connections
By identifying the cause of the leak, you can save time and money by addressing the root problem rather than replacing the entire fixture.

Plumbing & Drain Professionals
374 Morrison Rd Suite A, Columbus, OH 43213, USA
2. Tools You’ll Need for the Repair
Before you begin, gather the following tools to ensure you can complete the repair smoothly:
2.1- Essential Tools
- Adjustable wrench or pliers
- Plumber’s tape (Teflon tape)
- Replacement washers or O-rings
- Small brush or old toothbrush
- Rubber gloves (optional for extra grip)
Having the right tools on hand will make the repair process more efficient and help avoid any damage to your showerhead or pipes.
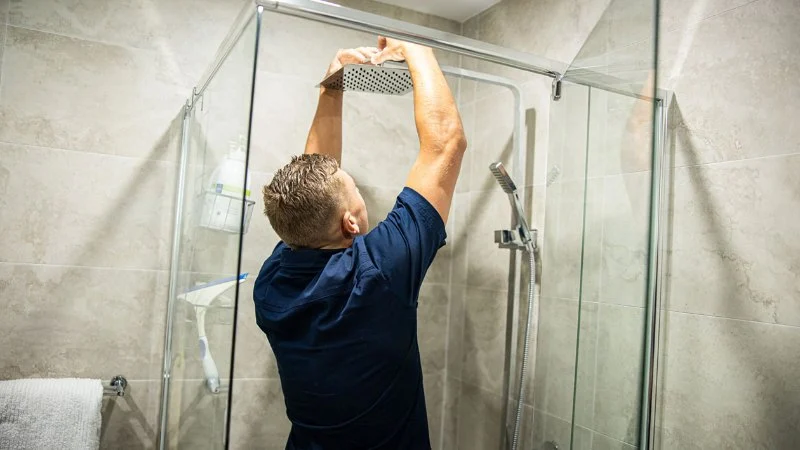
3. Step-by-Step Guide to Fixing a Leaky Showerhead
Now that you have the tools ready, it’s time to fix that leaky showerhead! Follow these simple steps:
3.1- Turn Off the Water Supply
Before starting, make sure to turn off the water supply to the shower to avoid any unwanted sprays while working on the fixture.
3.2- Remove the Showerhead
Use an adjustable wrench or pliers to carefully unscrew the showerhead from the shower arm. Be cautious not to damage the threads. If the showerhead is stuck, apply gentle pressure and consider using a cloth to protect the surface from scratches.
3.3- Inspect the Washer or O-Ring
Once the showerhead is removed, check the washer or O-ring inside the fixture. These parts often wear out over time, leading to leaks. If you notice any damage, it’s time to replace them with new ones.
3.4- Clean the Showerhead and Pipe Threads
Mineral deposits from hard water can clog the showerhead and cause leaks. Use a small brush or old toothbrush to scrub the inside of the showerhead and remove any buildup. You can also soak the showerhead in a vinegar solution for a few hours to dissolve mineral deposits.
3.5- Reassemble and Test
Once the washer is replaced and the parts are clean, apply a bit of plumber’s tape to the threads of the shower arm. Then, reattach the showerhead, tightening it by hand first before using the wrench to secure it. Turn the water back on and test for leaks.
4. Common Issues That Cause Leaky Showerheads
Even after fixing the obvious issues, some leaks may persist. Here are a few common issues to check for if your showerhead continues to leak:
4.1- Faulty Shower Arm Connection
If the connection between the shower arm and the pipe is loose or damaged, water may still leak. Ensure that the threads are intact and use plumber’s tape to create a tight seal.
4.2- Broken or Worn Threads
Worn or corroded threads on the shower arm can also lead to leaks. If the threads are beyond repair, you may need to replace the shower arm altogether.
4.3- Over-tightened Showerhead
Over-tightening the showerhead can cause damage to the threads or seals, which might result in a leak. Always hand-tighten the showerhead first and only use the wrench for an extra turn if needed.
5. How to Prevent Future Leaks
Once your leaky showerhead is fixed, you’ll want to prevent future leaks. Here are some simple preventive measures you can take:
5.1- Regular Cleaning
Regularly clean your showerhead to remove mineral buildup and prevent clogging. You can use a vinegar solution for a deep clean every few months.
5.2- Check the Seals
Periodically check the washers and O-rings for wear and tear. Replace them at the first sign of damage to avoid future leaks.
5.3- Avoid Over-tightening
Over-tightening the showerhead can damage the threads or cause unnecessary stress on the connections. Always tighten by hand, and only use tools for a secure fit.
6. Our Recommendation: Shop Plumbing Essentials at Plumbers Supply Hub
If you need high-quality tools or replacement parts for your showerhead repair, check out Plumbers Supply Hub. We offer a wide range of plumbing essentials, including showerheads, washers, O-rings, and much more. Visit our website to find the best products for your plumbing needs!


 1-Tom-Plumber5.0 (2457 reviews)
 Mr Water Heater Guy4.0 (25 reviews)
 Heeter Plumbing, LLC4.0 (152 reviews)
 Greg's Sewer & Drains5.0 (44 reviews)
 Jackteck Plumbing Services5.0 (48 reviews)
 Service 1 Plumbing4.0 (25 reviews)
 How to Insulate Exposed Pipes Without Blocking Access
 The Risks of Ignoring a Small Pipe Leak Early On
 How to Replace a Broken Pipe in a Slab Foundation | Plumbers Supply Hub
 How to Replace a Plumbing Vent Cap on the Roof | Plumbers Supply Hub
 What to Do If Your Toilet Is Overflowing: Quick Steps to Take
 How to Install a Bathroom Sink: A Complete Guide