
- 1. Why You Need to Replace the Plumbing Vent Cap
- 2. Common Signs of a Damaged Plumbing Vent Cap
- 3. Materials and Tools Needed for Vent Cap Replacement
- 4. How to Replace the Plumbing Vent Cap
- 5. When to Call a Professional Plumber
1. Why You Need to Replace the Plumbing Vent Cap
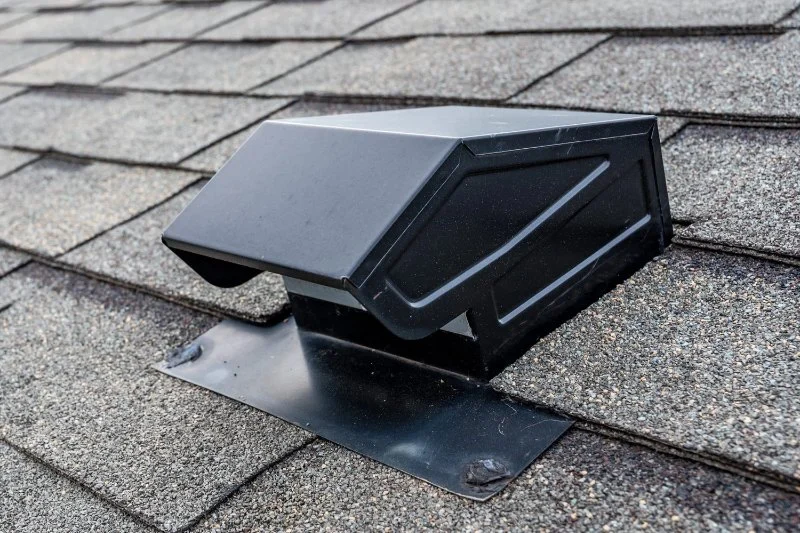
The plumbing vent cap on your roof plays a crucial role in the plumbing system by allowing air to enter the drain pipes, which helps maintain proper pressure and prevent sewer gases from entering the house. Over time, vent caps can become damaged or worn out due to weather exposure, pests, or natural wear and tear.
Replacing a damaged vent cap is essential to ensure the proper functioning of your plumbing system. A faulty vent cap can lead to drainage issues, bad odors, and even the buildup of harmful gases in your home. Timely replacement will also protect your plumbing from further damage and costly repairs in the future.
Plumbing & Drain Professionals
374 Morrison Rd Suite A, Columbus, OH 43213, USA
2. Common Signs of a Damaged Plumbing Vent Cap
If you’re unsure whether your plumbing vent cap needs replacing, here are some signs to watch out for:
Miller and Sons Plumbing LLC.
MiamisburgMontgomery CountyOhio
341 N Main St, Miamisburg, OH 45342, USA
2.1 Visible Cracks or Damage
One of the most obvious signs that a vent cap needs replacing is visible damage, such as cracks, chips, or missing pieces. If you notice that the cap is broken or deteriorating, it's time to replace it to prevent water, debris, or pests from entering your plumbing system.
2.2 Foul Odors Inside the House
If you start noticing unpleasant smells coming from your drains or in the house, it could indicate that the vent cap is no longer functioning properly. The vent cap helps release sewer gases outside, and a broken or blocked vent can cause these gases to back up into your home.
2.3 Slow Draining or Gurgling Noises
Another sign of a clogged or damaged plumbing vent cap is slow drainage or gurgling noises when using sinks, bathtubs, or toilets. This may indicate that there is inadequate airflow in the plumbing system, leading to drainage issues and poor water flow.
3. Materials and Tools Needed for Vent Cap Replacement
Replacing a plumbing vent cap is a simple task that requires a few materials and tools. Here's a list of what you'll need:
3.1 New Plumbing Vent Cap
First and foremost, you’ll need a new plumbing vent cap that matches the size and style of your existing vent. You can find vent caps made of materials such as plastic, metal, or stainless steel, each offering different durability and weather resistance levels.
3.2 Ladder
A sturdy ladder is essential for reaching your roof safely. Make sure the ladder is tall enough to reach the vent area without compromising stability.
3.3 Screwdriver or Drill
You’ll need a screwdriver or drill to remove the old vent cap and install the new one. Make sure you have the right drill bits and screws for secure attachment.
3.4 Roofing Sealant or Caulk
To ensure a tight seal around the new vent cap and prevent leaks, you may need roofing sealant or caulk. This helps waterproof the area and protect against rain or moisture damage.
4. How to Replace the Plumbing Vent Cap
Follow these steps to safely and effectively replace your plumbing vent cap:
4.1 Set Up the Ladder
First, position the ladder on a stable surface and climb carefully to reach the roof. Make sure you have a secure footing and maintain your balance while working at height.
4.2 Remove the Old Vent Cap
Once you reach the vent cap, inspect the cap to see how it’s secured. Most vent caps are held in place with screws or bolts. Use your screwdriver or drill to remove the fasteners and take the old vent cap off. Be careful not to damage the vent pipe during this process.
4.3 Clean the Area Around the Vent Pipe
Before installing the new vent cap, clean the area around the vent pipe. Remove any debris, dirt, or old sealant to ensure a clean, secure attachment for the new cap.
4.4 Install the New Vent Cap
Place the new vent cap over the vent pipe and align it properly. Use the screws or bolts to attach the cap securely. Apply roofing sealant around the edges of the vent cap to prevent leaks and ensure a tight fit.
4.5 Test the New Vent Cap
Once the new cap is installed, check for proper alignment and ensure that it is securely fastened. You may also want to check for any signs of leaks around the cap after a few rain showers to ensure everything is sealed correctly.
5. When to Call a Professional Plumber
While replacing a plumbing vent cap is generally a straightforward DIY task, there are certain situations where it’s best to call a professional plumber. If you’re uncomfortable working on the roof or unsure about the proper installation process, hiring a plumber can ensure the job is done correctly and safely.
Additionally, if you encounter any problems during the replacement process, such as damaged vent pipes or difficulty removing the old cap, a professional plumber can offer assistance and make the necessary repairs.
For reliable plumbing services, visit Plumbers Supply Hub for expert guidance and high-quality products for your plumbing needs.


 A & W Plumbing and Heating, Inc.4.0 (145 reviews)
 Neels Plumbing4.0 (79 reviews)
 Jim & Dude's Plumbing Heating & Air Conditioning4.0 (113 reviews)
 Bedrock Plumbing & Drain Cleaning4.0 (357 reviews)
 Paul C. Scott & Sons Plumbing, Inc.3.0 (115 reviews)
 Thomas Plumbing Services Walkertown NC4.0 (23 reviews)
 How to Detect a Hidden Slab Leak: A Complete Guide for Homeowners
 How to Test Water Pressure at Multiple Fixtures
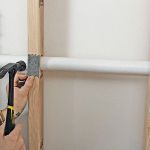 How to Reroute Plumbing for a Kitchen Island: A Step-by-Step Guide
 How to Replace an Outdated Plumbing Fixture Safely
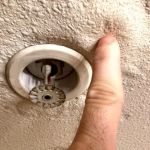 How to Find and Fix Hidden Water Leaks in Your Home
 How to Unclog a Sink with a Drain Snake: A Quick and Effective Guide