
- Planning Your Plumbing Installation
- Choosing the Right Materials for Plumbing
- Step-by-Step Plumbing Installation Process
- Common Mistakes to Avoid When Installing Plumbing
- Working with Professionals vs. Going DIY
- Real-World Case Study of Plumbing Installation
1. Planning Your Plumbing Installation
When starting a new construction project, one of the most crucial aspects to plan is the plumbing system. Proper planning ensures that water distribution is efficient and waste removal is effective, both of which are vital for a functional and long-lasting home. The first step in installing plumbing is to carefully consider the design of your plumbing system.

1.1- Designing the Plumbing System Layout
The plumbing layout should be designed early in the project, before construction begins. You’ll need to consider factors such as where the water source enters the home, where fixtures will be placed, and how the waste will be carried away. The design should also account for local building codes and the distance the pipes will need to travel to avoid unnecessary bends or long, inefficient routes.
Tri-County Plumbing Heating & Air Conditioning
3987 Hamilton Middletown Rd K, Hamilton, OH 45011, USA
1.2- Calculating the Water Pressure and Flow Rate
Understanding the water pressure and flow rate is essential for designing a plumbing system that delivers sufficient water to all areas of the home. It’s important to calculate how much water will be needed in each part of the house and how pressure will be maintained as water moves through the pipes. In some cases, you may need to install a booster pump or pressure regulator to ensure optimal water flow.
2. Choosing the Right Materials for Plumbing
Once you’ve planned your plumbing system, the next step is choosing the materials for the pipes, fittings, and fixtures. The right materials will ensure the longevity and efficiency of your plumbing system. Below are some of the most commonly used plumbing materials in new construction.
2.1- PVC and CPVC Pipes
For most residential plumbing systems, PVC (polyvinyl chloride) and CPVC (chlorinated polyvinyl chloride) pipes are a popular choice. These materials are durable, lightweight, and resistant to corrosion. PVC pipes are commonly used for waste and vent lines, while CPVC is often used for hot water lines due to its heat resistance. They are also relatively inexpensive compared to other materials like copper.
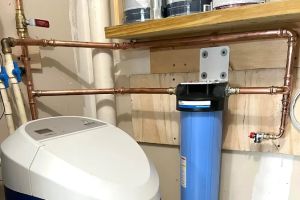
2.2- Copper Pipes
Copper pipes are another common option for water supply lines. They are highly durable, resistant to corrosion, and provide excellent water quality. Although they are more expensive than PVC or CPVC, copper pipes are known for their long lifespan and ability to withstand high pressures and temperatures. Copper is also antimicrobial, which helps to reduce the risk of bacterial growth inside the pipes.
2.3- PEX (Cross-Linked Polyethylene) Pipes
PEX pipes have gained popularity in recent years due to their flexibility, ease of installation, and resistance to freezing. These pipes are particularly useful for retrofitting older plumbing systems or installing a plumbing system in hard-to-reach areas. PEX is also less likely to burst in freezing temperatures compared to other materials. However, it is important to note that PEX should not be used for outdoor plumbing, as UV rays can degrade the material.
3. Step-by-Step Plumbing Installation Process
Installing plumbing involves several steps, from laying out the pipes to connecting them to the water supply and sewer system. Below is an overview of the general plumbing installation process:
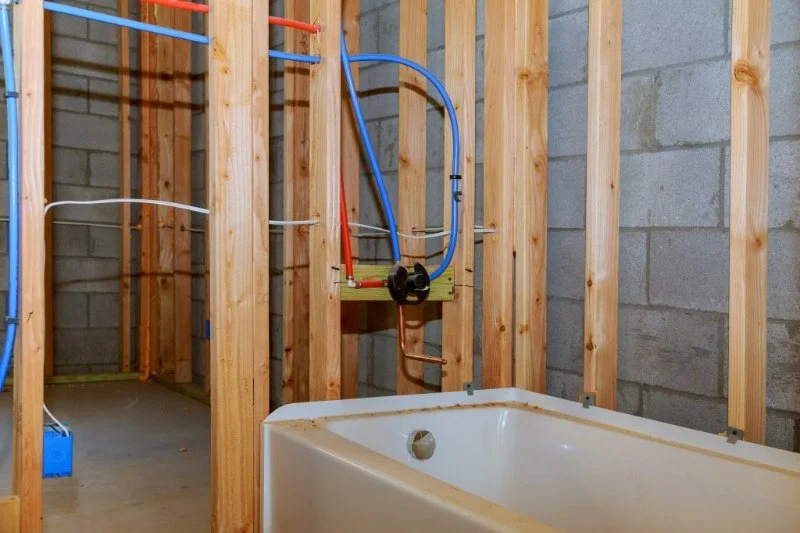
3.1- Installing Water Supply Lines
The first major step is to install the water supply lines, which carry water from the main supply to fixtures like sinks, toilets, and showers. Begin by laying the pipes according to the design, making sure they are securely anchored and free from sharp bends that could cause blockages or damage over time.
3.2- Connecting Wastewater Lines
Once the water supply lines are in place, you can move on to installing the wastewater lines. These pipes carry sewage and wastewater from the home to the municipal sewer system or a septic tank. It’s important to ensure the pipes have a slight slope to allow gravity to move the waste efficiently.
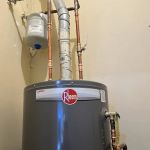
3.3- Installing Fixtures and Appliances
After the plumbing lines are installed, it’s time to install fixtures and appliances, such as sinks, toilets, bathtubs, dishwashers, and water heaters. Carefully connect the water supply lines to these fixtures, ensuring there are no leaks. Make sure to check all connections before moving forward.
4. Common Mistakes to Avoid When Installing Plumbing
Plumbing installation can be a complex task, and there are several common mistakes that even experienced professionals sometimes make. Avoiding these mistakes will help ensure that your plumbing system works properly and lasts longer.
4.1- Incorrect Pipe Sizing
Choosing the wrong pipe size can lead to issues like low water pressure, slow drains, and inefficient systems. It’s essential to calculate the correct pipe size for your home based on the expected water demand. If pipes are too small, the system won’t be able to handle the water flow, leading to pressure loss and potential backups.
4.2- Poor Pipe Insulation
Pipe insulation is crucial for preventing heat loss, protecting pipes from freezing, and reducing energy consumption. Failing to properly insulate pipes can lead to expensive repairs and higher energy costs. Ensure that pipes in unheated areas, such as basements or crawl spaces, are well insulated to protect them from temperature fluctuations.
4.3- Neglecting Local Building Codes
Every region has its own set of plumbing codes that must be followed during installation. Failing to comply with these codes can result in fines or the need to redo the work. Make sure to familiarize yourself with local building codes before starting any plumbing installation project.
5. Working with Professionals vs. Going DIY
While DIY plumbing can be an appealing option for some homeowners, plumbing installation is a complex task that requires experience and knowledge. Working with a licensed plumber can ensure that the installation is done correctly and in compliance with local codes. However, if you’re an experienced DIYer, you may feel comfortable tackling smaller projects like installing faucets or replacing pipes.
5.1- When to Hire a Professional
If you’re unsure about the plumbing system layout, the local codes, or you’re dealing with major installations, hiring a professional plumber is highly recommended. Plumbing mistakes can be costly, both in terms of repairs and potential damage to your home.
5.2- DIY Plumbing Projects
For smaller tasks, such as replacing faucets, fixing leaks, or installing a new showerhead, DIY plumbing may be an option. Ensure you have the necessary tools and skills to complete the project safely and effectively. Always consult expert resources if you’re unsure about any part of the process.
6. Real-World Case Study of Plumbing Installation
Consider the case of a homeowner in Chicago who decided to undertake the plumbing installation for their new home themselves. Despite careful planning, they encountered issues with improper pipe sizing and leaks at several junctions. After realizing that they didn’t have the expertise needed for a seamless installation, they hired a licensed plumber to fix the issues. The experience taught them the importance of professional help when dealing with a complex system like plumbing.
6.1- Lessons Learned
This real-world case highlights the importance of proper planning, choosing the right materials, and ensuring correct installation practices. While DIY can be rewarding, plumbing systems are complex, and professional help is often worth the investment to avoid costly mistakes.
Conclusion
Installing plumbing in your new construction project is a critical step in ensuring the comfort and functionality of your home. By planning ahead, choosing the right materials, and following a systematic installation process, you can create a plumbing system that meets your needs and lasts for years. Whether you decide to hire a professional or take the DIY route, understanding the steps involved is essential for a successful installation. For more tips and expert recommendations, visit Plumbers Supply Hub for all your plumbing needs and supplies.


 Pipe Rite Plumbing5.0 (2 reviews)
 Davids Gas Plumbing5.0 (43 reviews)
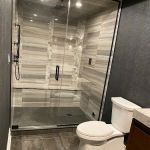 Apex Plumbing & Sewer Inc.4.0 (204 reviews)
 Cirigliano Plumbing4.0 (236 reviews)
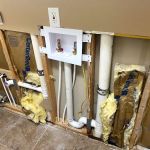 nash plumbing and services4.0 (34 reviews)
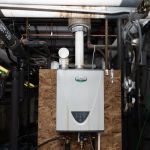 Advanced Plumbing4.0 (245 reviews)
 How to Locate Hidden Water Leaks in Walls or Ceilings | Expert Tips
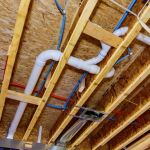 How to Properly Route Plumbing for a New Appliance
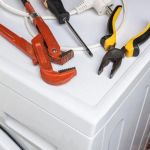 How to Install a Washing Machine: A Complete DIY Guide
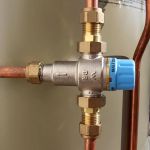 How to Replace a Mixing Valve for Tempered Water | Plumbers Supply Hub
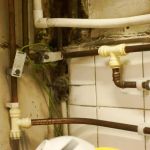 How to Troubleshoot Plumbing Issues in Older Homes
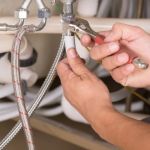 How to Maintain Your Plumbing System: A Homeowner’s Guide