
- Why Replace a Broken Valve in a Water Line?
- Tools Required for Valve Replacement
- Step-by-Step Guide to Replacing the Valve
- Common Challenges During Valve Replacement
Why Replace a Broken Valve in a Water Line?
Replacing a broken valve in a water line is crucial to maintaining the functionality and safety of your plumbing system. Water valves are responsible for controlling the flow of water into your home, and a faulty or broken valve can lead to leaks, low water pressure, or even complete water shutdowns. Timely replacement ensures your water system remains operational and prevents costly water damage.
A broken valve can be caused by a variety of factors, including corrosion, wear and tear, or freezing. As a homeowner, it’s important to address these issues promptly to avoid disruptions in your water supply and to prevent further damage to your plumbing system.
Roto-Rooter Plumbing & Water Cleanup
Saint CharlesSt. Charles CountyMissouri
3715 Mueller Rd Ste A, St Charles, MO 63301, USA
Tools Required for Valve Replacement
Before replacing a broken valve, you'll need to gather the proper tools. Here are the essential tools required for a smooth valve replacement process:
Inland Empire Tankless Plumbing
CalimesaRiverside CountyCalifornia
165 Sawgrass Ln, Calimesa, CA 92320, USA
1. Pipe Wrench or Adjustable Wrench
A pipe wrench or adjustable wrench is essential for loosening and tightening plumbing fittings. You’ll need this tool to remove the old valve and install the new one securely.
2. Pipe Cutter or Hacksaw
If the broken valve is part of a pipe that needs to be cut, a pipe cutter or hacksaw is necessary. This tool will allow you to cleanly cut through the pipe before replacing the valve.
3. Teflon Tape or Pipe Joint Compound
Teflon tape or pipe joint compound is used to ensure a leak-proof seal when installing the new valve. Applying this to the threads of the pipe will help prevent leaks once the valve is tightened in place.
4. New Valve
Of course, you’ll need a replacement valve that matches the size and type of your existing valve. It's important to ensure that the replacement valve is compatible with your water line and fits snugly in place.
Step-by-Step Guide to Replacing the Valve
Replacing a broken valve in a water line can seem like a challenging task, but with the right tools and preparation, it can be done safely and effectively. Here’s a step-by-step guide to help you through the process:
1. Turn Off the Water Supply
The first step in replacing a broken valve is to shut off the water supply to the affected area. This is critical to avoid flooding and ensure that no water is running through the pipes while you work. Locate the main water shut-off valve and turn it off completely.
2. Drain the Water Line
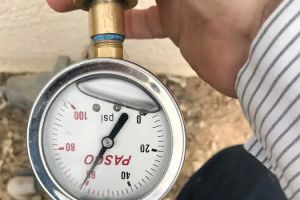
After turning off the water supply, open a faucet or valve in your home to relieve any pressure in the water line. This will prevent water from spilling when you remove the broken valve.
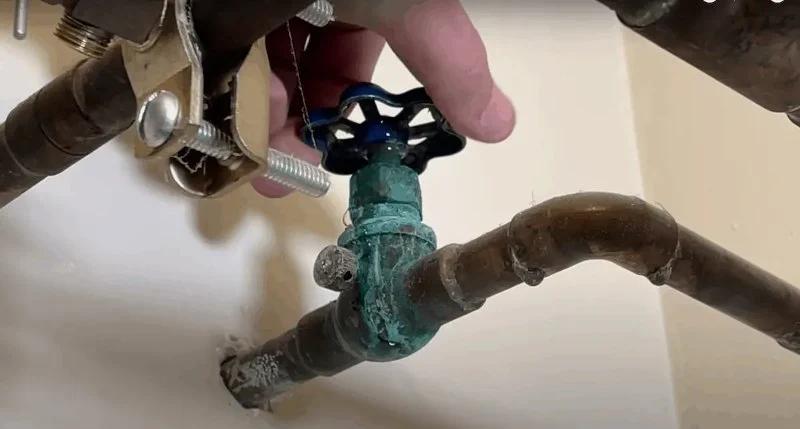
3. Remove the Broken Valve
Use your pipe wrench or adjustable wrench to loosen the broken valve from the water line. If the valve is corroded or stuck, apply some lubricant to loosen it. Be sure to have a bucket or towel ready to catch any water that may spill out when you remove the valve.
4. Cut the Pipe (If Necessary)
If the broken valve is part of a pipe that needs to be cut, use a pipe cutter or hacksaw to carefully cut the pipe. Make sure the cut is clean and straight to ensure a proper fit for the new valve.
5. Install the New Valve
Before installing the new valve, apply Teflon tape or pipe joint compound to the threads of the pipe. This will create a tight seal and prevent any leaks. Once you’ve prepared the threads, carefully attach the new valve to the pipe and tighten it with your wrench. Be sure not to overtighten, as this could damage the threads or the valve.
6. Turn on the Water Supply
Once the new valve is securely in place, turn the water supply back on and check for leaks. Open the faucet or valve to allow water to flow through the new valve and check for any signs of dripping or water leakage around the valve connection. If you notice any leaks, tighten the valve slightly until the leak stops.
Common Challenges During Valve Replacement
While replacing a broken valve in a water line is a manageable task, there are a few challenges you may encounter along the way. Here are some common issues and how to handle them:
1. Stubborn or Corroded Valves
If the old valve is corroded or stuck, it can be difficult to remove. Applying penetrating oil to the valve and allowing it to sit for several minutes can help loosen it. In extreme cases, you may need to use a valve puller tool or call a professional plumber if the valve cannot be removed with standard tools.
2. Incorrect Valve Size
Ensure you purchase the correct replacement valve that matches the size and type of the existing valve. If the new valve doesn’t fit properly, it can cause leaks or damage to the plumbing system. Always measure the pipe before purchasing a replacement valve to ensure compatibility.
3. Leaks After Installation
If you notice leaks after installing the new valve, double-check the tightness of the connection and inspect the Teflon tape or pipe joint compound for proper application. If the leak persists, you may need to disassemble the connection and reapply the sealant or tighten the valve further.
By following these steps and troubleshooting common challenges, you can successfully replace a broken valve in a water line and restore the function of your plumbing system. If you encounter more complex issues, don’t hesitate to reach out to a professional plumber for assistance.


 Hall's Plumbing, LLC4.0 (87 reviews)
 West Coast Plumbing and Drains Inc.5.0 (8 reviews)
 Don Shriver's Video Drain Cleaning & Repair3.0 (2 reviews)
 Roto-Rooter Plumbing & Water Cleanup4.0 (1417 reviews)
 County Line Plumbing5.0 (335 reviews)
 Roto-Rooter4.0 (344 reviews)
 How to Prevent Toilet Clogs: Simple Tips Every Homeowner Should Know
 How to Fix a Leaky Water Heater: Step-by-Step Instructions
 How to Choose a Reliable Plumbing Service in Your Area
 How to Clean Out a Septic Drain Field Safely
 How to Test for Bacteria in Household Water Supply
 Why Your Pipes Are Vibrating and How to Fix It