
- Introduction: Why Replace Your Kitchen Faucet?
- 1. Tools and Materials You'll Need
- 2. Preparing for Faucet Replacement
- 3. Disconnecting the Water Supply
- 4. Removing the Old Faucet
- 5. Installing the New Faucet
- 6. Reconnecting the Water Supply
- 7. Testing the New Faucet
- 8. Tips for a Successful Faucet Replacement
- 9. Faucet Maintenance and Care
Introduction: Why Replace Your Kitchen Faucet?
A kitchen faucet is one of the most used fixtures in the house. Over time, it can wear out, develop leaks, or simply become outdated. Replacing a kitchen faucet might sound like a daunting task, but it’s actually a manageable DIY project that can improve both the functionality and appearance of your kitchen.
In this article, we’ll walk you through how to replace a kitchen faucet in 10 easy steps. Whether you’re upgrading your kitchen or replacing a faulty faucet, this guide will ensure the job gets done right. Let’s dive in!

1. Tools and Materials You'll Need
Before starting your faucet replacement project, gather the necessary tools and materials. Here’s a list of what you’ll need:
- New kitchen faucet
- Adjustable wrench
- Plumber’s tape
- Bucket (to catch any residual water)
- Channel lock pliers
- Putty knife
- Clean cloth
- Silicone sealant (optional)
Having everything in place will make the replacement process much smoother and faster.

Johnny's Plumbing Repair Service Inc
BurlingtonAlamance CountyNorth Carolina
1026 N Main St, Burlington, NC 27215, USA
2. Preparing for Faucet Replacement
Start by clearing the area under your sink. Remove any items from the cabinet so that you have plenty of room to work. Place a bucket or towel under the area where the pipes and faucet connections are, as this will help catch any water that may leak out during the process.
Once the area is clear, ensure that the new faucet you’ve chosen fits the sink’s specifications (e.g., number of holes, faucet height). This step is important to avoid any surprises once you start the installation.
3. Disconnecting the Water Supply
The first step to removing your old faucet is to turn off the water supply. Look for the shutoff valves under your sink. Turn them clockwise to stop the flow of water to the faucet. Then, open the faucet to release any pressure left in the pipes and allow any remaining water to drain out into the sink.
Use a bucket to catch any water left in the pipes when disconnecting the supply lines from the faucet. You can use your adjustable wrench to loosen the nuts holding the water supply lines in place.
4. Removing the Old Faucet
With the water supply disconnected, it’s time to remove the old faucet. Depending on how it was installed, you may need to use your wrench to loosen the mounting nuts securing the faucet to the sink. If there’s any leftover plumber’s putty or sealant, use a putty knife to carefully remove it.
Once the faucet is loose, carefully lift it off the sink. If it’s stuck due to mineral buildup or rust, applying a bit of penetrating oil may help loosen it.
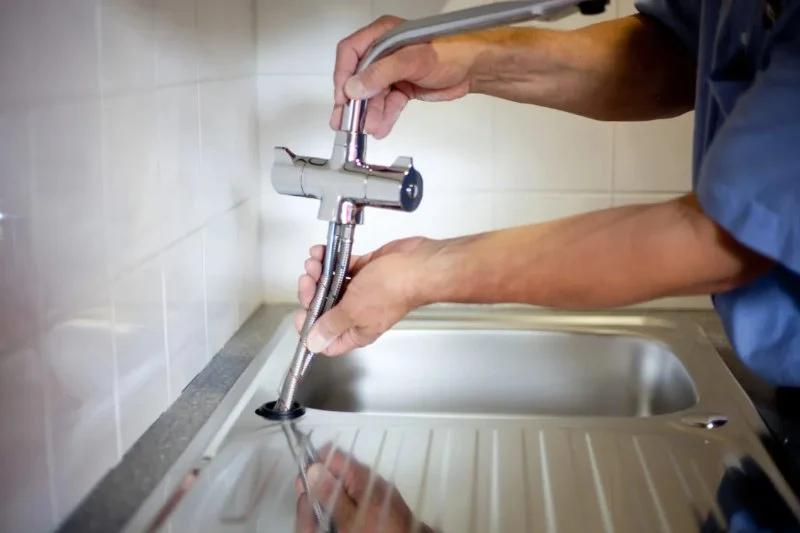
5. Installing the New Faucet
Now it’s time to install the new faucet. Place the faucet’s mounting plate on the sink, ensuring it fits snugly and aligns with the holes in the sink. If your new faucet requires plumber’s putty, apply a small amount around the base of the faucet to create a watertight seal.
Insert the faucet into the mounting holes and tighten the mounting nuts from underneath the sink. Be sure not to overtighten, as this could damage the sink or the faucet. Use your wrench to secure it firmly in place.
6. Reconnecting the Water Supply
With the faucet securely installed, it’s time to reconnect the water supply lines. Attach the supply lines to the faucet’s inlet valves and tighten the nuts using your adjustable wrench. Be sure to wrap plumber’s tape around the threaded connections to prevent leaks.
Double-check all connections to ensure everything is tightly secured. You don’t want to discover a leak after turning the water back on!
7. Testing the New Faucet
Once everything is connected, turn the water supply back on by slowly opening the shutoff valves. Turn on the faucet and check for any leaks around the base and at the water supply connections. If you notice any leaks, turn the water off and tighten the connections as necessary.
Check the water flow and temperature to ensure everything is working correctly. Congratulations, your new faucet is now ready for use!
8. Tips for a Successful Faucet Replacement
Here are some helpful tips to make your faucet replacement project go smoothly:
- Measure Twice: Before purchasing your new faucet, measure the sink’s faucet holes to ensure compatibility with the faucet you choose.
- Have the Right Tools: Using the correct tools will save you time and frustration. Invest in a good wrench set and plumber’s tape.
- Take Your Time: Don’t rush the installation process. Ensuring everything is done correctly will prevent issues down the line.
- Check for Leaks: Always test your new faucet for leaks before considering the job complete.
9. Faucet Maintenance and Care
After replacing your faucet, regular maintenance is essential to keep it running smoothly. Clean the faucet regularly to remove mineral deposits, and periodically check the water supply connections for leaks. If you have hard water, consider installing a water softener to prevent buildup in your faucet.
By following these simple maintenance tips, you can extend the life of your new faucet and keep it functioning properly for years to come.
If you need high-quality faucets, tools, or any other plumbing supplies for your DIY project, visit Plumbers Supply Hub for the best products and expert recommendations.


 Ed's Plumbing4.0 (72 reviews)
 Sunderland Plumbing5.0 (6 reviews)
 Four Elements Plumbing3.0 (14 reviews)
 Strub's Plumbing Services4.0 (24 reviews)
 Eureka Plumbing Sewer and Drain4.0 (78 reviews)
 Enduric Plumbing Services Inc.5.0 (106 reviews)
 How to Replace an Outdated Plumbing Fixture Safely
 How to Choose a Reliable Plumber for Emergency Repairs
 How to Reset a Tripped Pressure Switch in a Well Pump
 How to Fix a Slow Drain: DIY Solutions for Common Drainage Issues
 How to Repair a Pipe Saddle That Leaks – Step-by-Step Guide
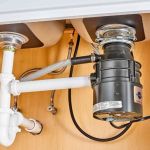 When to Replace a Garbage Disposal Rather Than Repairing It