
How to Replace a Broken Drain Elbow
- 1. Why Replace a Broken Drain Elbow?
- 2. Tools Needed for Replacing a Drain Elbow
- 3. Step-by-Step Guide to Replacing a Drain Elbow
- 4. Common Mistakes to Avoid When Replacing a Drain Elbow
- 5. When to Call a Professional Plumber
1. Why Replace a Broken Drain Elbow?
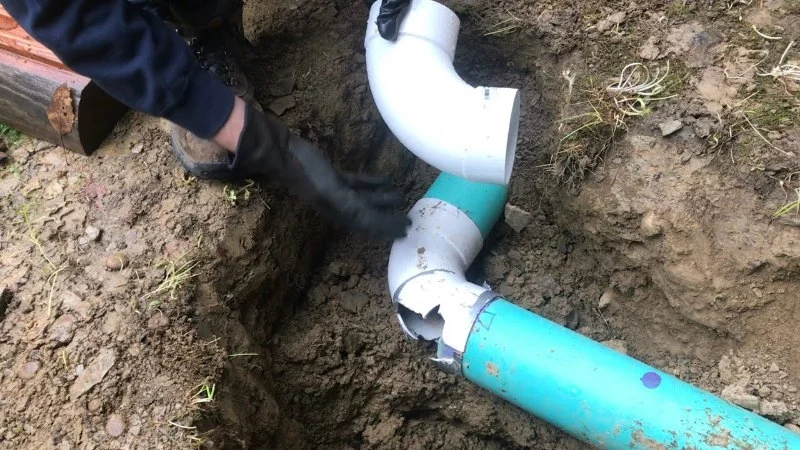
A broken drain elbow can cause a variety of plumbing issues, including leaks, water damage, or clogs. The drain elbow is an essential part of your plumbing system that connects different pipes and helps water flow smoothly from your sinks, bathtubs, and other drains into the sewer system. When a drain elbow breaks, it can disrupt this flow and lead to potential flooding or water backup, creating a mess and potential damage to your property.
Replacing a broken drain elbow quickly and efficiently ensures that your plumbing system continues to function properly. It helps prevent leaks, keeps your pipes in good condition, and improves the overall performance of your drainage system. Whether you're dealing with a small crack or a completely broken elbow, it's essential to address the issue as soon as possible to avoid more costly repairs later on.
2. Tools Needed for Replacing a Drain Elbow
Replacing a drain elbow is a manageable DIY task, but you’ll need the right tools to get the job done. Here’s a list of tools you will need to replace your broken drain elbow:
- Pipe Wrench: This tool will help you loosen and tighten the pipes.
- PVC Pipe Cutter: Use this to cut through the old and new PVC pipes cleanly and accurately.
- New Drain Elbow: Make sure you purchase a drain elbow that matches the size and material of your existing pipes.
- PVC Primer and Cement: These are used to seal the pipes and the new elbow tightly to prevent leaks.
- Measuring Tape: To measure the lengths of pipes and ensure a proper fit.
- Gloves and Safety Glasses: For your safety while working with sharp tools and chemicals.
Having these tools on hand before you start the job will make the process much smoother and ensure you complete the task correctly and safely.
3. Step-by-Step Guide to Replacing a Drain Elbow
Now that you have the necessary tools, here’s a simple guide to help you replace your broken drain elbow:
- Turn Off Water and Remove Any Obstructions: Before starting, make sure to turn off the water supply to avoid any accidental flooding. Clear any items from the area where you’ll be working to give yourself plenty of space.
- Locate the Broken Drain Elbow: Inspect your pipes to find the broken elbow. You may need to remove surrounding pipes or use a pipe wrench to loosen the fittings if they’re stuck.
- Cut the Pipes: Use a PVC pipe cutter to remove the broken drain elbow. Cut the pipe cleanly and ensure the edges are smooth to avoid leaks when the new elbow is installed.
- Prepare the New Elbow: Measure the length of the pipe to ensure the new elbow will fit properly. Apply PVC primer and cement to both the pipe and the elbow, following the manufacturer’s instructions.
- Install the New Drain Elbow: Push the new drain elbow into place, making sure it’s properly aligned with the other pipes. Hold it in place for a few seconds to allow the cement to set.
- Reconnect the Pipes: Tighten any other pipe connections with a pipe wrench. Ensure that all pipes are aligned and properly sealed to avoid leaks.
- Test the System: Once everything is secure, turn the water back on and check for any leaks around the new elbow. If you notice any leaks, turn off the water and recheck the fittings.
With these simple steps, you’ll have successfully replaced your broken drain elbow and restored your plumbing system.
4. Common Mistakes to Avoid When Replacing a Drain Elbow
Replacing a drain elbow is a relatively straightforward task, but there are some common mistakes to avoid to ensure a successful repair:
- Not Turning Off the Water: Forgetting to turn off the water before you start can lead to flooding and unnecessary mess. Always make sure to shut off the water supply to the area you're working on.
- Incorrect Measurements: Measuring the wrong length of pipe or elbow can result in a poor fit, leading to leaks. Always double-check your measurements before cutting any pipes.
- Skipping Primer and Cement: Skipping the use of primer and cement can result in weak joints and leaks. Be sure to follow the instructions and use the correct materials to ensure a tight, secure fit.
- Not Testing for Leaks: After installation, always test the system by running water through it and checking for leaks. This step ensures the elbow is properly installed and will function correctly.
By avoiding these common mistakes, you can ensure that your drain elbow replacement is done correctly the first time, saving you time and frustration.
5. When to Call a Professional Plumber
While replacing a drain elbow can be a DIY task, there are situations where it’s best to call in a professional plumber. If you're dealing with extensive pipe damage, difficult-to-reach pipes, or if you’re unsure about the installation process, a professional plumber can help ensure the job is done right.
Additionally, if you’re experiencing recurring plumbing issues or leaks, it may be a sign of a larger plumbing problem that requires expert attention. A licensed plumber can provide a comprehensive inspection of your plumbing system and offer long-term solutions.
If you ever feel uncertain or overwhelmed during the process, don’t hesitate to contact a plumber for help. At Plumbers Supply Hub, we offer a variety of plumbing tools and resources to help you get the job done, or connect you with professional plumbers if needed.


 Roto-Rooter Plumbing & Water Cleanup4.0 (806 reviews)
 Hockers Home Services4.0 (1566 reviews)
 Dugger Jr Ernest M3.0 (2 reviews)
 Dan Wood Company4.0 (2965 reviews)
 AW Crooks Plumbing, Heating & Cooling4.0 (780 reviews)
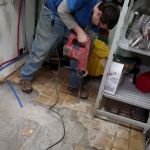 Hutson Plumbing3.0 (93 reviews)
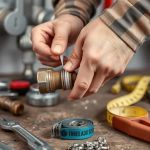 How to Repair a Broken Thread on a Pipe
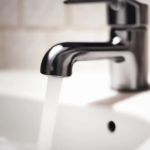 How to Choose Fixtures for a Water-Smart Bathroom
 What to Check When You Have Low Water Pressure in Your Home
 How to Reset a Tripped Pressure Switch in a Well Pump
 Why Your Water Softener Isn’t Working and How to Fix It
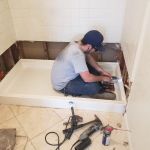 How to Replace a Shower Pan or Base | Plumbers Supply Hub