
- 1- What is an In-Line Check Valve?
- 2- Why Should You Replace an In-Line Check Valve?
- 3- Signs Your In-Line Check Valve Needs Replacing
- 4- Tools and Materials Needed for the Job
- 5- Step-by-Step Guide to Replacing an In-Line Check Valve
- 6- Maintenance Tips to Ensure Longevity of Your Check Valve
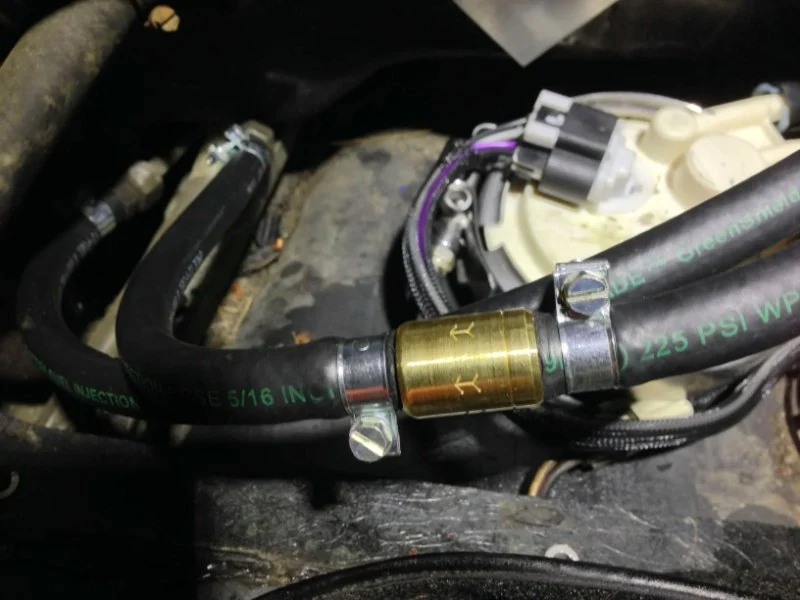
What is an In-Line Check Valve?
An in-line check valve is a plumbing device designed to allow water (or other fluids) to flow in only one direction. It prevents backflow, which can occur due to changes in water pressure or reverse flow from other systems. These valves are essential for ensuring the safety and functionality of various plumbing systems, such as sump pumps, irrigation systems, and water heaters.
Why Should You Replace an In-Line Check Valve?
Replacing an in-line check valve is important to maintain the efficiency and safety of your plumbing system. Over time, these valves can wear out due to constant pressure and wear from the fluid they control. If a check valve fails, it can lead to backflow, water damage, or even contamination of your water supply, especially if you're dealing with potentially hazardous fluids.
J. Blanton Plumbing, Sewer & Drain
1945 Techny Rd #11, Northbrook, IL 60062, USA
Signs Your In-Line Check Valve Needs Replacing
There are several signs that indicate it might be time to replace your in-line check valve:
1. Backflow Issues
If you notice water or fluid flowing back into the system, even when the pump or system is not operating, it’s a clear sign that the check valve is no longer working properly.
2. Leaking Around the Valve
If you notice leaks around the check valve or the valve is wet despite no visible source of leakage, it’s a sign of valve failure.
3. Poor Water Pressure
A malfunctioning check valve may cause irregular water pressure, either too high or too low, which can disrupt the functioning of your plumbing system.
Tools and Materials Needed for the Job
Replacing an in-line check valve doesn’t require an extensive list of tools, but you will need the following:
- Pipe wrench or adjustable wrench
- Replacement in-line check valve
- Pipe cutter or saw (if you need to remove sections of pipe)
- Teflon tape or pipe thread sealant
- Bucket or towels (for any water spillage)
Step-by-Step Guide to Replacing an In-Line Check Valve
Follow these steps to replace your in-line check valve:
1. Shut Off the Water Supply
Before starting any plumbing repairs, turn off the water supply to the system where you’re replacing the check valve. This will prevent any water from spilling out and causing a mess or damage.
2. Locate the Check Valve
Find the in-line check valve in the section of the piping you’re working on. Typically, this valve is installed in a vertical pipe. You may need to remove a section of pipe to access the valve.
3. Remove the Old Valve
Use your pipe wrench or adjustable wrench to unscrew the old check valve from the pipe. If the valve is connected with threads, simply unscrew it. For press-fit or glued connections, you may need to cut the pipe and remove the valve carefully.
4. Install the New Check Valve
Install the new valve in the same direction as the old valve. Apply Teflon tape to the threads of the pipe to ensure a watertight seal. Tighten the valve securely but avoid overtightening, which can damage the threads.
5. Test the System
Once the new valve is in place, turn the water supply back on and test the system. Check for leaks and ensure that the valve is working properly by verifying there is no backflow in the system.
Maintenance Tips to Ensure Longevity of Your Check Valve
To prolong the life of your new in-line check valve and prevent future failures, follow these maintenance tips:
1. Regular Inspections
Inspect your check valve periodically for signs of wear, corrosion, or leaking. Early detection of issues can prevent more costly repairs down the line.
2. Clean the Valve
Ensure that the valve is free from debris and sediment buildup. Cleaning the valve periodically can help maintain its functionality and prevent blockages that may cause failure.
3. Use Proper Water Treatment
If your water is hard or contains a lot of minerals, consider installing a water softener. Hard water can cause calcium buildup in the check valve, leading to inefficiency and failure.
Where to Find the Best Replacement Parts
If you’re looking for quality in-line check valves and other plumbing parts, visit Plumbers Supply Hub for a wide selection of products. We offer the best parts for your plumbing needs, and our experts are available to help you with any questions.


 Long Lake Plumbing LLC4.0 (7 reviews)
 Haines Drains Plumbing And Drain Cleaning3.0 (44 reviews)
 Vesi Works Plumbing - Plumber in Delano, MN4.0 (36 reviews)
 D W Plumbing4.0 (4 reviews)
 Paul L Buddy Plumbing & Heating4.0 (12 reviews)
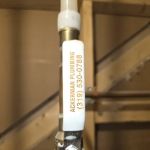 Ackerman Plumbing4.0 (123 reviews)
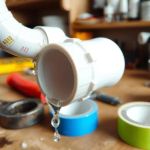 How to Replace a Plastic Pipe Fitting That Fails
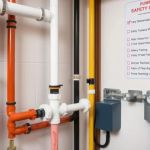 Plumbing Safety Tips for Homeowners Tackling DIY Projects | Safe Plumbing Solutions
 How to Detect When Your Plumbing Is Undersized
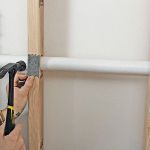 How to Reroute Plumbing for a Kitchen Island: A Step-by-Step Guide
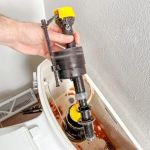 How to Replace a Toilet Fill Valve Quietly
 How to Handle a Plumbing Leak: A Homeowner’s Emergency Guide