
- 1. Why You Should Replace Your Dual-Flush Toilet Mechanism
- 2. Signs Your Dual-Flush Toilet Mechanism Needs Replacing
- 3. Step-by-Step Guide to Replacing the Dual-Flush Mechanism
- 4. Tips for Ensuring Proper Function After Replacement
- 5. Common Mistakes to Avoid During the Replacement Process
1. Why You Should Replace Your Dual-Flush Toilet Mechanism
Over time, even the most durable plumbing fixtures can wear out, and your dual-flush toilet mechanism is no exception. If you’re experiencing problems with your toilet, such as inconsistent flushing or leaks, it may be time to replace the internal mechanism. Replacing the mechanism not only restores proper functionality but can also improve water efficiency, helping you save on utility bills. In this article, we'll walk you through why and how to replace your dual-flush toilet mechanism with ease.

Major Leak Plumbing Inc.
MurrietaRiverside CountyCalifornia
41571 Corning Pl #107, Murrieta, CA 92562, USA
2. Signs Your Dual-Flush Toilet Mechanism Needs Replacing
Before diving into the replacement process, it’s important to know when it’s time for a change. Here are some common signs that your dual-flush toilet mechanism may need replacing:

1. Flushing Problems
If your toilet is not flushing properly, such as requiring multiple attempts or not flushing fully, it could indicate that the internal mechanism has become worn out. A clogged or damaged flush valve or handle can cause these issues.
2. Leaking Water
Water leaks around the toilet tank or base can be a clear sign that the flush mechanism is not functioning correctly. Leaking can waste a significant amount of water, increasing your water bill over time.
3. Difficulty with Dual-Flush Function
If you notice that the dual-flush system (the ability to choose between a full flush and a partial flush) is not working or the buttons are sticking, it may be time to replace the mechanism. This issue could indicate a malfunctioning button or valve system.
3. Step-by-Step Guide to Replacing the Dual-Flush Mechanism
Replacing your dual-flush toilet mechanism may seem like a daunting task, but with the right tools and instructions, it’s a straightforward process. Follow these steps to replace the mechanism and restore your toilet’s function:
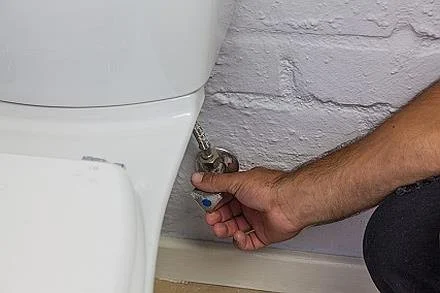
1. Turn Off the Water Supply
Before starting any plumbing project, always turn off the water supply to your toilet. This is typically done by shutting off the valve located behind the toilet. Make sure the water supply is completely turned off to avoid any spills or leaks during the replacement process.
2. Remove the Toilet Tank Lid
Carefully remove the toilet tank lid and set it aside. This will give you access to the inner workings of the toilet, including the flush mechanism.
3. Disconnect the Flush Handle and Chain
Next, disconnect the flush handle and the chain connected to the flapper. You may need a wrench to remove the handle if it’s securely attached.
4. Remove the Old Mechanism
Once the handle and chain are removed, carefully unscrew and remove the old dual-flush mechanism. Be cautious not to damage any parts that you may reuse, such as the flush valve or other hardware.
5. Install the New Mechanism
Follow the manufacturer’s instructions to install the new dual-flush mechanism. Align the new system with the holes in the tank and connect the flush valve, buttons, and chain. Make sure everything is secured tightly but avoid over-tightening to prevent damage.
6. Test the New Mechanism
Once the new mechanism is installed, turn the water supply back on and allow the tank to fill. Test both the full and partial flush options to ensure everything is working properly. Adjust the chain length or flush valve as needed to ensure optimal performance.
4. Tips for Ensuring Proper Function After Replacement
After replacing your dual-flush toilet mechanism, it's essential to ensure that everything is functioning properly. Here are some tips to maintain proper function:
1. Regularly Inspect the Mechanism
Periodically check the flush mechanism to ensure it’s functioning correctly. Look out for leaks, irregular flushing, or issues with the buttons or handle. Regular inspection can help prevent future issues.
2. Keep the Tank Clean
Mineral buildup can affect the function of the flush valve and other internal components. Clean the tank and flush mechanism periodically to keep everything in good working order.
3. Use High-Quality Parts
When replacing the mechanism, always choose high-quality parts that are compatible with your toilet model. Quality parts ensure better performance and longevity.
5. Common Mistakes to Avoid During the Replacement Process
To ensure a successful replacement and avoid unnecessary complications, here are some common mistakes to avoid:
1. Forgetting to Turn Off the Water Supply
Always remember to turn off the water supply before starting any work. Failing to do so can result in a messy and costly water spill.
2. Using Incompatible Parts
Make sure to buy the correct replacement parts for your specific toilet model. Using incompatible parts can lead to further issues down the line.
3. Over-tightening Connections
When reconnecting the flush handle and tank components, avoid over-tightening as this can damage the parts or cause leaks. Tighten parts enough to secure them, but be gentle to avoid damaging the components.
If you need assistance with purchasing parts or professional help, visit Plumbers Supply Hub for a variety of products and services to meet your plumbing needs.


 Plumbing Services, Inc.5.0 (7 reviews)
 Amazing Force Plumbing & Backflow LLC5.0 (302 reviews)
 The Plumbing Source4.0 (19 reviews)
 OneStop Plumbers - Plumbing and Leak Detection4.0 (454 reviews)
 Always Plumbing3.0 (17 reviews)
 Miller Plumbing5.0 (13 reviews)
 How to Handle Plumbing Emergencies When You’re Away from Home
 How to Route a New Plumbing Run in a Finished Basement – Step-by-Step Guide
 How to Locate Hidden Water Leaks in Walls or Ceilings: Tips for Homeowners
 How to Maintain Your Plumbing System: A Homeowner’s Guide
 How to Troubleshoot and Fix a Low Flow Showerhead
 How to Replace a Shower Glass Door Without Causing Leaks