
- Understanding the Role of Pipe Bedding Under the Floor
- Why a Broken Pipe Under the Floor Requires Immediate Attention
- Step-by-Step Guide to Replacing Pipe Bedding Under the Floor
- Tools and Materials Needed for the Job
- Real-Life Case: Fixing a Broken Pipe Under the Floor
Understanding the Role of Pipe Bedding Under the Floor
The pipe bedding under the floor is a foundational part of your home’s plumbing system. This bedding refers to the layer of material (often gravel or sand) that supports and surrounds pipes, providing stability and preventing movement. In many cases, pipes running under the floor are encased in this bedding to ensure they stay securely in place, reducing the risk of damage over time.
However, over time, due to wear and tear, pressure changes, or external forces, pipes can break or shift, damaging the bedding and creating plumbing issues. When this happens, it’s crucial to understand how to replace the broken pipe bedding to avoid future damage and ensure the longevity of your plumbing system.

Why a Broken Pipe Under the Floor Requires Immediate Attention
A broken pipe under the floor is more than just a minor inconvenience—it can lead to severe issues if left untreated. Here’s why it’s critical to address a broken pipe bedding promptly:
Dave Jones - Plumbing, HVAC, Fire Protection, Electrical
2225 Kilgust Rd, Monona, WI 53713, USA
1. Water Damage and Flooding
If a pipe breaks under your floor, water can leak out and cause significant damage to your property. The water can seep into the subflooring, walls, and even your home’s foundation, leading to mold, mildew, and structural damage. The longer the pipe remains unrepaired, the worse the damage will become.
2. Increased Repair Costs
When a broken pipe isn’t replaced promptly, the damage can spread, requiring more extensive repairs. The longer the issue persists, the higher the cost of fixing both the broken pipe and any secondary damage to the flooring or surrounding areas. Timely repair can save you from a more expensive restoration process.
3. Health and Safety Concerns
Persistent water leaks can create an environment conducive to mold and mildew growth, which can lead to health problems such as respiratory issues and allergies. Addressing broken pipes quickly helps minimize these health risks and maintains a safe living environment.
Step-by-Step Guide to Replacing Pipe Bedding Under the Floor
Replacing pipe bedding under the floor can seem like a daunting task, but with the right steps, you can tackle this plumbing issue yourself. Here’s a step-by-step guide to help you replace a broken pipe and its bedding under your floor:
1. Locate the Broken Pipe
The first step is to locate the broken pipe under the floor. You may need to remove part of the flooring or use a pipe locator tool to pinpoint the exact location of the break. If the pipe is leaking, you may notice signs such as damp spots, discoloration, or even puddles forming on the floor.
2. Turn Off the Water Supply
Before you begin any repairs, turn off the main water supply to prevent further water damage. Locate the shut-off valve for the water supply and ensure the area is completely dry before proceeding.
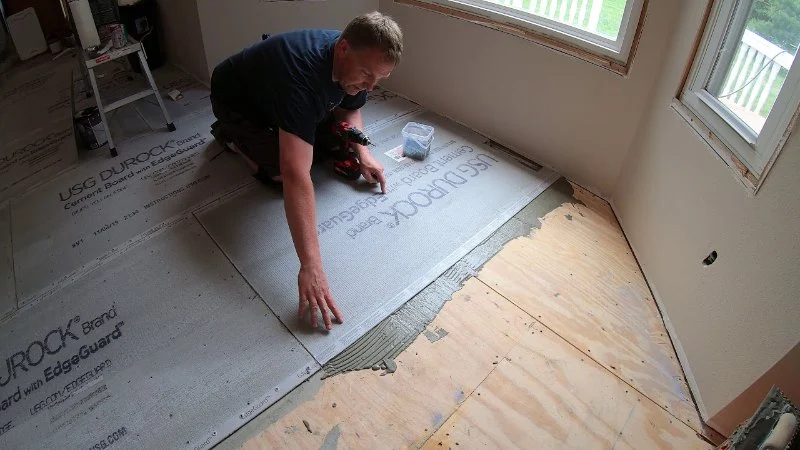
3. Remove the Flooring or Access Panel
If the broken pipe is beneath the flooring, you’ll need to remove part of the floor to access the pipe. Depending on your floor type (tile, hardwood, carpet), this might involve cutting through the material carefully. Alternatively, if there’s an access panel in the floor, use it to gain access to the damaged pipe without having to remove large sections of flooring.
4. Remove the Damaged Pipe and Bedding
Once you have access to the pipe, remove the damaged section. You may need to use a pipe cutter or saw to cut through the pipe. After removing the damaged pipe, clear away any broken bedding material (sand, gravel, etc.) that surrounds it. The bedding must be replaced to ensure proper pipe support.
5. Install the New Pipe and Bedding
Install the new pipe in place of the damaged one. Use pipe connectors, elbows, or couplings as necessary, ensuring the pipe is securely attached. Once the new pipe is in place, replace the bedding around it, using fresh material like gravel or sand. Make sure the bedding is packed firmly around the pipe to prevent any movement or shifting.
6. Test the New Pipe
Before you close up the floor and replace the flooring, turn the water supply back on and test the new pipe for leaks. Ensure there are no signs of water escaping, and everything is functioning as it should.
7. Restore the Floor
Once you’ve confirmed the repair is successful, replace the flooring or access panel. Be sure to secure it properly to ensure the floor is stable and level. If you’ve removed tile or hardwood, you may need to reapply adhesive or nails to secure the flooring back in place.
Tools and Materials Needed for the Job
To replace the broken pipe bedding under your floor, you’ll need a few essential tools and materials:
1. Pipe Cutter or Saw
A pipe cutter or saw is necessary for removing the damaged pipe and cutting the new one to the correct size.
2. Pipe Connectors and Couplings
You’ll need pipe connectors, elbows, and couplings to securely connect the new pipe to the existing plumbing system.
3. Gravel or Sand
New bedding material like gravel or sand is essential for supporting the pipe and ensuring it remains stable.
4. Flooring Removal Tools
Depending on your floor type, you may need tools to remove tiles, hardwood, or carpet to access the damaged pipe.
5. Sealing Materials
Sealants or adhesives may be needed to ensure the new pipe is securely attached and that the floor is properly sealed once the repair is complete.
Real-Life Case: Fixing a Broken Pipe Under the Floor
Take the example of Mark, a homeowner in Texas, who faced a broken pipe under his kitchen floor. Mark noticed a damp spot near the sink and quickly discovered a cracked pipe buried beneath the floorboards. He knew this issue could lead to serious water damage, so he decided to tackle the problem himself.
After locating the damaged pipe and shutting off the water supply, Mark carefully removed the flooring, exposing the broken pipe. He replaced the pipe and re-filled the bedding with fresh gravel to ensure proper support. Mark was able to restore the plumbing, prevent water damage, and save money by handling the repair himself. His careful attention to detail and proactive approach helped him avoid costly damage to his home.
Mark’s story shows how important it is to address plumbing issues promptly and thoroughly. With the right tools and approach, you can successfully replace broken pipe bedding under your floor and keep your home’s plumbing system in excellent condition.
If you need plumbing supplies or expert advice on how to replace broken pipes, visit Plumbers Supply Hub for everything you need to complete your repair efficiently.


 Loma Linda Plumbing3.0 (14 reviews)
 Force Plumbing Services of Lancaster5.0 (29 reviews)
 Ser Plumbing Inc5.0 (106 reviews)
 Armbrust Plumbing, Heating & Air Conditioning4.0 (1976 reviews)
 Lifetime Plumbing5.0 (70 reviews)
 Koontz Plumbing & Mechanical3.0 (18 reviews)
 How to Replace a Toilet That Wobbles After Installation
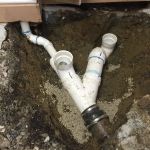 How to Reroute a Drain Line After Flooring Remodel
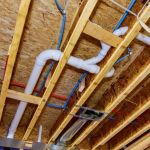 How to Route a New Plumbing Run in a Finished Basement – Step-by-Step Guide
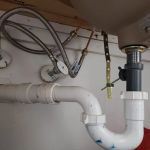 How to Repair a Sink That Drains Faster Than Faucet: Fixing Plumbing Issues Efficiently
 How to Replace a Kitchen Sink Sprayer Hose: Step-by-Step Guide
 How to Safely Drain a Water Heater Before Moving