
How to Replace a Sink Overflow Tube
- 1. Overview of Sink Overflow Tube Replacement
- 2. Tools Needed for the Job
- 3. Step-by-Step Guide to Replacing the Overflow Tube
- 4. Common Issues and How to Avoid Them
- 5. Final Thoughts and Recommendations
1. Overview of Sink Overflow Tube Replacement
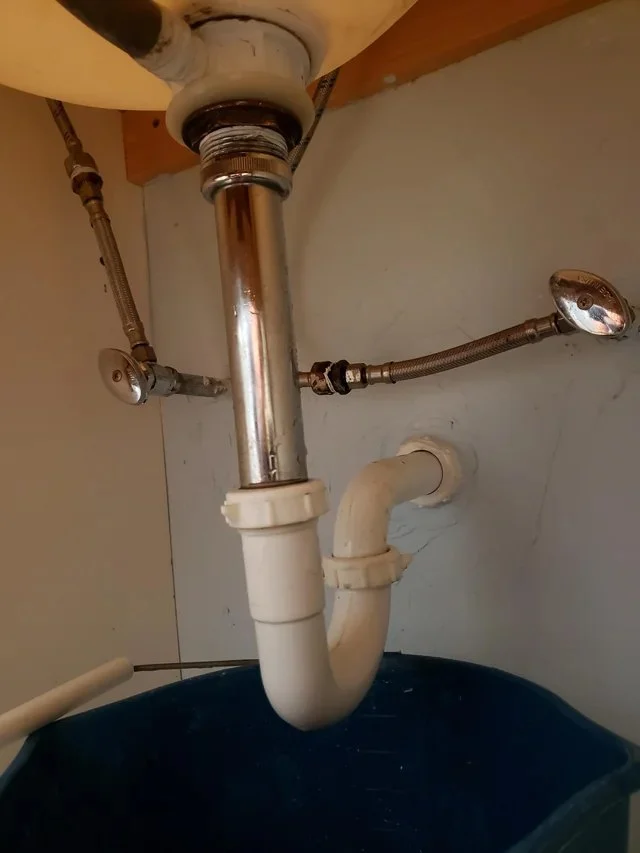
Replacing a sink overflow tube is an essential repair that ensures your sink works properly and prevents any unwanted water damage. The overflow tube is designed to prevent the sink from overflowing by allowing excess water to drain safely. If your sink starts to leak or doesn't drain properly, it might be time to replace the overflow tube. In this guide, we’ll walk you through the process step by step.

2. Tools Needed for the Job
Before you begin, make sure you have the necessary tools for the job. Having the right equipment will make the process smoother and more efficient. Here’s a list of what you’ll need:
- Adjustable Wrench
- Plumber's Tape
- Replacement Sink Overflow Tube
- Silicone Sealant
- Bucket or Towels (to catch any water)
- Pipe Cleaner
If you're unsure which overflow tube to buy, we recommend visiting Plumbers Supply Hub, where you'll find a variety of high-quality plumbing products for your needs.
3. Step-by-Step Guide to Replacing the Overflow Tube
Now that you have your tools, let’s dive into the steps required to replace the sink overflow tube:
Step 1: Turn Off the Water Supply
Before you begin any plumbing work, make sure the water supply is turned off to avoid any accidents. Locate the water shutoff valves under the sink and turn them clockwise until they’re fully closed.
Step 2: Remove the Drain Trap
Place a bucket or towels under the drain trap to catch any remaining water. Use your adjustable wrench to loosen the slip nuts on the drain trap. Carefully remove the trap, and allow any water to drain out.
Step 3: Disconnect the Overflow Tube
Using a wrench or pliers, disconnect the overflow tube from the sink. If the tube is damaged, it might break as you remove it, so be prepared for that. Be sure to clean the area around the connection with a pipe cleaner to remove any debris or buildup.
Step 4: Install the New Overflow Tube
Take your new overflow tube and apply plumber’s tape to the threaded end to create a tight seal. Attach the tube to the sink and tighten it securely. Make sure it’s aligned properly and that the tube fits snugly into place.
Step 5: Reconnect the Drain Trap
Once the overflow tube is installed, reconnect the drain trap. Tighten the slip nuts with the wrench, ensuring everything is secure. Check for any leaks around the connections.
Step 6: Test the Sink
Turn the water supply back on and let the sink fill with water to check for leaks. Ensure that the overflow tube functions properly by allowing the water to drain without any issues. If everything works correctly, you’ve successfully replaced your sink overflow tube!
4. Common Issues and How to Avoid Them
During the replacement process, you may encounter some common issues. Here’s a quick list of potential problems and how to avoid them:
Leaky Connections
If you notice water leaking around the connections, check to ensure that plumber’s tape has been applied properly and that the connections are tightly secured. A small leak can often be fixed by tightening the nuts or adding extra tape.
Incorrect Tube Size
Choosing the wrong size overflow tube is another common issue. Always double-check the dimensions before purchasing a replacement tube. If you're unsure, our team at Plumbers Supply Hub can assist you in selecting the correct size for your sink.
Difficulty Removing the Old Tube
Sometimes, the old overflow tube can be stubborn and hard to remove. In this case, using a pipe cleaner to clear out any debris can help loosen it. If needed, gently use pliers to help break it free without damaging the surrounding plumbing.
5. Final Thoughts and Recommendations
Replacing a sink overflow tube is a simple yet important task that anyone can handle with a bit of patience and the right tools. By following the steps outlined in this guide, you’ll be able to replace the overflow tube efficiently and restore your sink to its optimal condition.
Remember, plumbing repairs don’t have to be complicated. And if you need high-quality plumbing supplies or expert advice, don’t hesitate to check out Plumbers Supply Hub for all your plumbing needs.


 Cardinal Plumbing & Heating3.0 (34 reviews)
 Orange Coast Plumbing5.0 (251 reviews)
 Premier Plumbing5.0 (18 reviews)
 Dan Roemer Plumbing5.0 (1 reviews)
 Advanced Plumbing5.0 (223 reviews)
 Straight Flush Plumbing and Leak Detection5.0 (2 reviews)
 What Happens When You Pour Grease Down the Drain
 How to Replace an Outdated Plumbing Fixture Safely: A Step-by-Step Guide
 Why Your Water Bill Is High and How to Lower It with Plumbing Solutions
 How to Protect Pipes from Freezing in Cold Climates
 Plumbing Safety Tips for Homeowners Tackling DIY Projects | Safe Plumbing Solutions
 What Causes High Water Bills and How to Fix It