
- Understanding In-Line Check Valves
- Tools and Materials Needed for Check Valve Replacement
- Steps to Replace an In-Line Check Valve
- Common Issues During Check Valve Replacement
- Maintenance Tips for Prolonging the Life of Your Check Valve
- When to Call a Professional Plumber
Understanding In-Line Check Valves
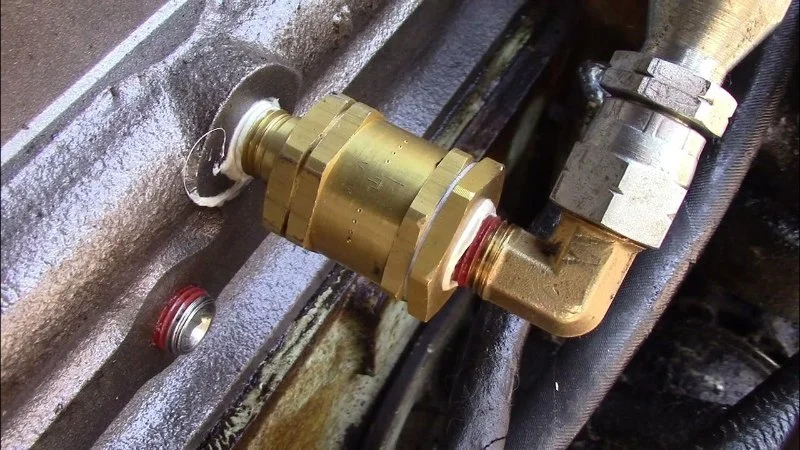
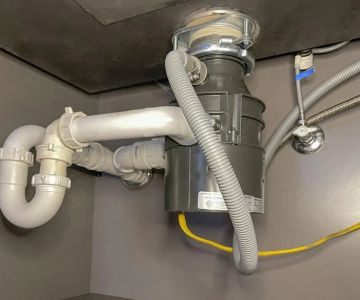
An in-line check valve is an essential component in plumbing systems. Its primary function is to allow fluid to flow in one direction while preventing backflow, which could otherwise cause damage to the plumbing system. In homes, these valves are commonly found in sump pumps, water heaters, and irrigation systems. Over time, check valves may become faulty, and replacing them is crucial for maintaining a smooth and safe water flow.
Tools and Materials Needed for Check Valve Replacement
Replacing an in-line check valve may seem intimidating at first, but with the right tools and materials, you can successfully complete the task yourself. Here’s what you will need:
- Pipe Wrenches: To remove the old valve and tighten the new one.
- Replacement Check Valve: Make sure to choose the correct size and type for your plumbing system.
- Sealant or Teflon Tape: For creating a watertight seal around the valve connections.
- Adjustable Wrench: To tighten fittings and connections.
- Bucket or Towels: For catching any residual water that may spill out during the replacement process.
Once you have gathered these tools, you're ready to begin the replacement process. It’s always a good idea to double-check that the new valve is compatible with your system before starting.
Steps to Replace an In-Line Check Valve
Replacing an in-line check valve is a straightforward process if you follow the steps carefully. Here’s how to do it:
- Turn Off the Water Supply: Before you begin, ensure the water supply is completely turned off to prevent any leaks or water damage. Locate the main water valve and close it to stop the flow of water.
- Drain the System: Open the faucets or any valves in your home to release any remaining water pressure in the pipes. You can also place a bucket or towels under the valve to catch any residual water.
- Locate the Check Valve: Identify the in-line check valve that needs replacing. It’s typically located on a section of the pipe with a flow direction indicator.
- Remove the Old Valve: Using a pipe wrench, loosen the nuts or bolts securing the valve to the pipes. Once loosened, remove the valve and inspect the area for any damage or corrosion that may need repair.
- Install the New Valve: Place the new check valve in the same position as the old one. Make sure the flow direction arrow on the valve matches the direction of water flow. Use Teflon tape or a sealant around the threads to ensure a tight, leak-proof fit.
- Tighten the Connections: Using an adjustable wrench, tighten the valve fittings securely. Avoid over-tightening, as this can damage the threads.
- Test the System: Turn the water supply back on and check for any leaks around the valve. Run water through the system to ensure that the check valve is functioning properly and preventing backflow.
Once these steps are completed, your in-line check valve will be successfully replaced, and your plumbing system should be back in working order.
Common Issues During Check Valve Replacement
While replacing an in-line check valve is relatively simple, there are some common issues that you may encounter:
- Incompatible Valve Size: If the new valve doesn’t match the size or type of the old valve, water may leak or fail to flow properly. Always double-check the specifications before purchasing a replacement.
- Corroded Pipe Threads: Over time, the threads on the pipes may become corroded, making it difficult to attach the new valve. In this case, you may need to replace the damaged section of pipe.
- Improper Valve Orientation: If the valve is installed backwards, it won’t allow water to flow properly, and backflow can occur. Always check the direction of flow before installation.
If you encounter any of these issues, take the time to address them before continuing. It's always better to fix problems early to avoid further complications.
Maintenance Tips for Prolonging the Life of Your Check Valve
Maintaining your in-line check valve can help prevent future replacements and extend its lifespan. Here are a few tips to keep your valve functioning properly:
- Regular Inspections: Periodically check the valve for any signs of wear, corrosion, or leaks. Early detection of issues can help you address them before they become major problems.
- Clean the Valve: Depending on the type of valve, sediment or debris can build up over time. Regular cleaning can help prevent blockages and keep the valve functioning smoothly.
- Protect Against Freezing: In colder climates, ensure that the check valve and pipes are properly insulated to prevent freezing, which can cause damage to both the valve and the pipes.
By following these simple maintenance practices, you can ensure that your in-line check valve stays in good condition and continues to protect your plumbing system from backflow.
When to Call a Professional Plumber
While replacing an in-line check valve is a task many homeowners can handle themselves, there are situations where it’s best to call a professional plumber:
- Complex Plumbing Systems: If your plumbing system is complex or if you are unsure about the type of valve you need, a plumber can help ensure that the correct replacement valve is installed.
- Pipe Damage: If you discover damaged or corroded pipes during the replacement process, a plumber can assess the situation and make the necessary repairs.
- Inability to Stop Leaks: If you cannot stop leaks after replacing the valve, it may indicate a deeper issue that requires professional attention.
When in doubt, don’t hesitate to consult a professional. They have the experience and expertise to resolve the issue efficiently and ensure your plumbing system runs smoothly.
If you're looking for the best replacement parts or tools for your in-line check valve project, visit [Plumbers Supply Hub] to find high-quality products and expert recommendations to make the job easier!


 Plumbing 911, Inc.4.0 (50 reviews)
 Rooter-Man Plumbers4.0 (5 reviews)
 JM and Daughters Plumbing5.0 (10 reviews)
 MN Plumbing & Home Services5.0 (13 reviews)
 Monona Plumbing & Fire Protection4.0 (311 reviews)
 Carver & Carver Plumbing Inc4.0 (198 reviews)
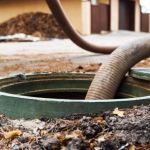 How to Clean Out a Septic Drain Field Safely
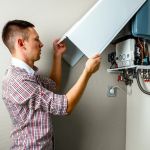 Tankless Water Heaters: Are They Worth the Investment? Pros and Cons Explained
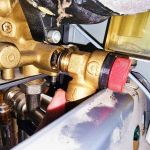 How to Replace a Faulty Pressure Relief Valve
 How to Fix a Dripping Faucet Without Calling a Plumber | Plumbers Supply Hub
 What to Check When You Have Low Water Pressure in Your Home
 How to Repair a Slab Leak Under the Floor: Step-by-Step Expert Guide