
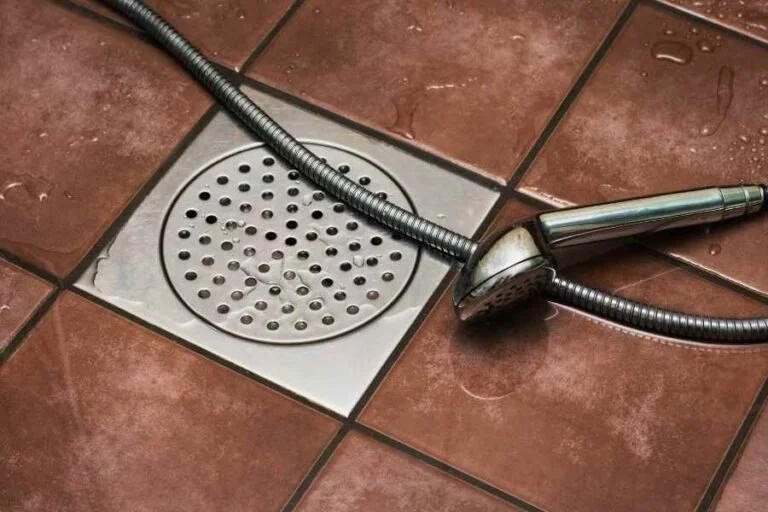
1. Understanding the Need to Replace an In-Wall Shower Drain
Replacing an in-wall shower drain can seem like a daunting task, but with the right tools and knowledge, it's a manageable DIY project. Over time, shower drains can become clogged, corroded, or simply worn out, leading to poor drainage or leaks. If you've noticed water pooling in your shower or a bad odor coming from the drain, it might be time to replace it. In this guide, we’ll walk you through the process of replacing an in-wall shower drain, from the tools you'll need to the final installation steps, ensuring that your shower works like new.
Ethan & Sons Plumbers
PittsburghAllegheny CountyPennsylvania
155 McMurray Rd #7000, Pittsburgh, PA 15241, USA
2. Tools and Materials Needed for the Job
2.1 Necessary Tools for the Job
Before you begin replacing your in-wall shower drain, gather the following tools:
- Pipe wrench or channel lock pliers
- Utility knife
- Flathead screwdriver
- Drill with masonry bit (if needed for wall access)
- Caulking gun and waterproof sealant
- Replacement shower drain (compatible with your existing plumbing)
- Tape measure
These tools will help you remove the old drain and install the new one securely. Make sure you have everything ready before starting the replacement process.
2.2 Materials for a Successful Replacement
The key material you’ll need is the new shower drain. When purchasing the replacement, ensure it's the correct size and style to fit your existing plumbing. It's also important to have plumber’s tape and sealant on hand. Sealant ensures a watertight fit, preventing leaks that could damage your walls or flooring. You’ll also need a new rubber gasket or drain flange, depending on your drain model.
3. Step-by-Step Guide to Replacing Your In-Wall Shower Drain
- 3.1 Turn Off the Water Supply
- 3.2 Removing the Old Drain
- 3.3 Clean the Pipes and Surrounding Area
- 3.4 Install the New Shower Drain
- 3.5 Seal and Finish the Installation
3.1 Turn Off the Water Supply
Before starting any plumbing work, it’s essential to turn off the water supply to avoid any leaks or accidents. Find the water shutoff valve for your shower or the main water supply to the house and turn it off. Once you’ve ensured there is no water running, you can begin the process of replacing your shower drain.
3.2 Removing the Old Drain
Use a pipe wrench or channel lock pliers to unscrew the existing drain. If the drain is sealed tightly with caulk, use a utility knife to cut through the caulk and gently pry it out. Be careful not to damage the surrounding area or pipes. If the drain is corroded or stuck, you may need to drill into it or use a drain removal tool. Once the drain is removed, clean up any remaining debris or caulk around the area to prepare for the new installation.
3.3 Clean the Pipes and Surrounding Area
Before installing the new shower drain, inspect the exposed pipes and surrounding area for any blockages, corrosion, or damage. Clean any dirt or debris from the pipe threads to ensure a smooth and secure connection with the new drain. If the pipes are rusty or damaged, consider repairing or replacing them before proceeding with the installation of the new drain.
3.4 Install the New Shower Drain
Take your new shower drain and apply a layer of plumber’s tape to the threads of the pipe to ensure a tight seal. Insert the drain flange into place and secure it using the provided screws or mounting hardware. Make sure the drain is aligned properly with the shower floor for proper drainage. Tighten the drain with your pipe wrench to secure it in place, but avoid over-tightening, as this can cause damage to the drain or surrounding pipes.
3.5 Seal and Finish the Installation
Once the drain is securely in place, apply a bead of waterproof sealant around the edges of the drain. Use a caulking gun to ensure an even layer of sealant. Allow the sealant to cure for at least 24 hours before testing the drain with water. After the curing time, turn the water back on and check for any leaks. If everything looks good, your in-wall shower drain replacement is complete!
4. Common Mistakes to Avoid
Replacing an in-wall shower drain is a straightforward process, but there are some common mistakes to avoid. One of the biggest mistakes is failing to properly seal the drain, which can lead to leaks and water damage. Always make sure to use high-quality waterproof sealant and allow it to cure before using the shower. Another mistake is choosing the wrong size or type of drain, which can cause drainage issues down the line. Measure carefully before purchasing your replacement drain to ensure a proper fit.
If you're not confident in your ability to replace your in-wall shower drain or encounter any issues during the process, don't hesitate to consult a professional plumber. For those looking for top-quality plumbing supplies and expert advice, Plumbers Supply Hub offers the best products and services to help with your plumbing repairs. Whether you're replacing a drain or upgrading your bathroom fixtures, we've got you covered.


 Viking Plumbing4.0 (742 reviews)
 Goodman Plumbing4.0 (56 reviews)
 Rooter Right Plumbing & Drain4.0 (287 reviews)
 Hereford Plumbing4.0 (2 reviews)
 Aztec Plumbing LLC4.0 (18 reviews)
 Modern Plumbing5.0 (45 reviews)
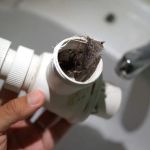 How to Repair a Swollen P-Trap After a Clog
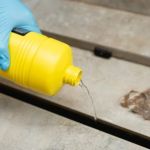 When to Use Chemical Drain Cleaners with Caution: Risks and Safe Alternatives
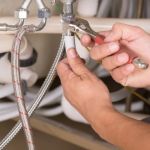 How to Maintain Your Plumbing System: A Homeowner’s Guide
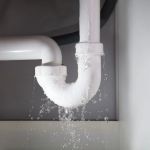 How to Fix a Sink That Rattles When Water Runs: Troubleshooting Guide
 How to Replace a Floor Drain Cover That Is Damaged
 How to Protect Pipes from Freezing in Cold Climates