
How to Repair a Crack in a Plastic Drain Pipe
- 1-Why It's Important to Repair a Crack in a Plastic Drain Pipe
- 2-Identifying the Source and Severity of the Crack
- 3-Tools and Materials Needed for Repair
- 4-Step-by-Step Guide to Repairing the Crack
- 5-Case Study: Fixing a Cracked Drain Pipe
- 6-Final Tips for Ensuring a Successful Pipe Repair
Cracks in plastic drain pipes can lead to significant issues, such as water leakage, pipe damage, or even mold growth if left untreated. These cracks may seem like minor problems at first, but they can escalate quickly, leading to costly repairs and potential water damage. Repairing a crack in a plastic drain pipe promptly is not only important for maintaining the integrity of your plumbing system but also for preserving the health and safety of your home. In this article, we’ll guide you through the process of fixing a crack in a plastic drain pipe effectively, helping you save time and money.

Plumber Hawaiian Gardens
Hawaiian GardensLos Angeles CountyCalifornia
12440 E Carson St, Hawaiian Gardens, CA 90716, USA
2-Identifying the Source and Severity of the Crack
The first step in repairing a cracked plastic drain pipe is to assess the extent of the damage. Identifying the source and severity of the crack will help determine the most appropriate repair method. Here are some tips to guide you through the identification process:
- Locate the Crack: Inspect the drain pipe thoroughly, checking for any visible signs of damage, such as leaks, wet spots, or discoloration. A crack may appear as a small, hairline fracture or a larger, more noticeable break.
- Check for Leaks: If the crack is causing water to leak, this may indicate that the damage is more severe, and a quick, effective repair is needed to prevent further damage.
- Consider Pipe Material: Plastic pipes come in different types, such as PVC or ABS. Be sure to identify the material of your pipe, as different types may require different repair techniques.
- Assess the Crack’s Location: Cracks near joints or bends can be more challenging to repair and may require additional reinforcement to ensure a long-lasting fix.
Once you’ve identified the crack and assessed its severity, you can move forward with selecting the best repair method.
3-Tools and Materials Needed for Repair
To repair a crack in a plastic drain pipe, you’ll need a few essential tools and materials. Here’s a list of what you’ll need:
- Pipe Repair Kit: A pipe repair kit typically includes epoxy resin, fiberglass cloth, or other materials designed for patching cracks in plastic pipes.
- Pipe Cutter: If the damage is severe, you may need to cut out the damaged section of the pipe and replace it. A pipe cutter will help you make clean, straight cuts.
- Sandpaper or a Wire Brush: Sanding or cleaning the damaged area helps the adhesive or repair material bond more effectively to the pipe surface.
- Gloves: Protect your hands during the repair process, especially when working with adhesives or chemicals.
- Measuring Tape: If you need to cut a section of the pipe, you’ll need a measuring tape to ensure an accurate measurement.
Having the right tools and materials on hand will make the repair process easier and ensure a more successful outcome.
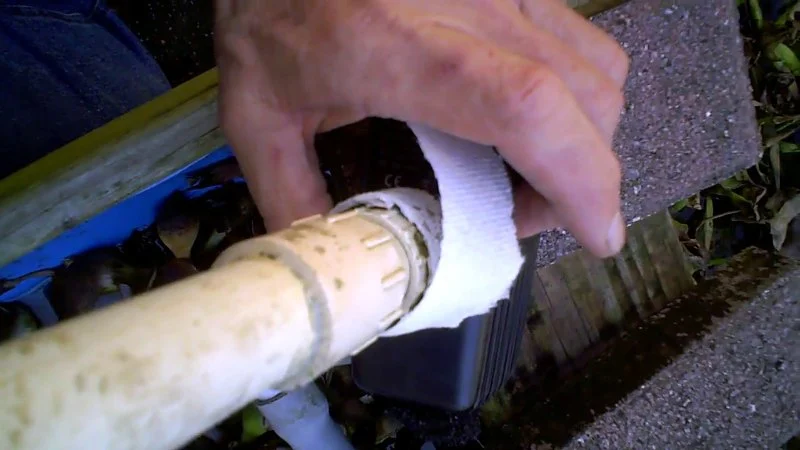
4-Step-by-Step Guide to Repairing the Crack
Here’s a simple, step-by-step guide to repairing a crack in your plastic drain pipe:
- Turn Off the Water Supply: Before you begin, make sure to turn off the water supply to the affected area to prevent further leakage.
- Clean and Dry the Area: Use sandpaper or a wire brush to clean the damaged area. The pipe must be dry and free of debris for the repair material to adhere properly.
- Prepare the Repair Material: Follow the instructions provided with your pipe repair kit. For epoxy-based kits, mix the resin and hardener according to the package instructions.
- Apply the Repair Material: Once the material is ready, apply it over the crack, making sure to cover the area thoroughly. You may need to use a piece of fiberglass cloth to reinforce the repair.
- Allow the Repair to Cure: Let the repair material cure for the recommended amount of time. Be patient and allow it to harden completely before proceeding.
- Test for Leaks: After the repair has cured, turn the water back on and check the area for any leaks. If you notice any, apply additional repair material or consider replacing the section of the pipe.
Once the pipe is fully repaired, you can enjoy peace of mind knowing that the crack is fixed and your plumbing system is back to normal.
5-Case Study: Fixing a Cracked Drain Pipe
John, a homeowner from California, discovered a crack in his PVC drain pipe after noticing water pooling near his basement. He used a pipe repair kit to fix the crack, following the step-by-step process outlined above. After letting the repair cure for 24 hours, John tested the pipe and was relieved to find no leaks. The repair lasted for several years, saving him the cost of replacing the entire section of the drain pipe. John's story is a great example of how a simple, DIY repair can solve a plumbing issue without the need for professional help.
6-Final Tips for Ensuring a Successful Pipe Repair
To ensure that your pipe repair is durable and long-lasting, here are a few final tips:
- Check for Other Damages: If you find one crack, inspect the surrounding area for other potential weaknesses in the pipe.
- Use Quality Repair Materials: Always choose high-quality repair kits and materials to ensure the best results and longevity of the repair.
- Consider Professional Help for Extensive Damage: If the damage is extensive or if you’re unsure about the repair, consider calling a professional plumber for assistance.
With the right tools, materials, and techniques, you can successfully repair a crack in a plastic drain pipe and restore the functionality of your plumbing system.


 Absolute Plumbing Services, LLC.4.0 (37 reviews)
 O.J. Laughlin Plumbing Company, Inc.4.0 (50 reviews)
 Jack L Woods Plumbing Co Inc4.0 (176 reviews)
 Damon's Plumbing LLC4.0 (24 reviews)
 Repipe Max Inc.5.0 (22 reviews)
 Heidelberger Plumbing5.0 (34 reviews)
 How to Choose Fixtures for a Water-Smart Bathroom
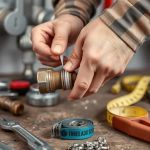 How to Repair a Broken Thread on a Pipe
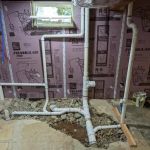 How to Install Plumbing for a Basement Bathroom - Step-by-Step Guide
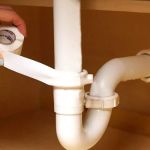 How to Prevent Settling Damage to Plumbing Joints
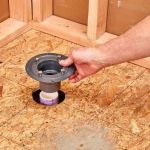 How to Replace a Shower Niche Drain: Step-by-Step Guide for Homeowners
 How to Troubleshoot and Fix a Low Flow Showerhead