
How to Replace an In-Wall Shower Drain: A Step-by-Step Guide
- 1- Understanding the Importance of Replacing an In-Wall Shower Drain
- 2- Common Signs of a Damaged In-Wall Shower Drain
- 3- Tools and Materials Needed for Replacing a Shower Drain
- 4- Step-by-Step Guide to Replacing an In-Wall Shower Drain
- 5- Avoiding Common Mistakes During the Replacement Process
- 6- When to Call a Professional Plumber for Shower Drain Replacement
1- Understanding the Importance of Replacing an In-Wall Shower Drain
The shower drain plays a critical role in ensuring that water flows properly out of your shower and into the home's plumbing system. Over time, however, shower drains can become damaged, clogged, or worn, leading to various problems like water backing up, unpleasant odors, or even water damage to the walls and floor. An in-wall shower drain, unlike a typical floor drain, is built into the wall of your shower area and requires careful attention and maintenance.
Replacing an in-wall shower drain ensures smooth water flow and prevents potential issues such as leaks, mold growth, or significant water damage. In this article, we’ll guide you through the process of replacing the drain, from identifying the problem to successfully installing a new one.
2- Common Signs of a Damaged In-Wall Shower Drain
Recognizing when your in-wall shower drain is damaged is essential to avoid further plumbing issues. Some common signs that indicate it's time for a replacement include:
- Water Pooling: If you notice water accumulating in the shower, especially around the drain, it may indicate that the drain is clogged or partially blocked.
- Slow Drainage: Slow drainage is another sign that there might be a blockage or a malfunction in the drain system.
- Unpleasant Odors: Foul smells coming from the drain could suggest that debris or mold is trapped inside, often caused by poor drainage.
- Visible Damage or Corrosion: Any visible cracks, rust, or corrosion around the drain are clear signs that the drain may be deteriorating and needs to be replaced.
- Leaks: If you notice water stains or wetness on the walls or floor near the drain, there could be a leak caused by a faulty or broken drain pipe inside the wall.
Addressing these issues promptly can save you from further damage and expensive repairs. If you notice any of these signs, it’s time to replace your in-wall shower drain.
3- Tools and Materials Needed for Replacing a Shower Drain
Replacing an in-wall shower drain is a manageable DIY project if you have the right tools and materials. Here's a list of what you’ll need:
- Pipe Wrench or Adjustable Wrench: To loosen and tighten the plumbing connections.
- Hacksaw or Pipe Cutter: To remove old pipes or cut new ones to fit the new drain.
- Plumber’s Putty: To seal the drain and prevent leaks.
- Replacement Shower Drain: A new in-wall shower drain that fits your plumbing system.
- Screwdriver: To remove screws securing the drain assembly.
- Sealant or Silicone Caulk: To ensure a watertight seal around the drain.
- Measuring Tape: For precise measurements to ensure a proper fit for the new drain.
- Bucket or Container: To catch any remaining water or debris from the pipes during the replacement process.
With these tools and materials at hand, you’ll be ready to tackle the drain replacement with confidence. You can find high-quality plumbing tools and parts at Plumbers Supply Hub.
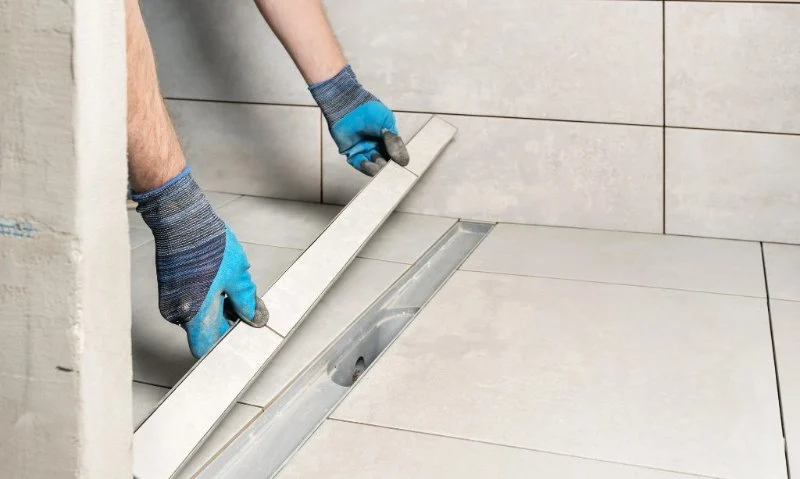
4- Step-by-Step Guide to Replacing an In-Wall Shower Drain
Follow these steps to replace your in-wall shower drain effectively:
- Turn Off the Water Supply: Ensure the water supply to the shower is turned off to prevent any water leakage during the replacement process.
- Remove the Old Drain Cover: Use a screwdriver to remove the drain cover, exposing the pipe underneath.
- Loosen the Plumbing Connections: Use a pipe wrench or adjustable wrench to loosen the plumbing connections around the drain. You may need to cut the old pipe if it’s too corroded or damaged.
- Clean the Area: Remove any debris or old sealant around the drain area. Make sure the area is clean and dry before installing the new drain.
- Install the New Drain: Place the new shower drain into the existing hole and secure it with the necessary screws. Apply plumber’s putty or silicone caulk around the edges to create a watertight seal.
- Reconnect the Plumbing: Reattach the plumbing connections to the new drain and tighten them securely with your wrench.
- Test the New Drain: Turn the water supply back on and test the drain for leaks. Check the surrounding area for any signs of moisture or water pooling.
Following these steps will ensure that your in-wall shower drain is replaced properly, allowing for smooth water flow and preventing future issues.
5- Avoiding Common Mistakes During the Replacement Process
To ensure the replacement goes smoothly and to avoid costly mistakes, keep these tips in mind:
- Measure Twice, Cut Once: Make sure you measure the pipe lengths and the drain opening carefully before making any cuts. An incorrect fit can lead to leaks or difficulty reassembling the drain.
- Use Proper Sealant: Always use plumber’s putty or silicone caulk to seal the drain properly. Failing to do so can lead to leaks and water damage.
- Don’t Over-Tighten: Tighten the connections, but avoid over-tightening, as this could damage the pipes or cause cracks in the drain assembly.
By avoiding these common mistakes, you’ll ensure a successful shower drain replacement.
6- When to Call a Professional Plumber for Shower Drain Replacement
While replacing an in-wall shower drain is a manageable DIY task, there are certain situations when it’s best to call a professional plumber:
- If the drain is severely damaged or the pipe is inaccessible.
- If you encounter difficulties with the plumbing connections or leaks after installation.
- If you are unsure about the compatibility of the new drain with your existing plumbing system.
In these cases, a licensed plumber can ensure the job is done correctly and avoid potential issues that could lead to water damage or costly repairs.


 CLEANSTREAM LLC5.0 (198 reviews)
 Plumbdoc,LLC0.0 (0 reviews)
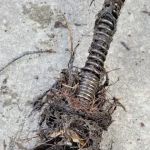 773 Plumbers4.0 (12 reviews)
 Z-Man Plumbing L.L.C.4.0 (7 reviews)
 Mr. Rooter Plumbing of The Inland Empire4.0 (532 reviews)
 Roto-Rooter Plumbing & Water Cleanup4.0 (821 reviews)
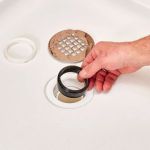 How to Replace a Floor Drain Strainer: A Step-by-Step Guide
 How to Install a Secondary Drain for Air Conditioners
 What Causes High Water Bills and How to Fix It
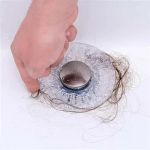 How to Replace a Tub Drain With Hair Trap Feature
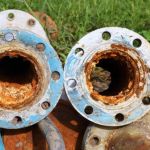 How to Replace a Galvanized Pipe in Your Home
 How to Fix a Dripping Faucet Without Calling a Plumber | Plumbers Supply Hub