
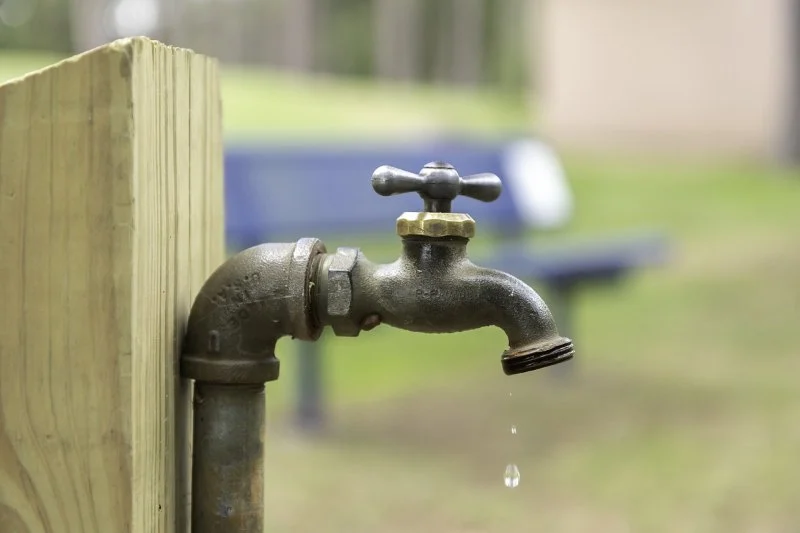
1. Understanding the Problem: Why Does a Spigot Leak Only When Turned On?
A spigot that leaks only when turned on is a frustrating yet common issue for homeowners. The primary cause is often a worn-out washer, deteriorating seals, or a faulty valve inside the spigot. When the spigot is off, the water pressure is held in place, but as soon as the valve is opened, pressure causes water to leak through cracks or damaged components. The good news is that this is a problem that can be fixed relatively easily with a bit of DIY knowledge and the right tools.

2. Tools and Materials You’ll Need for the Replacement
Before you begin replacing your leaky spigot, make sure you have the necessary tools and materials on hand. Here’s a list of what you’ll need:
- Wrench or Pipe Wrench
- Channel Lock Pliers
- Replacement Spigot (or faucet)
- Plumber’s Tape
- Rubber Washers
- Bucket or Towels
- Pipe Dope or Joint Compound
Having these tools and materials ready will ensure that you can replace the spigot efficiently without needing to stop midway to search for more equipment.
3. Step-by-Step Guide to Replacing Your Leaking Spigot
Now that you’re prepared, let’s walk through the process of replacing the spigot. With just a few simple steps, you’ll have your outdoor faucet working like new!
3.1 Turn Off the Water Supply
Before you start working on your leaky spigot, it’s important to turn off the water supply to the spigot. You can usually do this by locating the water shut-off valve, which is typically near the water meter or where the pipe enters your house. Make sure that no water is running to avoid creating a bigger mess once you begin working.
3.2 Remove the Old Spigot
Using a wrench or pipe wrench, carefully unscrew the nuts that hold the spigot in place. Once the nuts are removed, the spigot should come off easily. If there’s a significant buildup of dirt or debris around the spigot, clean it off before proceeding to the next step.
It’s a good idea to have a bucket or towels nearby to catch any remaining water in the pipes that may spill out when you remove the spigot.
3.3 Install the New Spigot
Once the old spigot is removed, it’s time to install the new one. Apply a small amount of plumber’s tape to the threads of the pipe to ensure a tight seal. Then, attach the new spigot by screwing it onto the pipe. Be sure to tighten the connection securely using your wrench or pliers, but avoid over-tightening, as this can cause damage to the spigot or pipe.
3.4 Apply Joint Compound or Pipe Dope
To further ensure that your new spigot doesn’t leak, you can apply a small amount of pipe dope or joint compound around the threads before securing the spigot. This helps create a more effective seal and prevents leaks around the base of the spigot.
3.5 Turn the Water Back On
With the new spigot in place, it’s time to turn the water supply back on. Slowly open the valve and check for leaks. If everything is sealed properly, your spigot should be leak-free and working as expected. If you notice any leaks, tighten the connections a little more or check the washer for proper placement.
4. Common Mistakes to Avoid When Replacing a Leaking Spigot
Replacing a spigot is relatively straightforward, but there are a few common mistakes that can hinder the process or result in further damage. Here’s a list of things to avoid:
4.1 Not Turning Off the Water Supply
One of the most common mistakes is failing to turn off the water supply before replacing the spigot. Doing so can cause water to spill out when you remove the old spigot, making a mess and possibly leading to water damage in your home.
4.2 Over-Tightening the Spigot
While it’s important to secure the spigot properly, over-tightening can cause cracks or damage to the pipe threads or the spigot itself. Tighten the spigot until it’s snug, but don’t use excessive force.
4.3 Forgetting to Use Plumber’s Tape
Not using plumber’s tape is a common mistake that can lead to leaks at the connection point between the spigot and pipe. Be sure to apply plumber’s tape around the pipe threads to create a better seal before attaching the spigot.
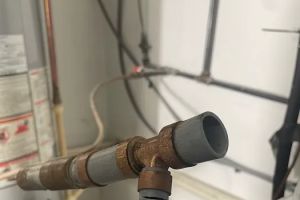
5. When to Call a Professional Plumber
While replacing a leaky spigot is often a DIY job, there are times when it’s best to call a professional plumber. If you find that the pipe threads are damaged or if you notice significant corrosion around the pipe, it’s a good idea to have a plumber inspect the issue. Additionally, if you’re uncomfortable performing the replacement yourself or if the problem seems more complex, seeking professional help is always a good option.
At Plumbers Supply Hub, we offer a wide range of plumbing products and tools to help with spigot replacements and other plumbing projects. Whether you're a DIY enthusiast or need expert help, we have the resources to assist you in getting the job done right.


 Mid MO Mechanical4.0 (11 reviews)
 Right Choice Rooter & Plumbing Service4.0 (82 reviews)
 Heins Plumbing and Heating4.0 (50 reviews)
 Got Your 6 Plumbing LLC4.0 (12 reviews)
 H2O Service LLC4.0 (52 reviews)
 Oyen Plumbing & Heating LLC4.0 (21 reviews)
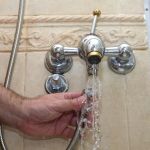 Why Sometimes You Get No Hot Water in Certain Fixtures
 What to Know Before Doing Plumbing in a Tiny Home
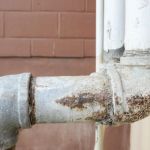 Signs You Need to Replace Old Plumbing Pipes
 How to Repair a Hairball Clog Without Harsh Chemicals
 How to Replace an Ice Maker Valve Under the Refrigerator
 How to Replace a Bathtub Spout with Diverter: Step-by-Step Guide