
How to Repair a Condensation Issue on Cold Pipes
- 1- Understanding Condensation Issues on Cold Pipes
- 2- Why Do Cold Pipes Sweat and How Does It Happen?
- 3- Tools Required to Fix Condensation on Cold Pipes
- 4- Step-by-Step Guide to Repair Condensation on Cold Pipes
- 5- Preventive Measures to Avoid Future Condensation Issues
- 6- When to Call a Professional Plumber for Condensation Problems
1- Understanding Condensation Issues on Cold Pipes
Condensation on cold pipes, commonly referred to as "sweating," occurs when warm, humid air comes into contact with the cold surface of a pipe. As the cold pipe cools the air around it, moisture in the air condenses and forms droplets on the surface of the pipe. While this is a natural phenomenon, excessive condensation can lead to a number of problems, such as water damage, mold growth, or even corrosion of the pipes.
It’s important to address condensation issues promptly to prevent potential damage to your home or plumbing system. This article will guide you through the steps to fix condensation on cold pipes and provide tips for preventing it in the future.
2- Why Do Cold Pipes Sweat and How Does It Happen?
Condensation occurs when the surface temperature of a pipe is lower than the dew point of the air surrounding it. This usually happens when warm, moist air in your home makes contact with cold water pipes, which are typically found in areas like basements, crawl spaces, and under sinks. The temperature difference between the air and the pipe causes moisture in the air to condense on the pipe's surface, leading to water droplets or "sweating."
Factors contributing to condensation include:
- High Humidity: Homes with high humidity, especially in areas like bathrooms and kitchens, are more prone to condensation issues on pipes.
- Cold Water Flowing Through Pipes: Pipes carrying cold water, especially in hot weather, are at a higher risk of sweating.
- Poor Ventilation: Insufficient airflow in areas like basements or crawl spaces can trap moisture, increasing the likelihood of condensation.
Now that we understand why this happens, let's explore the tools and materials you will need to resolve this issue.
3- Tools Required to Fix Condensation on Cold Pipes
Fixing condensation on cold pipes is a manageable task with the right tools and materials. Here’s a list of the tools you’ll need:
- Foil Insulation: To wrap around the pipes and prevent condensation from forming.
- Pipe Insulation Sleeves: A more permanent solution for insulating pipes and preventing condensation.
- Measuring Tape: To measure the length of the pipes to ensure proper insulation coverage.
- Utility Knife: For cutting insulation material to fit the pipes properly.
- Duct Tape or Zip Ties: To secure the insulation in place.
With these tools, you'll be ready to tackle the condensation problem and prevent it from reoccurring.
4- Step-by-Step Guide to Repair Condensation on Cold Pipes
Follow these simple steps to address condensation on your cold pipes and prevent future issues:
- Turn Off the Water Supply: Before beginning any work, ensure that the water supply is turned off to avoid accidental leaks or water damage.
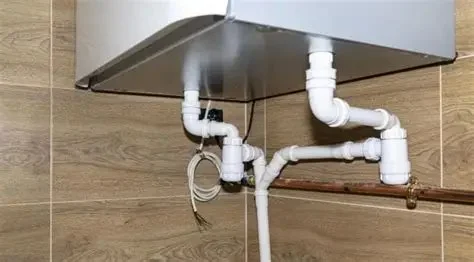
- Inspect the Pipes: Locate the pipes that are sweating. These are typically cold water pipes running through unventilated areas like basements or crawl spaces.
- Dry the Pipes: Use a dry cloth or towel to wipe away any excess moisture from the pipes. This will help prevent further water damage while you work on the insulation.
- Measure the Pipe Length: Use a measuring tape to determine the length of the exposed pipes that need to be insulated.
- Install Insulation: Cut the foil insulation or pipe sleeves to the required length and wrap them around the pipes. Use duct tape or zip ties to secure the insulation in place. Be sure that the insulation covers the entire length of the pipe that is exposed to the air.
- Test the Results: After insulating the pipes, turn the water supply back on and monitor the pipes for any further condensation. If the problem persists, check for gaps in the insulation and address them accordingly.
By following these steps, you can effectively resolve the condensation issue on your cold pipes and prevent it from recurring.
5- Preventive Measures to Avoid Future Condensation Issues
While repairing existing condensation issues is important, preventing them from happening in the future is equally essential. Here are some preventive measures to consider:
- Improve Ventilation: Ensure that areas with cold pipes, such as basements and crawl spaces, are well-ventilated. This will reduce humidity and the likelihood of condensation.
- Use Dehumidifiers: In high-humidity areas, using a dehumidifier can help lower moisture levels in the air and prevent condensation from forming on cold pipes.
- Insulate Pipes: Insulating your cold water pipes with foam or other insulating materials can prevent condensation from occurring by keeping the pipes at a consistent temperature.
- Maintain Proper Home Temperature: Keep the temperature of your home stable, particularly in areas with exposed pipes. Avoid drastic temperature fluctuations that could encourage condensation.
Implementing these preventive measures will help keep your pipes dry and functional, saving you from future condensation problems.
6- When to Call a Professional Plumber for Condensation Problems
While fixing condensation on cold pipes is often a DIY task, there are situations where you might need to call in a professional plumber:
- If the condensation is severe and causing water damage to your home’s structure.
- If you cannot access or insulate the pipes properly due to their location.
- If the condensation issue is accompanied by leaks or other plumbing problems.
A professional plumber can assess the situation, repair any damage, and help you find long-term solutions to prevent future condensation problems.


 Pottys Plumbing5.0 (2 reviews)
 Hatz Plumbing4.0 (19 reviews)
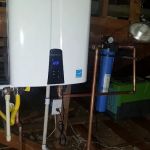 Superior Plumbing Services4.0 (27 reviews)
 Farragut Plumbing Co LLC0.0 (0 reviews)
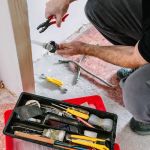 Quick Fix Plumbers Glendale5.0 (13 reviews)
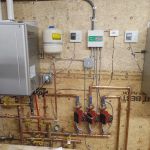 K Farmer Plumbing & Services5.0 (285 reviews)
 How to Replace a Bathtub Spout with Diverter: Step-by-Step Guide
 How to Install a Bathroom Sink: A Complete Guide
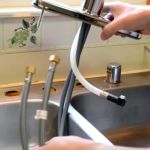 How to Fix a Leaky Faucet Under the Sink - Plumbers Supply Hub
 How to Replace a Malfunctioning Pressure Reducing Valve
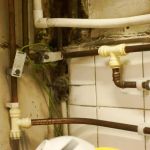 How to Troubleshoot Plumbing Issues in Older Homes
 How to Install a Pot Filler Faucet in the Kitchen: A Step-by-Step Guide