

- 1 - Why Should You Change Your Showerhead?
- 2 - Choosing the Right Showerhead for Your Bathroom
- 3 - Tools Needed for Installing a Showerhead
- 4 - Step-by-Step Instructions for Installing a Showerhead
- 5 - Troubleshooting Common Issues When Installing a Showerhead
1 - Why Should You Change Your Showerhead?
Changing your showerhead is an easy and affordable way to improve your bathroom's overall feel and performance. Over time, showerheads can become clogged with mineral deposits, especially in areas with hard water, reducing water flow and making your shower experience less enjoyable. Additionally, upgrading to a newer, more efficient showerhead can save you money on water bills while providing a better, more luxurious shower experience.
Whether you're looking to upgrade to a rainfall showerhead, a handheld model, or just need a more efficient water flow, replacing your showerhead can have a significant impact on your daily routine. This simple DIY project can refresh your bathroom without the need for expensive renovations.

J-Co Plumbing and Boiler Service
Los AngelesLos Angeles CountyCalifornia
11142 Fleetwood St #11, Sun Valley, CA 91352, USA
2 - Choosing the Right Showerhead for Your Bathroom
Choosing the right showerhead depends on your personal preferences, bathroom size, and water pressure. Here are some factors to consider:
Benjamin Franklin Plumbing of Ann Arbor
Ann ArborWashtenaw CountyMichigan
4470 Jackson Rd Suite 201, Ann Arbor, MI 48103, USA
1. Water Pressure
If you live in an area with low water pressure, you may want to consider a showerhead designed to boost water flow. Look for models that feature pressure-boosting technology to ensure a powerful stream, even in homes with weaker plumbing.
2. Water Efficiency
If you're looking to save water and reduce your utility bills, opt for a low-flow showerhead. These models provide a satisfying shower experience while using less water, making them both eco-friendly and cost-effective.
3. Style and Features
Showerheads come in many styles, including handheld, fixed, rain shower, and multi-function models. Consider what type of shower experience you're looking for. Do you want the convenience of a handheld showerhead, or are you seeking the luxury of a rain shower that covers your entire body in a gentle stream?
4. Material and Finish
Showerheads are available in a range of materials and finishes, including chrome, brushed nickel, and matte black. Choose a finish that complements the rest of your bathroom's decor for a cohesive look.
3 - Tools Needed for Installing a Showerhead
Installing a new showerhead is a straightforward process, but having the right tools will make it easier. Here's what you'll need:
- Adjustable Wrench: Used to loosen the old showerhead and tighten the new one.
- Plumber's Tape: This helps seal the connection between the showerhead and the pipe to prevent leaks.
- Towel or Cloth: To cover the shower arm and prevent damage while using the wrench.
- Showerhead: Your new showerhead, which should come with instructions on installation.
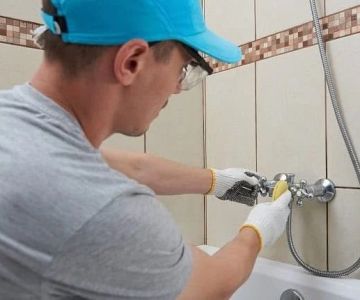
4 - Step-by-Step Instructions for Installing a Showerhead
Follow these easy steps to install your new showerhead:
Step 1: Remove the Old Showerhead
First, use your adjustable wrench to loosen the old showerhead by turning it counterclockwise. Wrap a towel or cloth around the shower arm to prevent scratching, and then use the wrench to loosen the connection. Once it’s loose, remove the showerhead completely.
Step 2: Clean the Shower Arm
Before attaching the new showerhead, take a moment to clean the threads of the shower arm. This will ensure a secure and leak-free connection. You can use a clean cloth to wipe away any debris or old plumber’s tape that may remain from the previous installation.
Step 3: Apply Plumber’s Tape
Wrap a few layers of plumber’s tape around the threads of the shower arm. This tape helps create a watertight seal to prevent leaks once the new showerhead is attached.
Step 4: Attach the New Showerhead
Screw the new showerhead onto the shower arm by hand, turning it clockwise. Once it’s hand-tight, use the adjustable wrench to give it a final turn to ensure it’s secure. Be careful not to overtighten, as this can cause damage to the threads or the showerhead.
Step 5: Test for Leaks
Turn on the water to check for any leaks. If you notice any drips around the connection, tighten the showerhead slightly or add more plumber’s tape. Make sure the water flows smoothly and there are no leaks before finishing the installation.
5 - Troubleshooting Common Issues When Installing a Showerhead
Sometimes, even with careful installation, problems can arise. Here are some common issues and how to resolve them:
1. Leaking Connections
If you notice water dripping around the connection, it may be due to insufficient plumber’s tape or an improperly tightened connection. Try removing the showerhead and reapplying fresh plumber’s tape, then reinstalling it carefully.
2. Low Water Pressure
If your new showerhead isn’t providing adequate water pressure, it could be due to a clogged filter or a design issue. Check the showerhead’s aerator and clean it if necessary. Some showerheads are designed to limit water flow for efficiency, so check if yours is designed for high pressure.
3. Wrong Showerhead Size
If the showerhead doesn’t fit properly on the shower arm, make sure the showerhead’s threads match the size of the arm. Some older showerheads may require an adapter, which can be purchased at most hardware stores.
By following these steps and troubleshooting tips, you can easily install a new showerhead and enhance your shower experience. For high-quality showerheads and plumbing supplies, visit Plumbers Supply Hub for the best products and expert advice.


 Fite Plumbing, LLC4.0 (39 reviews)
 Water Tight Plumbing & Sewer4.0 (38 reviews)
 R and j water heater5.0 (4 reviews)
 EZ PLUMBING SERVICE4.0 (30 reviews)
 Cornett Plumbing & Heating4.0 (47 reviews)
 Major Leak Plumbing Inc.5.0 (5 reviews)
 How to Repair a Pipe Saddle That Leaks
 What to Do If Your Toilet Is Overflowing: Quick Steps to Take
 Why Your Water Heater Is Leaking and How to Fix It
 How to Replace a Pressure Reducing Valve Quietly: A Step-by-Step Guide
 How to Safely Drain a Water Heater Before Moving: Step-by-Step Guide
 How to Replace a Bathtub Spout with Diverter