
- 1. Understanding Wet Vent Systems
- 2. Identifying Leaks in Wet Vent Systems
- 3. Tools and Materials for Repair
- 4. Step-by-Step Guide to Repairing Leaks
- 5. Why You Should Consider Professional Help
1. Understanding Wet Vent Systems
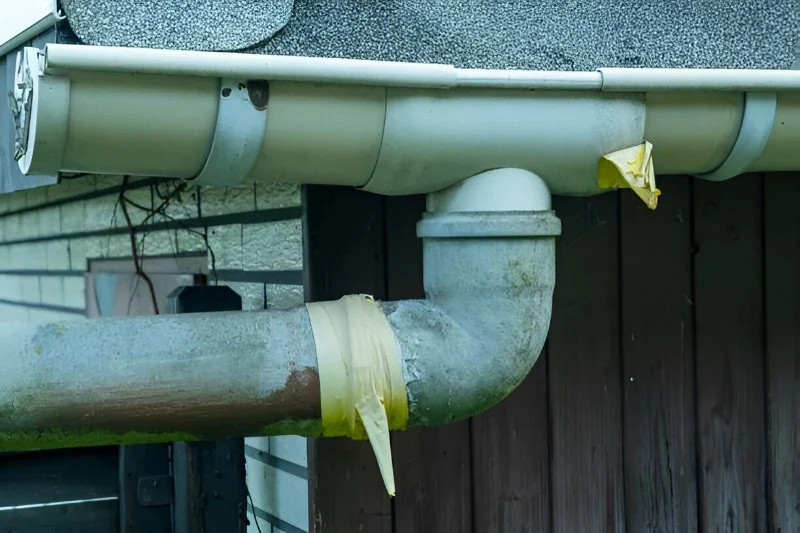
A wet vent system is a type of plumbing system that combines the venting and waste systems in one pipe. This setup is commonly used in residential homes and helps regulate air pressure within the pipes while allowing wastewater to flow smoothly. The vent system is essential for ensuring that wastewater doesn’t become backed up and that air can circulate properly through the plumbing system.
Wet vent systems are particularly common in bathrooms, where one vent pipe serves multiple fixtures like toilets, sinks, and showers. While they are an efficient and space-saving solution, wet vent systems can be prone to leaks, especially where joints and connections are made between pipes.
Booker Brothers Plumbing, Heating & Electrical LLC
SullivanMoultrie CountyIllinois
321 S Hamilton St Suite #1, Sullivan, IL 61951, USA
2. Identifying Leaks in Wet Vent Systems
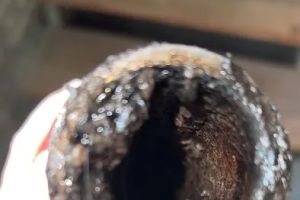
Leaking joints in a wet vent system can be difficult to detect at first, especially since many of the pipes are hidden behind walls or ceilings. However, there are some common signs that indicate a leak in the vent system:
- Unpleasant odors: A foul smell or sewer gas in your home is often the first sign of a leaking vent system. This happens when the seal around a joint has been compromised, allowing gases to escape.
- Visible water damage: Water stains on walls, ceilings, or floors may indicate that the pipes are leaking. Look around the area where the vent pipes are installed, especially near joints.
- Slow drainage: If you notice that your sinks, tubs, or toilets are draining slowly, it could be a sign of a clog or a leak in the vent system that’s preventing proper airflow.
Once you’ve identified a potential leak, it’s important to repair it as soon as possible to avoid further damage, such as mold or structural issues in your home.
Ostlund A Service Company
BrightonLivingston CountyMichigan
3637 S Old US Hwy 23 Suite 100, Brighton, MI 48114, USA
3. Tools and Materials for Repair
Before you begin repairing a leaking joint in a wet vent system, you’ll need to gather the right tools and materials. Here’s a list of what you’ll need:
- Pipe Wrench: A pipe wrench is essential for loosening and tightening the pipes. It will help you disassemble the vent system if needed.
- PVC Pipe Cutter: If you need to replace any pipes, a PVC pipe cutter will help you make precise cuts.
- Plumbing Tape: Plumbing tape is great for sealing the joints and ensuring a leak-proof seal after the repair.
- Pipe Sealant or Adhesive: Use pipe sealant or PVC adhesive to seal any cracks or leaks in the joint.
- Replacement Pipes (if needed): If any pipes are damaged beyond repair, you will need to replace them with new ones of the same size and material.
- Plumber’s Putty: For sealing smaller leaks and creating a tighter joint, plumber’s putty can be helpful.
Once you have all the necessary tools and materials, you’re ready to start the repair process.
4. Step-by-Step Guide to Repairing Leaks
Repairing a leaking joint in a wet vent system is a manageable task if you follow these simple steps:
- Step 1: Turn Off Water Supply - Before starting any repair work, make sure to turn off the water supply to your home. This will help prevent any accidental leaks or flooding while you work.
- Step 2: Locate the Leak - Use a flashlight to locate the leaking joint. If the leak is near a wall or ceiling, you may need to remove drywall or other coverings to access the vent pipe.
- Step 3: Remove the Damaged Joint - Use the pipe wrench to loosen and remove the damaged joint. If necessary, cut away any damaged sections of pipe using the PVC pipe cutter.
- Step 4: Clean the Pipes - Once the joint is removed, clean the edges of the pipes using a cloth to remove any debris or moisture. This will ensure a clean, secure connection when you reassemble the pipes.
- Step 5: Apply Sealant - Apply pipe sealant or plumber’s putty to the edges of the pipe and joint, ensuring that it is evenly spread.
- Step 6: Reassemble the Joint - Carefully reassemble the joint by fitting the pipes together and tightening them with a pipe wrench. Ensure the connection is secure but not overtightened, which could cause further damage.
- Step 7: Test the Repair - Turn the water back on and test the system for leaks. Check around the joint for any signs of water seepage. If the joint is dry, the repair is complete!
By following these steps, you can effectively repair a leaking joint in a wet vent system and restore proper function to your plumbing system.
5. Why You Should Consider Professional Help
While repairing a leaking joint in a wet vent system can be a DIY task for experienced homeowners, there are instances when it’s best to call a professional plumber. If the leak is extensive, if you’re unsure about the cause of the issue, or if the repair requires specialized tools, it may be more cost-effective and safer to seek professional help.
A licensed plumber has the expertise to identify underlying problems in your vent system and fix them properly, preventing future issues and ensuring that your plumbing system works smoothly.
If you’re looking for reliable plumbing supplies or professional help with your repair, visit Plumbers Supply Hub for top-notch products and services.


 Dream Home Plumbing5.0 (123 reviews)
 CGS Plumbing4.0 (4 reviews)
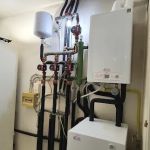 City Plumbing, Heating & Air0.0 (0 reviews)
 DeLong Plumbing4.0 (41 reviews)
 Zoom Drain5.0 (297 reviews)
 AAA Plus Septic Pump & Repair3.0 (9 reviews)
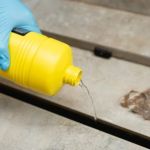 When to Use Chemical Drain Cleaners with Caution: Risks and Safe Alternatives
 How to Prevent Plumbing Problems During Renovations
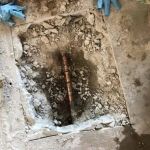 How to Detect a Hidden Slab Leak: A Complete Guide for Homeowners
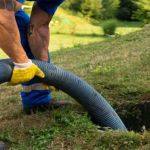 How to Clean Out a Septic Tank Safely and Effectively
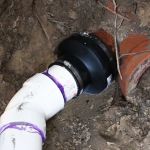 How to Replace a Broken Pipe in a Slab Foundation | Plumbers Supply Hub
 Why Your Water Pressure Is Low and How to Fix It