
- 1. Why Replace a Wall-Mounted Sink?
- 2. Tools Needed for Sink Replacement
- 3. Steps to Replace a Wall-Mounted Sink Without Leaks
- 4. Common Leak Causes and How to Avoid Them
- 5. When to Call a Plumber
1. Why Replace a Wall-Mounted Sink?
Wall-mounted sinks are popular for their sleek, space-saving design. However, over time, they can experience wear and tear, especially around the mounting hardware, which may result in leaks. If your sink is damaged, cracked, or showing signs of corrosion, it's time for a replacement. Replacing a wall-mounted sink not only improves the look of your bathroom or kitchen but also ensures that plumbing functions properly, reducing the risk of water damage and mold growth.
Additionally, replacing an old sink with a new one that fits better into your space or enhances your décor can refresh your entire bathroom or kitchen. By following the right steps, you can replace the sink without the fear of leaks or additional problems.

The East Tennessee Plumber
ClevelandBradley CountyTennessee
1680 Southern Heights Cir SE, Cleveland, TN 37311, USA
2. Tools Needed for Sink Replacement
Replacing a wall-mounted sink requires some basic plumbing tools. Having the right tools on hand will ensure the process goes smoothly and helps prevent future issues like leaks. Here’s a list of tools you’ll need for a successful sink replacement:
- Wrench: A pipe wrench or adjustable wrench will help loosen nuts and bolts connecting the plumbing.
- Plumber’s Tape: Plumber's tape (Teflon tape) is essential for ensuring leak-free connections between pipes and fittings.
- Pipe Cutters: If you need to modify the pipes, pipe cutters are necessary for clean and precise cuts.
- Bucket: A bucket is helpful for catching any residual water when disconnecting plumbing connections.
- Caulk or Silicone Sealant: Sealant is essential for securing the edges of the sink and ensuring a waterproof connection to the wall.
- Level: A level will ensure your sink is mounted properly, ensuring that the water flows in the correct direction.
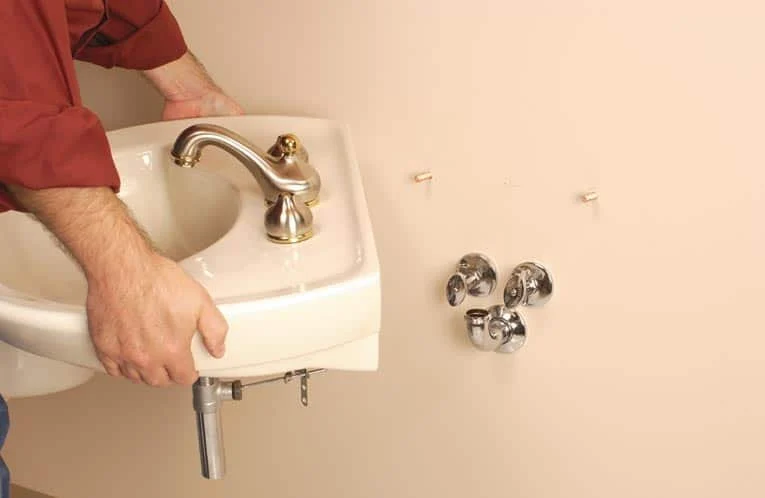
3. Steps to Replace a Wall-Mounted Sink Without Leaks
Replacing a wall-mounted sink without causing leaks involves careful planning, accurate measurements, and proper installation. Follow these steps to replace your sink safely and securely:
- Turn Off the Water Supply: Before starting, turn off the water supply to the sink. You can do this by locating the shut-off valves under the sink or turning off the main water supply to the house.
- Disconnect the Plumbing: Use a wrench to disconnect the water supply lines and drain pipes from the sink. Be sure to place a bucket under the pipes to catch any residual water.
- Remove the Old Sink: If your sink is mounted to the wall, you may need to unscrew the mounting brackets or bolts that hold it in place. Carefully remove the sink from the wall.
- Prepare the New Sink: Ensure the new sink is properly aligned with the mounting hardware. If necessary, install the mounting brackets or wall anchors before placing the sink.
- Install the New Sink: Position the new sink on the wall and secure it with screws or bolts. Use a level to ensure the sink is mounted correctly.
- Reconnect the Plumbing: Reconnect the water supply lines and drain pipes. Be sure to use plumber’s tape on the threads to avoid leaks. Tighten the connections with your wrench, but avoid over-tightening.
- Seal the Sink: Apply a bead of silicone sealant around the base of the sink where it meets the wall. This helps prevent water from seeping behind the sink and causing damage.
- Test for Leaks: Turn the water back on and test the connections for any leaks. Run water through the sink and check around the plumbing connections for signs of leakage. If you spot any leaks, tighten the connections or add more sealant where necessary.
4. Common Leak Causes and How to Avoid Them
Even with careful installation, leaks can still occur if the proper precautions are not taken. Here are some common causes of leaks when replacing a wall-mounted sink and how to avoid them:
- Loose Plumbing Connections: Leaks often occur due to improperly tightened connections. Always check and recheck that all connections are secure, but don’t overtighten, as that can cause damage.
- Damaged Gaskets or Seals: If the gaskets or seals are old or damaged, they can allow water to leak through. Be sure to inspect them and replace them if necessary.
- Improper Use of Plumber’s Tape: Failing to wrap plumber’s tape around threaded connections properly can lead to leaks. Ensure you wrap the tape around the threads in a clockwise direction for a tight seal.
- Improper Mounting: If the sink isn’t properly aligned or mounted securely to the wall, it may shift and cause water to leak around the edges. Ensure the sink is level and tightly secured to prevent movement.
5. When to Call a Plumber
While replacing a wall-mounted sink can be a DIY project for many, there are situations where it’s best to call a professional plumber. Here are some cases when you might want to seek expert help:
- Complicated Plumbing: If your plumbing system is more complex than usual (for example, if it involves gas lines or difficult-to-reach connections), it’s safer to call a professional.
- Persistent Leaks: If you’ve tried to fix a leak, but it persists after installation, a plumber can diagnose the issue and ensure proper repair.
- Structural Issues: If the wall or the sink mounting is damaged, you may need a plumber to help reinforce the area or provide additional support for a secure installation.
Replacing a wall-mounted sink is a rewarding DIY project that can save you money and enhance your bathroom or kitchen. By following the proper steps and using the right tools, you can install your sink securely without leaks. For any additional plumbing needs, visit Plumbers Supply Hub for the best products, tools, and professional services to complete your project.


 Dream Home Plumbing5.0 (123 reviews)
 CGS Plumbing4.0 (4 reviews)
 City Plumbing, Heating & Air0.0 (0 reviews)
 DeLong Plumbing4.0 (41 reviews)
 Zoom Drain5.0 (297 reviews)
 AAA Plus Septic Pump & Repair3.0 (9 reviews)
 When to Use Chemical Drain Cleaners with Caution: Risks and Safe Alternatives
 How to Prevent Plumbing Problems During Renovations
 How to Detect a Hidden Slab Leak: A Complete Guide for Homeowners
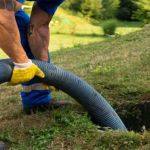 How to Clean Out a Septic Tank Safely and Effectively
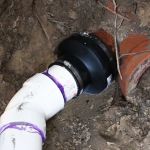 How to Replace a Broken Pipe in a Slab Foundation | Plumbers Supply Hub
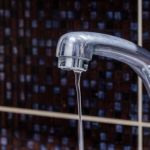 Why Your Water Pressure Is Low and How to Fix It