- 1. Understanding What a Slab Leak Is
- 2. Detecting a Leak Beneath the Floor
- 3. Preparing for Slab Leak Repair
- 4. Repairing the Leak Under the Floor
- 5. Preventing Future Slab Leaks
1. Understanding What a Slab Leak Is
A slab leak occurs when the water pipes running beneath a home’s concrete foundation develop cracks or holes, leading to water seeping under the floor. This type of leak can cause serious structural damage if not addressed promptly. Many homeowners in the U.S., particularly those in areas with shifting soil like Texas or California, experience slab leaks due to soil movement, pipe corrosion, or poor installation.
1.1 Common Causes of Slab Leaks
There are several reasons why a slab leak might occur:
- Corrosion from minerals in the water supply
- Pipe abrasion caused by vibrations or concrete pressure
- Improper installation or use of low-quality materials
- Soil movement due to temperature changes or water erosion
Understanding these causes can help homeowners take preventive action before a small leak becomes a major issue.
Housholder Associates plumbing and excavation
Homer CityIndiana CountyPennsylvania
4673 Old US 119 Hwy S, Homer City, PA 15748, USA
2. Detecting a Leak Beneath the Floor
Detecting a slab leak early can save you thousands of dollars in repair costs. Common warning signs include warm spots on the floor, unexplained water bills, or the sound of running water when all fixtures are off. In severe cases, you might even see cracks forming in the concrete or notice mildew on carpets.
2.1 Tools and Techniques for Detection
Professional plumbers use advanced tools to pinpoint slab leaks without unnecessary damage. These tools include:
- Electronic leak detection equipment
- Thermal imaging cameras
- Acoustic listening devices
For homeowners attempting to identify a leak on their own, turning off all water fixtures and monitoring the water meter for movement can indicate whether a hidden leak exists.
3. Preparing for Slab Leak Repair
Before beginning any repair, it’s essential to assess the extent of the leak and determine the best repair method. Safety and planning are key here — a rushed repair could worsen the issue.
3.1 Steps to Take Before Repair
1. Shut off the main water supply.
2. Clear the affected area of furniture and flooring materials.
3. Identify the precise location of the leak using professional diagnostic tools.
4. Gather all necessary repair tools and materials.
3.2 Recommended Tools and Materials
Having the right tools can make a major difference. You’ll likely need a jackhammer or concrete saw to access the damaged section, pipe cutters, plumbing fittings, sealants, and patching compounds. You can find professional-grade plumbing supplies and repair kits at Plumbers Supply Hub, where we provide everything from leak detection tools to premium copper and PEX fittings.
4. Repairing the Leak Under the Floor
Once the leak is located and the area is accessible, there are several methods for repairing it, depending on the severity of the damage.
4.1 Direct Access Repair
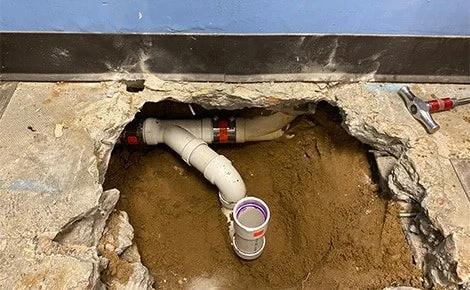
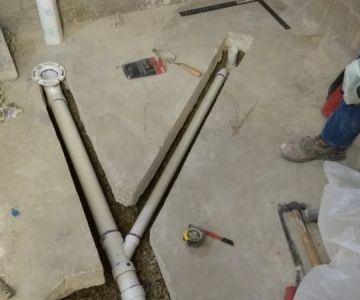
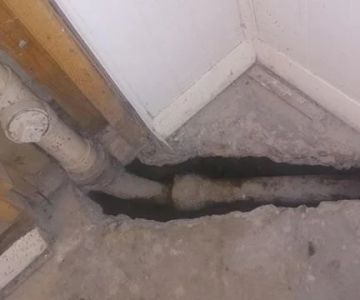
This traditional method involves breaking through the concrete directly above the leak, replacing or repairing the damaged section of pipe, and then re-pouring the concrete. It’s cost-effective for small leaks but can be labor-intensive.
4.2 Pipe Rerouting
In cases where multiple leaks or extensive corrosion are found, rerouting the pipe is often the best long-term solution. This involves running new plumbing lines through the walls or attic, bypassing the slab entirely. Though more expensive upfront, it reduces the risk of future slab leaks significantly.
4.3 Epoxy Pipe Coating
Epoxy coating is a modern, non-invasive method where a special lining is applied inside the existing pipe. It seals cracks and prevents future leaks without breaking the concrete. Many homeowners prefer this solution for its minimal disruption.
4.4 Case Example: Homeowner Experience
One homeowner in Phoenix discovered a slab leak when their water bill tripled unexpectedly. After consulting a professional, they opted for epoxy coating instead of digging through their new tile floor. The repair took less than a day and cost significantly less than traditional excavation — a perfect example of how modern techniques can save both time and money.
5. Preventing Future Slab Leaks
Preventing slab leaks starts with understanding their causes and investing in proper maintenance. Simple preventive steps can extend the lifespan of your plumbing system and protect your home’s foundation.
5.1 Regular Maintenance and Inspections
Schedule annual plumbing inspections to check for early signs of corrosion or pressure imbalances. Professionals can identify minor issues before they lead to costly damage. Keeping an eye on water pressure and ensuring it stays within safe limits is also essential.
5.2 Upgrading Plumbing Materials
Older homes often have outdated copper or galvanized pipes prone to corrosion. Upgrading to modern PEX or CPVC materials can help prevent leaks. You can explore high-quality, durable plumbing materials from Plumbers Supply Hub, ensuring your next repair or replacement is built to last.
5.3 Water Quality Management
Hard water accelerates pipe corrosion. Installing a water softener can significantly reduce the risk of future leaks and prolong the life of your plumbing system. It’s a smart investment for homes in areas with mineral-heavy water.
By staying proactive, using quality materials, and working with trusted professionals, you can protect your home’s foundation from future slab leaks and avoid expensive repairs.


 Concept Plumbing Inc4.0 (12 reviews)
 EDWARDS SEWER & DRAIN4.0 (77 reviews)
 American Leak Detection of Orange County4.0 (576 reviews)
 Coast Plumbing, Heating & Air, Inc.4.0 (536 reviews)
 Geiger Plumbing4.0 (87 reviews)
 Discount Drain & Sewer Cleaning3.0 (12 reviews)
 What to Check During a Home Plumbing Walkthrough
 How to Replace an Outdated Plumbing Fixture Safely
 How to Replace a Showerhead with Low Flow Design for Water Conservation
 How to Replace a Spigot That Leaks Only When Turned On – A Step-by-Step Guide
 How to Replace a Faulty Pressure Relief Valve: Step-by-Step Guide for Homeowners
 How to Replace a Broken Pipe Bedding Under Floor: A Complete Guide