
- 1. Understanding the Importance of the Ice Maker Valve
- 2. Tools and Materials Needed to Replace the Ice Maker Valve
- 3. Step-by-Step Guide to Replacing the Ice Maker Valve
- 4. Troubleshooting Common Issues After Replacing the Ice Maker Valve
- 5. Tips for Maintaining Your Ice Maker Valve for Longevity
1. Understanding the Importance of the Ice Maker Valve
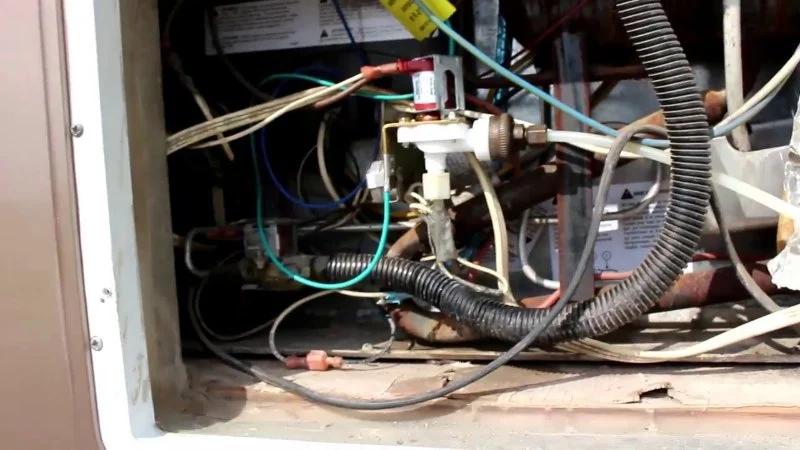
The ice maker valve is an essential component in your refrigerator’s water system. It controls the flow of water to the ice maker, ensuring that it receives the proper amount of water to make ice. When this valve malfunctions, it can lead to a variety of issues, such as no ice being produced or a leaking water supply. Understanding how to replace the valve when it’s not functioning properly is crucial to keeping your refrigerator in good working order.
2. Tools and Materials Needed to Replace the Ice Maker Valve
Before diving into the replacement process, you’ll need a few tools and materials to get the job done. Here’s a list of the essential items:
Ravinia Plumbing, Sewer, Heating & Electric
LincolnshireLake CountyIllinois
575 Bond St suite a, Lincolnshire, IL 60069, USA
2.1 Tools
- Adjustable wrench
- Screwdriver (Phillips or flathead depending on the screws used)
- Socket wrench set
- Plumbers tape or Teflon tape (optional, for sealing connections)
2.2 Materials
- Replacement ice maker valve
- Replacement water line if necessary
- Cleaning cloths to clean up any spills
3. Step-by-Step Guide to Replacing the Ice Maker Valve
Now that you have all the necessary tools and materials, follow these steps to replace your ice maker valve:
3.1 Unplug the Refrigerator and Turn Off the Water Supply
For safety, unplug the refrigerator and shut off the water supply. This will prevent any electrical shock or water leaks while you work on the appliance.
3.2 Locate the Ice Maker Valve
The ice maker valve is usually located behind the refrigerator, near the bottom. Depending on your refrigerator model, you might need to remove the rear panel to access the valve.
3.3 Disconnect the Water Line
Using an adjustable wrench, disconnect the water line from the valve. Be ready to catch any residual water that may spill out when the line is detached.
3.4 Remove the Old Valve
Unscrew or unclip the old valve from its mounting bracket. Keep track of any screws or clips that need to be reused when installing the new valve.
3.5 Install the New Valve
Position the new valve where the old one was mounted, and securely attach it using the screws or clips. Ensure that it is mounted tightly, as loose fittings can lead to leaks.
3.6 Reconnect the Water Line
Once the new valve is in place, reconnect the water line to the valve. Make sure the connection is tight and secure, using plumbers tape if necessary to prevent leaks.
3.7 Test the New Valve
Turn the water supply back on, plug in the refrigerator, and test the new valve by checking if the ice maker is working properly. Observe for any leaks or unusual behavior.
4. Troubleshooting Common Issues After Replacing the Ice Maker Valve
After installing a new ice maker valve, you might encounter a few common issues. Here’s how to troubleshoot them:
4.1 No Water Flow to the Ice Maker
If there is no water flow to the ice maker, check the water supply valve and ensure it is fully open. Also, verify that the water line is properly connected to the valve without any kinks or obstructions.
4.2 Leaking Water
Water leaks may occur if the connections are not tightened properly. Double-check all connections to ensure that the water line is securely attached to the valve. You can also use plumbers tape to seal any potential leaks.
4.3 Ice Maker Still Not Working
If the ice maker isn’t producing ice, the issue may not be the valve itself. Check the ice maker’s power supply and make sure it is functioning correctly. If the problem persists, the issue might lie with the ice maker itself, not the valve.
5. Tips for Maintaining Your Ice Maker Valve for Longevity
To ensure that your ice maker valve works effectively for years to come, follow these maintenance tips:
5.1 Regularly Inspect for Leaks
Periodically check the water line and valve for signs of leaks. Addressing small issues early can prevent bigger problems down the road.
5.2 Keep the Area Clean
Make sure the area around the valve and water line is free of debris. Cleaning the space regularly can help prevent blockages and ensure the ice maker operates smoothly.
5.3 Replace the Valve as Needed
Over time, the valve may wear out or become less effective. If you notice any issues, it may be time to replace the valve again. Keep an eye on your ice maker’s performance, and don’t hesitate to replace the valve if necessary.
If you're ready to replace your ice maker valve or need other plumbing supplies, check out Plumbers Supply Hub for high-quality products and expert advice!


 Righty Tighty Plumbing5.0 (116 reviews)
 Four Seasons Drain Services5.0 (89 reviews)
 TruFlow Plumbing & Drainage, Inc4.0 (49 reviews)
 Kelly Plumbing & Heating, Inc.4.0 (165 reviews)
 Command Plumbing Inc.4.0 (233 reviews)
 Rooter Guy Plumbing3.0 (11 reviews)
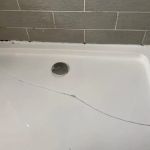 How to Repair a Crack Around a Bathtub Rim: A Step-by-Step Guide
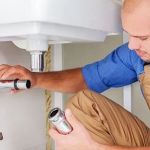 The Risks of Installing Incorrectly Sized Pipes
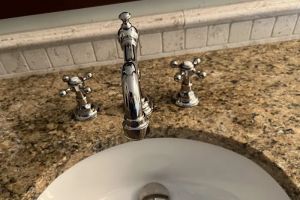
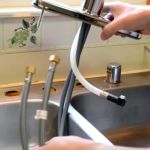 How to Fix a Leaky Faucet Under the Sink - Plumbers Supply Hub
 How to Repair a Pipe Saddle That Leaks
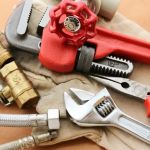 The Top Plumbing Tools Every Homeowner Should Have in Their Toolkit
 What to Do When Your Sink Leaks Only at the Base: Causes & Fixes