
- Preparing for the Installation
- Gathering the Tools
- Removing the Old Faucet
- Installing the New Faucet
- Testing the New Faucet
Preparing for the Installation
Installing a new kitchen sink faucet is a rewarding DIY project that can be done with just a few basic tools. Before getting started, it’s important to prepare the workspace and gather everything you’ll need. Whether you're replacing an old faucet or installing a new one, taking a little time for preparation can make the process smoother.

Guardian Plumbers Murrieta
MurrietaRiverside CountyCalifornia
25779 Jefferson Ave, Murrieta, CA 92562, USA
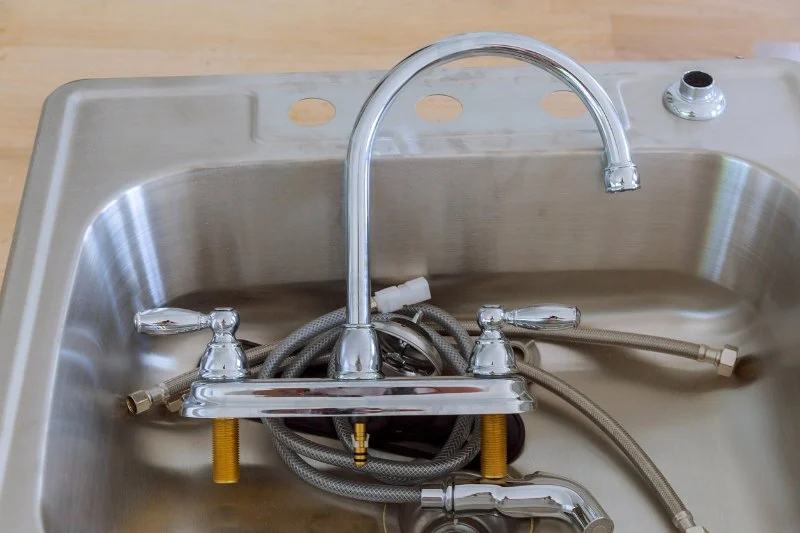
Assess the Current Faucet Setup
Start by inspecting your current faucet setup. Determine the type of faucet you have (single-handle or double-handle) and make sure the new faucet will be compatible with your sink and plumbing. Measure the space to ensure that the faucet will fit properly.

Right Away Sewer & Drain Cleaning
101 Horizon Cir NE, Fridley, MN 55421, USA
Gathering the Tools
For a successful kitchen faucet installation, you’ll need a few essential tools. These tools will ensure that the process goes smoothly and you have everything on hand when needed. Here’s a basic list:
- Adjustable wrench: This will help you tighten or loosen the faucet connections.
- Plumber’s tape: Used to seal threads and prevent leaks.
- Bucket or towel: To catch any water that may spill when disconnecting the old faucet.
- Pipe wrench (optional): For stubborn connections that don’t want to budge.
- New faucet and installation kit: Make sure to get the correct faucet for your sink’s configuration and the right parts for the installation.
Removing the Old Faucet
Once you’ve gathered all your tools, it’s time to remove the old faucet. Here’s how to do it step by step:
- Turn off the water supply: Locate the water supply valves under your sink and turn them off to prevent any leaks during the installation process.
- Disconnect the water lines: Use your adjustable wrench to disconnect the water supply lines from the faucet.
- Remove the faucet mounting nuts: These nuts are typically located under the sink. Use your wrench to loosen and remove them, freeing the old faucet from the sink.
- Clean the area: Once the old faucet is removed, clean the sink and the surrounding area to ensure there’s no debris or leftover sealant that could interfere with the new installation.
Installing the New Faucet
Now that the old faucet is removed, it’s time to install the new one. This part of the process will vary slightly depending on the type of faucet, but here are the general steps:
- Prepare the faucet: Before placing the new faucet in position, attach any necessary components such as the supply lines or sprayer hose, if applicable.
- Place the faucet in the mounting holes: Line up the new faucet with the holes in the sink, making sure it fits securely.
- Secure the faucet: Use the mounting nuts provided in the faucet kit to fasten the faucet to the sink. Be sure to tighten them securely but not overtighten.
- Seal the faucet: Apply plumber’s tape to the threads of the faucet connections before attaching the water supply lines. This helps prevent leaks.
Testing the New Faucet
Once the new faucet is installed, it’s important to test it to ensure everything works properly:
- Turn on the water supply: Open the water supply valves and check for leaks around the faucet connections.
- Test the faucet: Turn on the faucet to check water pressure and flow. Make sure both hot and cold water are functioning as expected.
- Check for leaks: Even if you don’t see any visible leaks, it’s a good idea to let the faucet run for a few minutes while checking for any signs of dripping or leakage around the connections.
Dealing with Common Installation Issues
It’s not uncommon to encounter a few challenges when installing a new faucet. Some common issues include leaks, water pressure problems, or difficulties with securing the faucet in place. If you encounter any issues, don’t hesitate to consult a professional or refer to your faucet’s installation manual for troubleshooting tips.
For additional help with finding the right faucet or tools for your project, visit Plumbers Supply Hub, where we offer a wide selection of plumbing products and expert advice.


 Dollar Drains Plumbing service5.0 (50 reviews)
 DRC Plumbing and Sewer, Inc.4.0 (50 reviews)
 Express Plumbers, LLC5.0 (3 reviews)
 Witvoet Plumbing, Inc.3.0 (14 reviews)
 Turn Key Plumbing & Construction Inc4.0 (47 reviews)
 Roto-Rooter Plumbing & Water Cleanup4.0 (326 reviews)
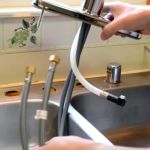 How to Fix a Leaky Faucet Under the Sink - Plumbers Supply Hub
 How to Install a Pot Filler Faucet in the Kitchen: A Step-by-Step Guide
 How to Test for Lead in Residential Plumbing | Plumbers Supply Hub
 How to Replace an In-Wall Shower Drain
 How to Route Plumbing for an Outdoor Grill Station
 How to Replace a Galvanized Pipe in Your Home – Step-by-Step Guide