
- 1. What is a Slab Leak?
- 2. Signs of a Hidden Slab Leak
- 3. How to Detect a Slab Leak
- 4. Tools and Techniques for Slab Leak Detection
- 5. What to Do If You Suspect a Slab Leak
- 6. Slab Leak Repair Options
1. What is a Slab Leak?
A slab leak is a water leak that occurs beneath the concrete foundation of your home. These leaks can be particularly tricky because they are hidden under the slab, making them difficult to detect until significant damage has occurred. Slab leaks can result from various causes, including wear and tear on pipes, shifting foundations, or corrosion of materials.
Since the leak is hidden beneath your home’s flooring, it often goes unnoticed until you start noticing signs of water damage, such as mold growth, wet spots, or increased water bills. Understanding how to detect a slab leak early can help you save on expensive repairs and prevent further damage to your property.
Mister Sewer, Plumbing & HVAC
ZelienopleButler CountyPennsylvania
22059 Perry Hwy, Zelienople, PA 16063, USA
2. Signs of a Hidden Slab Leak
Detecting a slab leak early can save you significant time and money. Here are some of the most common signs that indicate the presence of a hidden slab leak:
2.1 Unexplained Wet Spots or Damp Flooring
One of the first signs of a slab leak is the appearance of wet spots or damp flooring, particularly in areas that are over your foundation. You might notice that your carpets or tiles feel moist, or you may find puddles forming on the floor without any obvious cause.
2.2 Increased Water Bills
A sudden increase in your water bill can be an indication of a hidden leak. Since slab leaks are often constant, they lead to a continuous flow of water, which can drastically increase your water consumption. If you notice a significant rise in your bill without any increase in usage, it’s worth checking for a leak.
2.3 Low Water Pressure
If the water pressure in your home decreases unexpectedly, it could be due to a leak in your plumbing system. A slab leak often diverts water away from the intended area, causing a drop in pressure throughout your house. You may notice that faucets and showerheads are no longer providing the strong water flow they once did.
2.4 Cracks in the Floor or Walls
Another sign of a slab leak is the appearance of cracks in the walls or floors. As water leaks under the foundation, it can weaken the structure of your home, causing the foundation to shift or settle unevenly. This movement can result in visible cracks in your walls or floors.
3. How to Detect a Slab Leak
Detecting a hidden slab leak typically requires professional expertise, but there are a few methods you can try to help confirm your suspicions. Here’s a step-by-step guide to help you detect a slab leak:
3.1 Check for Wet Areas
Start by checking areas of your home where water might accumulate. Look for wet spots in floors, walls, or under the carpet. Pay close attention to areas near your plumbing system, such as bathrooms or kitchens.
3.2 Monitor Your Water Meter
One simple way to check for a slab leak is by monitoring your water meter. Turn off all faucets and appliances that use water, then take a reading of the water meter. If the meter continues to run, this indicates a leak in the system, potentially under the slab.
3.3 Listen for Sounds of Running Water
Slab leaks often make a faint sound of running water, even when the faucets are turned off. If you notice any unusual sounds coming from the foundation, it could be a sign that water is leaking beneath your home. You can use a stethoscope or simply place your ear to the floor to listen for any sounds.
4. Tools and Techniques for Slab Leak Detection
Professional plumbers use several advanced tools and techniques to detect slab leaks accurately. Here are some of the most commonly used methods:
4.1 Electronic Leak Detection
Electronic leak detection involves using sensors and listening devices to detect the sound of water leaking under the slab. This method is effective for pinpointing the exact location of the leak without needing to dig or damage the floor.
4.2 Pressure Testing
Pressure testing involves isolating sections of the plumbing system and measuring the water pressure. If there is a drop in pressure in a specific area, it indicates a leak in that section. This method helps plumbers locate the leak with minimal disruption to your home.
4.3 Thermal Imaging
Thermal imaging cameras are used to detect temperature differences in the flooring or walls, which can indicate the presence of water leaking under the slab. This non-invasive method helps identify the area of the leak, allowing for quicker and more accurate repairs.
5. What to Do If You Suspect a Slab Leak
If you suspect you have a slab leak, it’s important to act quickly to minimize damage. Here are the steps you should take:
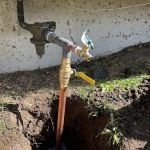
5.1 Shut Off the Water Supply
If you notice signs of a slab leak, the first thing you should do is turn off the main water supply to your home to prevent further water damage. This will stop the leak and reduce the risk of flooding in your home.
5.2 Contact a Professional Plumber
Slab leaks are complex and require professional expertise to detect and repair. Contact a licensed plumber who specializes in slab leak detection and repair. They will have the necessary tools and experience to locate the leak and provide effective solutions.
5.3 Prepare for Repair
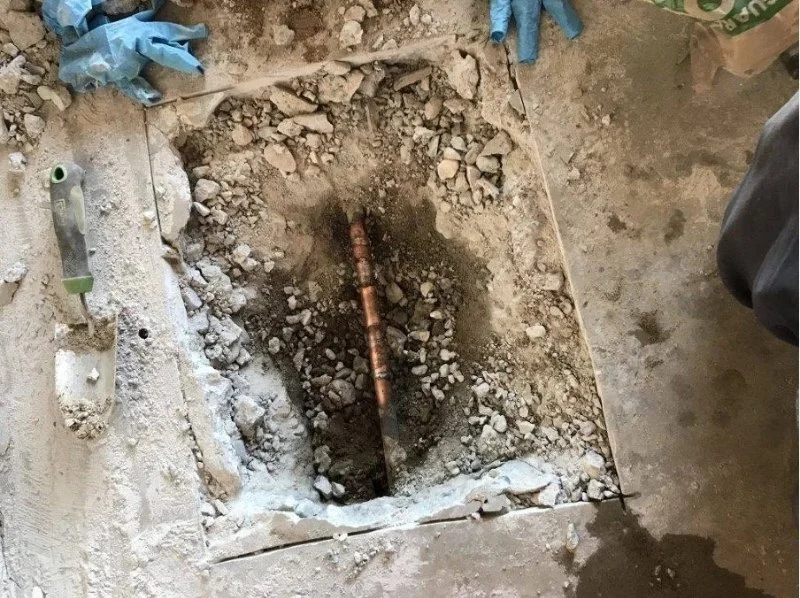
Once the leak is detected, the plumber will explain the best course of action for repair. Depending on the severity and location of the leak, repairs may involve tunneling under the slab, rerouting plumbing, or even replacing sections of the pipes. Be prepared for the disruption and cost that may come with these repairs.
6. Slab Leak Repair Options
There are a few different methods used to repair a slab leak, depending on the severity of the leak and the layout of your home’s plumbing system:
6.1 Pipe Rerouting
In some cases, plumbers will reroute the plumbing system around the damaged area, bypassing the section of the pipe under the slab. This method is less invasive and often less expensive than other repair methods.
6.2 Slab Jacking
Slab jacking, or slab lifting, involves injecting a grout mixture under the slab to raise the foundation back to its original level. This is often used if the slab has shifted due to water damage, helping to stabilize the structure.
6.3 Pipe Replacement
In more severe cases, the plumber may need to replace the damaged pipes beneath the slab. This can be a more costly and invasive process but may be necessary for long-term solutions.
For expert help with slab leak detection and repair, visit Plumbers Supply Hub for trusted professionals and quality products to resolve any plumbing issues.


 Advantage Plumbing & Rooter5.0 (214 reviews)
 LP Quality Air and Plumbing5.0 (36 reviews)
 Bob's Plumbing & Drain Cleaning4.0 (36 reviews)
 AA Plumbing and Drain Cleaning2.0 (35 reviews)
 Generations Plumbing Co5.0 (55 reviews)
 Medley Plumbing4.0 (507 reviews)
 How to Replace a Mixing Valve for Tempered Water | Plumbers Supply Hub
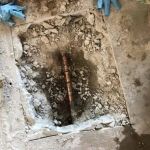 How to Detect a Hidden Slab Leak: A Complete Guide for Homeowners
 How to Replace a Bathtub Spout with Diverter: Step-by-Step Guide
 How to Fix a Leaky Water Heater: Step-by-Step Instructions
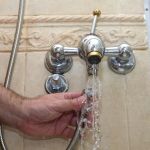 Why Sometimes You Get No Hot Water in Certain Fixtures
 How to Detect and Stop Galvanic Corrosion in Pipes