
- 1. Why Do Water Heaters Leak?
- 2. Tools You’ll Need to Fix a Leaky Water Heater
- 3. Step-by-Step Guide to Fixing a Leaky Water Heater
- 4. When to Call a Professional
- 5. Preventing Future Water Heater Leaks
1. Why Do Water Heaters Leak?
Water heaters are vital appliances in our homes, providing hot water for showers, laundry, and other household needs. However, they are prone to leaks due to the high pressure and temperature inside the tank. Leaks can occur for various reasons, including:
Randolph County Plumbing Co
WinchesterRandolph CountyIndiana
110 E Franklin St, Winchester, IN 47394, USA
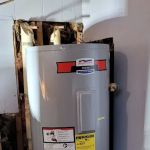
1.1 Corrosion
Over time, the metal components inside the water heater can corrode, leading to small leaks. This is especially common in older units where the protective lining inside the tank has worn away.

R D Andrews Repairs
Cement CityHillsdale CountyMichigan
10667 Woodbrook Dr, Cement City, MI 49233, USA
1.2 Loose Connections
Loose pipes, valves, or fittings can cause water to leak from the connections. This is often an issue that can be fixed by tightening or replacing the affected parts.
1.3 Excessive Pressure
If the pressure inside the water heater tank gets too high, it can cause leaks at the tank’s seams or joints. This is a common issue with water heaters that are not regularly maintained or serviced.
2. Tools You’ll Need to Fix a Leaky Water Heater
Before you begin the repair process, it’s important to gather the necessary tools to ensure you can fix the leak efficiently and safely. Here’s a list of tools you’ll need:
2.1 Pipe Wrench
A pipe wrench is essential for tightening or loosening plumbing connections. It provides a strong grip to work on the pipes connected to the water heater.
2.2 Screwdriver Set
A set of screwdrivers is necessary for removing screws that may be securing the water heater components. You’ll typically need a flathead and a Phillips head screwdriver.
2.3 Plumber’s Tape
Plumber’s tape (also known as Teflon tape) is used to ensure a watertight seal around the connections to prevent future leaks.
2.4 Replacement Parts
Depending on the cause of the leak, you may need to replace certain parts such as valves, seals, or pipes. Be sure to purchase the correct replacement parts before starting the repair.
3. Step-by-Step Guide to Fixing a Leaky Water Heater
Now that you have the necessary tools, follow this step-by-step guide to fix your leaky water heater:
3.1 Step 1: Turn Off the Power and Water Supply
Before starting any repair, ensure that the power to the water heater is turned off. For electric heaters, turn off the circuit breaker. For gas heaters, set the thermostat to the “off” position. Then, turn off the water supply to the heater.
3.2 Step 2: Inspect the Leak
Carefully inspect the water heater to locate the source of the leak. Check the connections, valves, and tank for signs of corrosion or damage. If the leak is coming from a pipe, inspect the pipe for cracks or loose fittings.
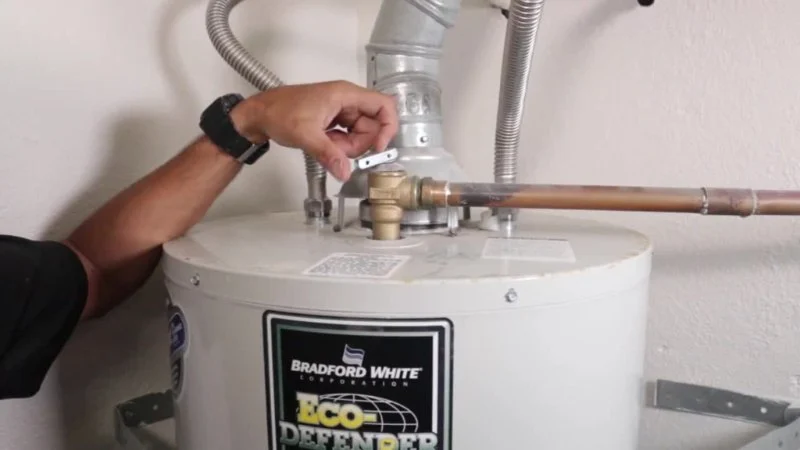
3.3 Step 3: Tighten the Connections
If the leak is caused by a loose connection, use a pipe wrench to tighten the affected connection. Be careful not to overtighten, as this can cause additional damage.
3.4 Step 4: Replace Damaged Parts
If tightening the connections doesn’t stop the leak, you may need to replace damaged parts. Remove any corroded valves, seals, or pipes and replace them with new ones. Use plumber’s tape to ensure a secure seal when reinstalling the parts.
3.5 Step 5: Test the Heater
After completing the repairs, turn the water supply back on and check for any remaining leaks. If there are no leaks, restore power to the water heater and allow it to heat the water. Check the area around the repair once the heater reaches its operating temperature.
4. When to Call a Professional
While some water heater repairs can be done by homeowners, certain situations require professional help. Here are some signs that it may be time to call a plumber:
4.1 Severe Leaks
If the leak is large or the water heater is severely damaged, it’s best to call a professional. A plumber can help assess the damage and determine whether the heater needs to be replaced or if it can be repaired.
4.2 Electrical Issues
If you have an electric water heater and suspect electrical issues, such as faulty wiring or an electrical malfunction, it’s best to call an electrician or a licensed plumber to handle the repairs.
4.3 Persistent Issues
If your water heater continues to leak after you’ve attempted repairs, it may indicate a deeper issue that requires expert attention. A professional plumber can diagnose the problem and provide a long-term solution.
5. Preventing Future Water Heater Leaks
To avoid dealing with leaky water heaters in the future, it’s important to perform regular maintenance. Here are a few tips:
5.1 Regular Inspections
Inspect your water heater annually for signs of wear, corrosion, or loose connections. Catching small issues early can prevent them from turning into major problems.
5.2 Flush the Tank
Flushing the tank periodically helps remove sediment buildup, which can cause pressure issues and lead to leaks. Most experts recommend flushing the tank once a year.
5.3 Check the Pressure Relief Valve
Ensure that the pressure relief valve is functioning properly. This valve helps maintain the proper pressure inside the tank, reducing the risk of leaks caused by excessive pressure.
For all your plumbing needs, including water heater parts and repair kits, visit Plumbers Supply Hub for the best products and services available.


 Chattanooga and Battlefield Plumbing4.0 (139 reviews)
 Benjamin's Plumbing & Drain Cleaning5.0 (60 reviews)
 Z & H Plumbing and Water Heaters5.0 (22 reviews)
 Brad Purdy Plumbing and Heating5.0 (4 reviews)
 Local Plumbing & Drain Cleaning4.0 (28 reviews)
 M&P Mechanical HVAC And Plumbing5.0 (8 reviews)
 How to Repair a Crack Around a Bathtub Rim: A Step-by-Step Guide
 How to Reroute Plumbing for a Kitchen Island: A Step-by-Step Guide
 How to Detect and Repair Water Leaks in Your Home’s Walls
 How to Replace a Malfunctioning Pressure Reducing Valve
 How to Fix a Slow Drain: DIY Solutions for Common Drainage Issues
 The Risks of Ignoring a Small Pipe Leak Early On