
How to Repair a Pipe Saddle That Leaks
- 1- Understanding Pipe Saddle Leaks
- 2- Common Causes of Pipe Saddle Leaks
- 3- Tools Needed to Repair a Pipe Saddle Leak
- 4- Step-by-Step Guide to Repairing a Pipe Saddle Leak
- 5- When to Call a Professional Plumber
- 6- Preventive Maintenance Tips for Avoiding Future Pipe Saddle Leaks
1- Understanding Pipe Saddle Leaks
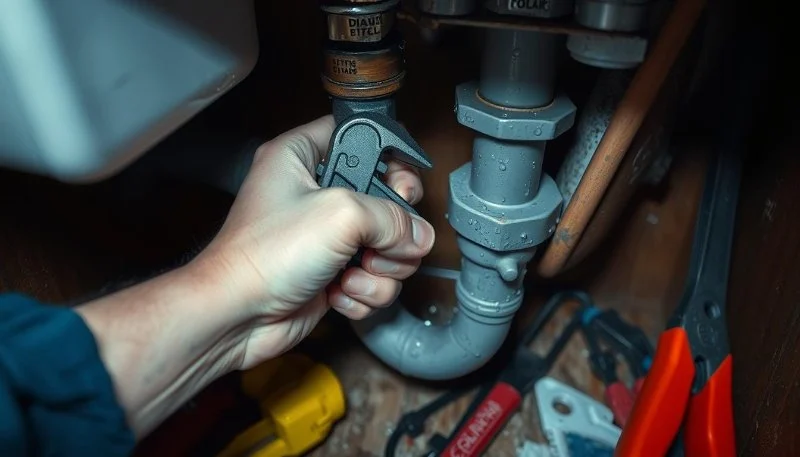
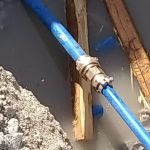
A pipe saddle is a type of clamp or bracket used to support a pipe, often seen in plumbing systems to provide stability and ensure proper alignment. When a pipe saddle leaks, it can lead to water damage and other issues if not addressed promptly. Pipe saddle leaks can occur at various points where the saddle makes contact with the pipe, particularly if the saddle is damaged, improperly installed, or if the pipe itself is experiencing issues such as corrosion.
This article will help you understand why pipe saddle leaks happen, how to repair them, and how to prevent future issues. If you're unsure of the problem or prefer professional help, visit Plumbers Supply Hub for tools, products, and expert assistance.
2- Common Causes of Pipe Saddle Leaks
There are several reasons why a pipe saddle might start leaking. Understanding the cause will help you determine the most effective repair solution. Some of the most common causes include:
- Improper Installation: If the pipe saddle was not properly secured or aligned during installation, it can cause stress on the pipe and lead to leaks.
- Corrosion: Over time, corrosion can develop on both the saddle and the pipe, weakening the connection and resulting in leaks.
- Damage to the Saddle: Physical damage or wear and tear from prolonged use can cause cracks or breaks in the saddle, leading to leakage.
- Incorrect Pipe Size: A pipe saddle that does not fit the pipe properly can create gaps or uneven pressure, which may lead to leaks at the saddle.
Identifying the root cause of the leak is essential before beginning any repairs. It will guide you in choosing the correct materials and tools to fix the issue effectively.
3- Tools Needed to Repair a Pipe Saddle Leak
Repairing a pipe saddle leak is a manageable DIY task if you have the right tools. Here's a list of the tools you'll need:
- Pipe Wrench or Adjustable Wrench: To loosen or tighten the pipe saddle and any other pipe fittings.
- Screwdriver: Depending on the saddle type, you may need a screwdriver to remove screws or fasteners.
- Pipe Sealant or Plumber's Tape: To seal any gaps and prevent further leaks after the repair.
- Replacement Saddle: If the saddle is damaged, having a replacement on hand will be necessary.
- Hacksaw or Pipe Cutter: In case you need to cut or adjust the pipe to fit the new saddle.
These tools will help you handle the repair efficiently. If you don’t have these items at home, you can find high-quality options at Plumbers Supply Hub, your one-stop shop for all plumbing needs.
4- Step-by-Step Guide to Repairing a Pipe Saddle Leak
Here's a step-by-step guide on how to repair a leaking pipe saddle:
- Turn Off the Water Supply: Before starting any work, turn off the water supply to prevent further damage or water wastage.
- Inspect the Leak: Carefully examine the pipe saddle and the surrounding area for any visible damage, corrosion, or gaps. This will help you determine if the saddle can be repaired or if it needs to be replaced.
- Loosen the Saddle: Use a pipe wrench or adjustable wrench to loosen and remove the screws or bolts holding the saddle in place.
- Clean the Pipe: Clean the area around the pipe and the saddle to remove any dirt, debris, or corrosion that might interfere with the repair process.
- Apply Sealant: Apply plumber's tape or pipe sealant around the pipe where the saddle contacts it. This will help create a watertight seal when the saddle is reinstalled.
- Install the New Saddle (if necessary): If the old saddle is damaged, replace it with a new one. Make sure it fits securely and aligns properly with the pipe.
- Tighten the Saddle: Secure the saddle back in place by tightening the screws or bolts. Ensure it is snug but not overly tight to avoid damaging the pipe.
- Test for Leaks: Turn the water supply back on and check the repair area for leaks. If there are no leaks, the repair is complete.
By following these steps, you can effectively repair a leaking pipe saddle and restore your plumbing system to its full functionality.
5- When to Call a Professional Plumber
While repairing a pipe saddle leak is a simple task for those with some DIY experience, there are situations where calling a professional plumber is necessary:
- The leak is too severe, and you are unable to locate or access the problem area.
- The pipe saddle is too corroded or damaged beyond repair, requiring replacement of the entire section of pipe.
- You are uncertain about how to handle the repair or need assistance with more complex plumbing issues.
In these cases, it's best to contact a licensed plumber to ensure the problem is properly addressed and that your plumbing system is not at risk of further damage.
6- Preventive Maintenance Tips for Avoiding Future Pipe Saddle Leaks
To prevent future pipe saddle leaks, regular maintenance is key. Here are some tips to keep your plumbing in good condition:
- Inspect your plumbing regularly for any signs of corrosion, wear, or damage, especially around pipe saddles.
- Ensure that all pipe saddles are properly installed and secured to avoid stress on the pipes.
- Use pipe insulation to protect pipes from temperature fluctuations that can cause expansion and contraction, which can weaken the saddle connection.
- Check for water pressure issues that could put excessive stress on your pipes and saddles.
Taking these proactive steps will help extend the life of your plumbing system and minimize the risk of future leaks.


 Budget Sewer & Drain Cleaning0.0 (0 reviews)
 artisan water group5.0 (11 reviews)
 Pipeworks Plumbing5.0 (12 reviews)
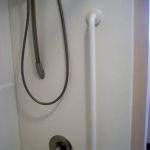 Mike Ingrilli Plumbing LLC4.0 (60 reviews)
 Drain Pro Plumbing, Inc.4.0 (138 reviews)
 Moorhead Plumbing & Heating, Inc.4.0 (40 reviews)
 How to Perform a DIY Plumbing Inspection for Homeowners
 How to Clean Out a Septic Drain Field Safely
 How to Test for Bacteria in Household Water Supply
 How to Fix a Leaky Showerhead Without Replacing the Entire Fixture
 How to Fix a Leaky Sink Drain: A Step-by-Step Plumbing Guide
 How to Unclog a Sink with a Drain Snake: A Quick and Effective Guide