
- 1- Understanding the Cause of a Leaky Sink Drain
- 2- Tools You'll Need to Fix a Leaky Sink Drain
- 3- Step-by-Step Guide to Fixing a Leaky Sink Drain
- 4- When to Call a Plumber for a Leaky Sink Drain
- 5- How Plumbers Supply Hub Can Help with Sink Drain Repairs
1. Understanding the Cause of a Leaky Sink Drain
Leaky sink drains are a common issue in households, but understanding the root cause is key to fixing the problem. A leaky drain could be caused by several factors, including worn-out washers, cracked pipes, or poor installation. Identifying the exact cause of the leak will help you determine the appropriate solution and whether you can fix it yourself or need professional help.
Typically, the leak occurs at the drain connections, where the drain pipe meets the sink or the trap. Sometimes, the seal around the drain may deteriorate over time, leading to leaks. Understanding how your sink’s plumbing works will give you an advantage in pinpointing the issue and tackling it effectively.
Bedell plumbing | Heating & Cooling Services
431 W Carmel Dr, Carmel, IN 46032, USA
2. Tools You'll Need to Fix a Leaky Sink Drain
Before you start fixing your leaky sink drain, it's essential to gather the necessary tools. Having the right tools on hand will make the process smoother and more efficient. Here’s a list of common tools you'll need:
J R Plumbing, LLC
New BerlinWaukesha CountyWisconsin
16817 W Greenfield Ave, New Berlin, WI 53151, USA
2.1. Adjustable Wrench
An adjustable wrench is essential for loosening and tightening nuts and bolts that secure the sink drain components. This tool will help you handle most of the plumbing fittings around the drain and sink.
2.2. Plumber’s Tape
Also known as Teflon tape, plumber’s tape is used to seal pipe threads and prevent leaks. You’ll need this to ensure a tight and leak-proof seal when replacing washers or reassembling the plumbing connections.
2.3. Pipe Wrench
A pipe wrench is helpful if you need to remove or replace larger parts of the drain system, such as the drain trap or pipe fittings. This tool allows you to grip and turn large plumbing components without causing damage.
2.4. Replacement Parts
Depending on the cause of the leak, you may need replacement parts such as rubber washers, O-rings, or a new drain assembly. Make sure to have these parts ready before starting the repair, as this will speed up the process.
2.5. Bucket or Towels
It's always a good idea to have a bucket or towels nearby to catch any water that may spill when disassembling the drain components. This will help minimize mess and prevent water damage to your cabinets or floor.
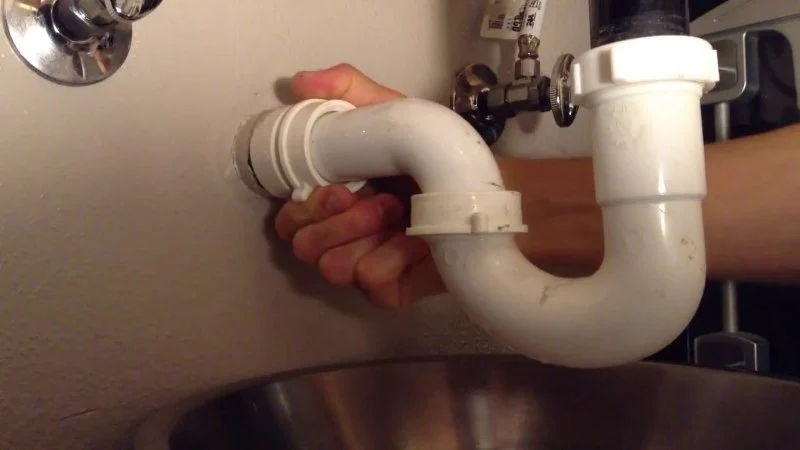
3. Step-by-Step Guide to Fixing a Leaky Sink Drain
Now that you have the right tools, here’s a detailed guide on how to fix a leaky sink drain. Follow these steps carefully to ensure a successful repair:
3.1. Turn Off the Water Supply
Before you begin, turn off the water supply to your sink to avoid any accidents or flooding during the repair. Locate the water shutoff valves under the sink and turn them clockwise to close them.
3.2. Clear the Area Under the Sink
Remove any items stored under the sink to give yourself plenty of space to work. Place a bucket or towel underneath the drain to catch any water that may spill when you remove the drain components.
3.3. Inspect the Drain Assembly
Look closely at the drain assembly to identify where the leak is coming from. Check the connections between the drain, pipes, and sink. If the leak is coming from a loose connection, use your adjustable wrench to tighten the fitting. If the washer or O-ring is worn or cracked, you’ll need to replace it.
3.4. Replace Worn-Out Washers or Seals
If you find that a washer or seal is causing the leak, remove the old part and replace it with a new one. Make sure to apply plumber’s tape to the threads before reassembling the parts to create a leak-proof seal.
3.5. Reassemble the Drain
Once you've replaced any damaged parts, carefully reassemble the drain. Tighten all connections with your wrench, but be cautious not to over-tighten them, as this can cause damage to the plumbing components.
3.6. Test the Sink
After you’ve reassembled the drain, turn the water supply back on and check for any leaks. Run water through the sink and observe the drain area carefully to ensure the leak has been fixed. If there are still leaks, you may need to tighten the connections further or replace additional parts.
4. When to Call a Plumber for a Leaky Sink Drain
While many leaky sink drain issues can be solved with DIY fixes, there are cases where calling a professional plumber is necessary. If you’ve tried the steps above and the leak persists, it might indicate a more significant plumbing problem, such as a clogged drain pipe or damaged plumbing that requires expert attention.
Additionally, if you’re uncomfortable with the repair process or unsure about the cause of the leak, it’s best to seek professional help to avoid making the problem worse. A licensed plumber will have the skills and tools to diagnose and fix the issue effectively.
5. How Plumbers Supply Hub Can Help with Sink Drain Repairs
If you need plumbing parts or expert advice for fixing your leaky sink drain, Plumbers Supply Hub can assist you. We offer a wide range of replacement parts, including washers, seals, drain assemblies, and tools to help you complete your DIY plumbing repairs. Our website also provides helpful guides and product recommendations to ensure you choose the right parts for your repair.
Visit Plumbers Supply Hub for all your plumbing needs and find the best solutions to fix your leaky sink drain today!


 Eby Plumbing Plus4.0 (32 reviews)
 Ted Douglas and Sons Sewer & Drain Cleaning4.0 (66 reviews)
 Drain Cleaning and Plumbing LLC4.0 (15 reviews)
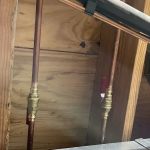 AMG Plumbing5.0 (69 reviews)
 PRIORITY ENGINEERING LLC 404.0 (10 reviews)
 Precision Plumbing Services4.0 (34 reviews)
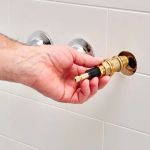 How to Replace an Outdated Plumbing Fixture Safely: A Step-by-Step Guide
 How to Clean Out a Septic Drain Field Safely: Expert Tips and Guidelines
 How to Use Baking Soda and Vinegar to Clear Clogged Drains
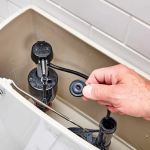 How to Repair a Toilet That Runs Intermittently: Step-by-Step Guide
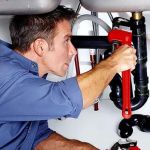 代码How to Test Your Plumbing for Leaks Using Simple Tools
 How to Troubleshoot Your Sump Pump: Common Issues and Solutions