
- Introduction: Why You Should Replace a Damaged Floor Drain Cover
- Tools You’ll Need for Replacing the Floor Drain Cover
- Step-by-Step Guide to Replacing a Floor Drain Cover
- Helpful Tips for Ensuring a Long-Lasting Replacement
- Conclusion: Restore Your Floor Drain’s Functionality
Introduction: Why You Should Replace a Damaged Floor Drain Cover
A floor drain cover may seem like a small part of your home’s plumbing system, but when it becomes damaged, it can lead to bigger problems. A broken or missing cover can cause debris to enter the drain, leading to clogs, foul odors, and even water damage. Replacing a damaged floor drain cover not only improves the functionality of your plumbing but also enhances safety and cleanliness in your home.
Whether you're dealing with a cracked cover or one that's been dislodged over time, replacing it is a simple task that can be done on your own. In this guide, we’ll walk you through the steps of replacing a floor drain cover and offer helpful tips for ensuring a smooth repair.
Isaac & Sons Plumbing La Verne
La VerneLos Angeles CountyCalifornia
2716 Amherst St, La Verne, CA 91750, USA
Tools You’ll Need for Replacing the Floor Drain Cover
Before getting started, gather the following tools to make the process easier and quicker:
Orange Coast Plumbing
Hawaiian GardensLos Angeles CountyCalifornia
22427 Funston Ave, Hawaiian Gardens, CA 90716, USA
1. New Floor Drain Cover
The first step is to purchase a new floor drain cover. Make sure to select one that matches the size and style of your existing drain. Drain covers come in various sizes, materials, and designs, so be sure to choose one that fits your home’s needs. Visit stores like Plumbers Supply Hub for a wide selection of drain covers.
2. Screwdriver
You may need a flathead or Phillips screwdriver depending on the type of screws used to secure the cover. Ensure you have the correct size to avoid damaging the screws.
3. Pliers or Adjustable Wrench
If the drain cover is stuck or difficult to remove, pliers or an adjustable wrench can help you grip and loosen it.
4. Measuring Tape
If you’re unsure of the drain cover size, a measuring tape will help you accurately measure the diameter of the drain to ensure a proper fit for your new cover.
Step-by-Step Guide to Replacing a Floor Drain Cover
Now that you have the necessary tools, follow these simple steps to replace your damaged floor drain cover:
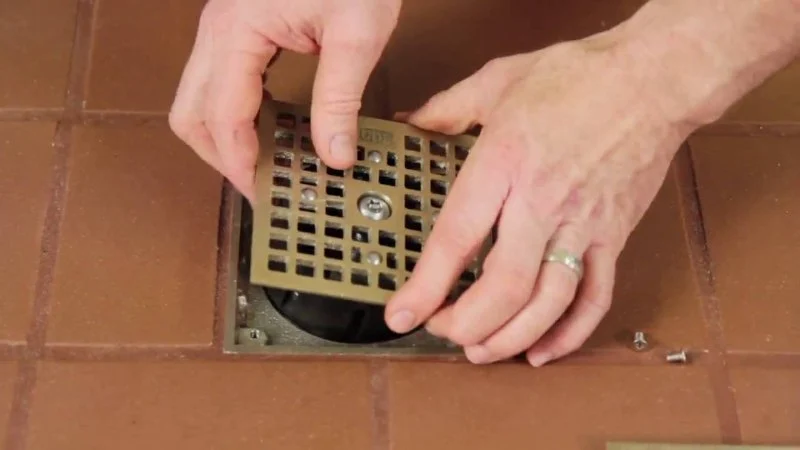
1. Remove the Old Drain Cover
Start by inspecting the existing floor drain cover. If it’s secured with screws, use the screwdriver to remove them carefully. If the screws are rusted or too tight, pliers or an adjustable wrench can help loosen them. Once the screws are removed, gently lift the cover from the drain. If it’s stuck, use the pliers to pry it loose without damaging the surrounding area.
2. Clean the Drain Area
Before installing the new cover, take the time to clean the area around the drain. Remove any dirt, debris, or water that may have accumulated. This ensures that the new cover sits securely and that there are no obstructions that could cause future clogs.
3. Measure the New Cover
Measure the new drain cover to make sure it fits properly. Most floor drain covers are standard sizes, but it’s still a good idea to check the diameter to ensure a snug fit. If the new cover is slightly larger or smaller, you may need to adjust it or use an appropriate gasket for a better seal.
4. Install the New Cover
Place the new floor drain cover over the drain and align it with the screw holes. Secure it in place by tightening the screws evenly using your screwdriver. Make sure the cover is flush with the floor and doesn’t wobble. If you have a cover that uses snap-on clips instead of screws, ensure that the clips lock into place securely.
Helpful Tips for Ensuring a Long-Lasting Replacement
To ensure that your new floor drain cover lasts longer and functions properly, consider these tips:
1. Choose the Right Material
Floor drain covers come in various materials such as stainless steel, plastic, or cast iron. Stainless steel covers are durable, rust-resistant, and ideal for areas with high moisture. Plastic covers are lightweight and affordable, but may not be as durable in the long run.
2. Regular Maintenance
Perform regular maintenance on your floor drains by cleaning them periodically. This prevents debris buildup and ensures that the drain functions properly, reducing the likelihood of damage to the cover.
3. Avoid Over-tightening Screws
When installing the new drain cover, avoid over-tightening the screws. This can cause the cover to crack or warp. Tighten the screws just enough to keep the cover in place without forcing them too hard.
Conclusion: Restore Your Floor Drain’s Functionality
Replacing a damaged floor drain cover is a simple yet effective way to maintain the functionality and cleanliness of your home’s plumbing. By following the steps outlined above, you can easily replace the cover, ensuring that your drain is secure and protected from debris. Remember to choose a high-quality replacement cover, and don’t forget about regular maintenance to keep your drains in top condition.
For more plumbing supplies and tips, visit Plumbers Supply Hub for everything you need to maintain and upgrade your home’s plumbing system.


 Ozark Plumbing5.0 (62 reviews)
 Bolton Plumbing & Construction LLC5.0 (8 reviews)
 CleanRite Drain Cleaning5.0 (2 reviews)
 Armz Plumbing4.0 (80 reviews)
 Luisier Plumbing Inc4.0 (38 reviews)
 Detox Hydro Jet5.0 (24 reviews)
 How to Troubleshoot a Noisy Toilet: Common Causes and Solutions
 How to Test a Backwater Valve in Your Sewer Line: A Step-by-Step Guide
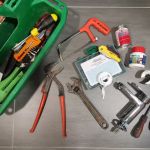 The Essential Plumbing Emergency Kit Every Homeowner Needs: Key Tools for Fast Fixes
 How to Ensure Proper Venting in Your Drainage System
 How to Install a Water Meter for Irrigation
 How to Install a New Sink Faucet: DIY Guide for Homeowners