
Understanding Plumbing Leaks in Your Ceiling
Plumbing leaks in your ceiling can be a frustrating and costly problem, but understanding what causes them can help you prevent further damage. Ceiling leaks are often the result of faulty or aging pipes, poor installation, or water damage from other areas in your home, such as the bathroom or kitchen. Leaks can lead to significant structural damage if not addressed quickly. Fortunately, with the right approach, you can manage and repair plumbing leaks in your ceiling without calling in a professional plumber.
ProFix Drains & Hydro Jet
Santa AnaOrange CountyCalifornia
2833 N Bristol St Suite 53A, Santa Ana, CA 92706, USA
Identifying the Source of the Leak
Before attempting any repair, it's crucial to identify the exact source of the leak. A leak might seem like it's coming from the ceiling, but the source could be from the pipes above, or even from the roof. Here are steps to help pinpoint the leak:

1. Check for Visible Signs of Water Damage
Look for water stains, sagging, or discoloration on your ceiling. These are often the first signs that something is wrong. If you notice water pooling or dripping, it’s likely that the leak is active and requires immediate attention.
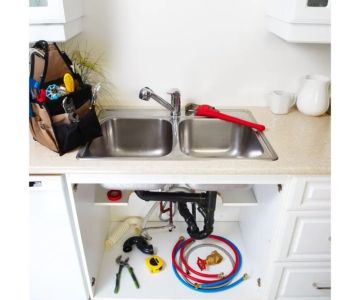
2. Inspect Plumbing Fixtures and Pipes
Check all pipes and plumbing fixtures located directly above the ceiling. For instance, if the leak appears to be coming from the kitchen or bathroom, the source could be a leaking pipe or a clogged drain. If you can access the attic, look for any visible signs of dripping water or damp insulation.
3. Perform a Water Test
If you’re unsure whether the leak is from a plumbing pipe or from a roof leak, try the water test method. Turn on water in the plumbing system (faucets, shower, etc.) and check the ceiling for any signs of dripping. This method can help you determine whether the leak is plumbing-related or caused by roof damage.
Tools and Materials You Need
Once you’ve identified the source of the leak, you can gather the necessary tools and materials to repair the plumbing leak. Here’s a list of what you might need:
- Pipe wrench or adjustable pliers
- Replacement pipes or pipe sections
- Epoxy or pipe sealant
- Patching material for ceiling (drywall or plaster)
- Drywall saw or utility knife
- Bucket or basin to catch water
- Caulking gun (if using sealant)
- Insulation (if needed)
Step-by-Step Guide to Fixing Ceiling Plumbing Leaks
Now that you have the necessary tools and materials, follow this step-by-step guide to fix the plumbing leak in your ceiling:
1. Turn Off Water Supply
The first and most important step is to turn off the water supply to prevent further leakage. Locate the main shut-off valve and turn it off. This will stop the flow of water to the affected pipes, allowing you to safely work on the repair.
2. Access the Leaking Pipe
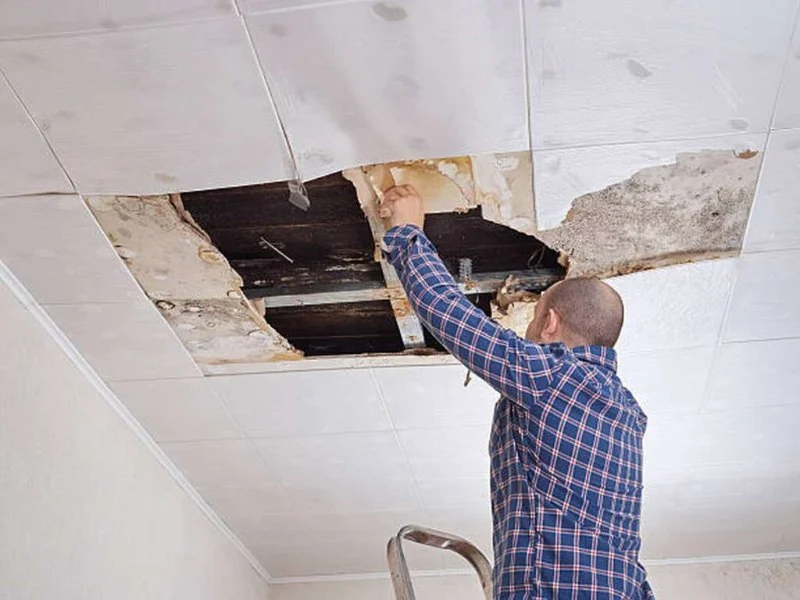
If the ceiling leak is caused by a burst or leaky pipe, you will need to access the pipe to fix it. This may involve cutting away part of the ceiling. Use a drywall saw or utility knife to carefully cut out a section of the ceiling around the leak. Be cautious not to damage any electrical wires or other hidden systems behind the ceiling.
3. Repair the Pipe
If the leak is due to a small crack or hole in the pipe, you can use epoxy or pipe sealant to seal the crack. For larger holes or damaged sections of the pipe, you may need to replace the damaged part. Use pipe wrenches or adjustable pliers to disconnect and replace the damaged pipe. Install a new pipe section and make sure all connections are tight to prevent future leaks.
4. Re-patch the Ceiling
Once the leak is fixed, you can proceed to patch the ceiling. Use drywall or plaster patching material to fill in the hole. Smooth it out and allow it to dry before sanding it down for a smooth finish. You may need to repaint the patched area to match the rest of the ceiling.
5. Test the Repair
After everything is dry and patched, turn the water back on to check for any further leaks. Run the water through the system and inspect the area to ensure the leak is completely fixed.
Real-Life Case Studies of Ceiling Leak Repairs
Here are two real-life examples to show how homeowners successfully fixed plumbing leaks in their ceilings:
- Example 1: The Johnson family noticed water stains on their living room ceiling. After inspecting the plumbing in their attic, they discovered a small crack in the pipe leading to the bathroom. Using epoxy, they sealed the crack and patched the ceiling. The family saved hundreds of dollars by handling the repair themselves.
- Example 2: A homeowner in Florida had a major leak in their ceiling caused by a burst pipe in the attic. After shutting off the water and cutting out the damaged ceiling section, they replaced the faulty pipe and sealed the hole. The total repair cost was under $200, significantly lower than the estimate they received from a plumber.


 CPR Divisions3.0 (2 reviews)
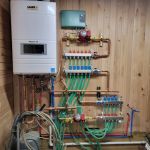 Kerstetter Plumbing,Heating and Excavating5.0 (5 reviews)
 Valencia's Plumbing4.0 (114 reviews)
 Richardson Plumbing4.0 (204 reviews)
 Ivanhoe Plumbing4.0 (20 reviews)
 J Repiping & Builders4.0 (35 reviews)
 How to Replace an In-Wall Shower Drain
 How to Repair a Crack Around a Bathtub Rim: A Step-by-Step Guide
 How to Save Money on Plumbing Costs Through Regular Maintenance
 Plumbing 101: A Beginner’s Guide to Home Plumbing Repairs
 What to Do If Your Toilet Is Overflowing: Quick Steps to Take
 The Differences Between PVC, CPVC, and PEX Pipes: A Complete Comparison