
- Why Reroute a Drain Line After a Flooring Remodel?
- Steps to Reroute a Drain Line
- Tools and Materials Required
- Common Challenges and How to Overcome Them
Why Reroute a Drain Line After a Flooring Remodel?
When undertaking a flooring remodel, especially in areas like kitchens or bathrooms, rerouting a drain line may become necessary. During such remodels, the position of fixtures like sinks, bathtubs, or dishwashers often changes, which can interfere with the existing plumbing layout. In these cases, it becomes essential to reroute the drain line to ensure the plumbing functions properly and meets code standards.
Rerouting drain lines is crucial to avoid future drainage issues, such as clogs or slow drainage. Additionally, improper plumbing adjustments during a remodel can lead to costly repairs down the line. Ensuring the drain line is properly repositioned can help prevent these issues and maintain the efficiency of your home plumbing system.

John Meister & Son's Plumbing
FarmingtonFulton CountyIllinois
34942 N County 39 Hwy, Farmington, IL 61531, USA
Steps to Reroute a Drain Line
Rerouting a drain line may seem like a complex task, but with the right approach, it can be done effectively. Here’s a step-by-step guide to help you through the process:

1. Plan the New Drainage Path
Before you begin any work, you need to determine the new path for the drain line. Consider the layout of the remodeled space and how the new plumbing will connect to existing drain lines. This step involves careful planning to ensure the line will function correctly once rerouted. It’s also important to check local plumbing codes to ensure compliance.
2. Shut Off Water Supply and Drain the System
Safety is always a top priority. Before you begin the rerouting process, make sure to turn off the water supply to the affected area. You should also drain any standing water from the pipes to prevent any accidental spills or flooding during the rerouting work.
3. Remove the Old Drain Line
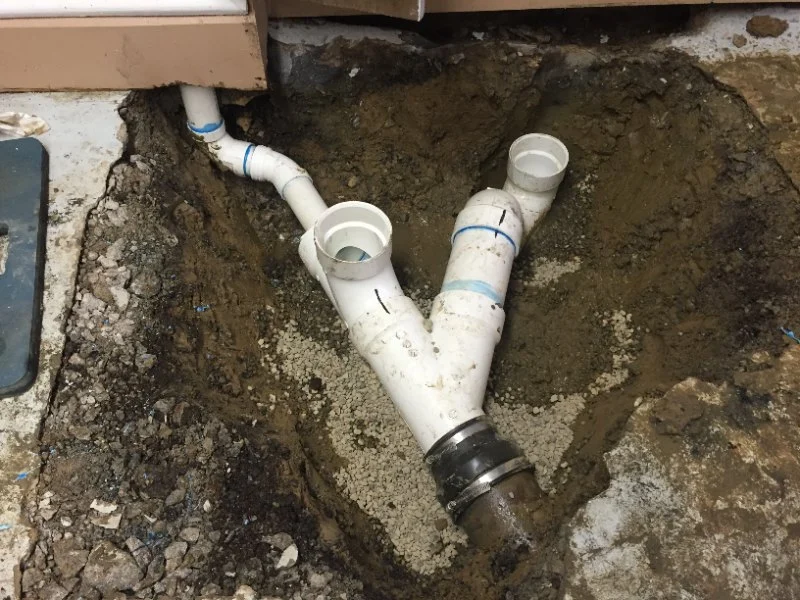
Once the water is shut off and the system is drained, carefully remove the old drain line. Use a pipe cutter or saw to disconnect the existing piping. Be sure to keep the pipe sections intact if you plan to reuse them or need them for other parts of the project.
4. Install the New Drain Line
Install the new drain line by connecting the pipes along the newly planned path. Use proper fittings, elbows, and couplings to ensure a secure connection. Make sure the pipes are pitched downward to allow for proper drainage flow. The slope should be about 1/4 inch per foot to maintain good water flow.
5. Test the New Drain Line
Once the new drain line is installed, it’s important to test the system. Turn on the water supply and check for any leaks or issues with drainage. If everything works smoothly, you’ve successfully rerouted your drain line!
Tools and Materials Required
Rerouting a drain line requires specific tools and materials. Here’s a list of what you’ll need:
Tools
- Pipe cutter or hacksaw
- Pipe wrenches
- Measuring tape
- Level for slope
- PVC pipe glue and primer
- Pipe fittings and connectors
Materials
- PVC or ABS piping
- PVC cement and primer
- Pipe insulation (optional)
Common Challenges and How to Overcome Them
While rerouting a drain line can be a straightforward process, there are several common challenges that DIYers may encounter. Here’s how to handle them:
1. Difficult Access to Pipes
In some cases, the pipes may be located in hard-to-reach areas, making the rerouting process more complicated. If you’re working under a sink or behind a wall, it may require additional steps like cutting open drywall or removing flooring. Always plan your project to minimize the need for major structural changes.
2. Misalignment of Pipes
When connecting the new drain line, make sure the pipes are properly aligned to avoid leaks. Even a slight misalignment can cause water to leak, leading to damage over time. Using pipe fittings and double-checking each connection can help ensure that everything is aligned correctly.
3. Maintaining Proper Drainage Slope
Ensuring the proper slope for drainage is critical for the effectiveness of the rerouted line. A slope that’s too shallow may lead to slow drainage, while a slope that’s too steep can cause water to flow too quickly, potentially leading to clogs. A proper pitch of 1/4 inch per foot is ideal for most drain lines.
By carefully planning the route, using the right tools, and keeping an eye on these challenges, you can successfully reroute your drain line during a flooring remodel, ensuring your plumbing system continues to function properly and efficiently.


 Aladdin's Plumbing3.0 (61 reviews)
 Greene County Plumbing Solutions4.0 (13 reviews)
 HOP Hands On Professional5.0 (13 reviews)
 Z & H Plumbing and Water Heaters5.0 (22 reviews)
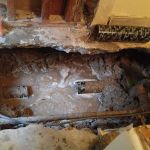 Hagen Plumbing Inc1.0 (5 reviews)
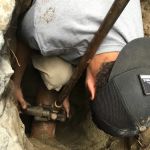 Proline Plumbing & Rooter4.0 (7 reviews)
 Steps to Unclog a Toilet That Won’t Flush Properly
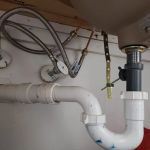 How to Repair a Sink That Drains Faster Than Faucet: Fixing Plumbing Issues Efficiently
 How to Clean Lime Scale from Shower Doors
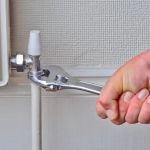 Why Your Pipes Rattle at Night and What to Fix
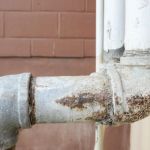 Signs You Need to Replace Old Plumbing Pipes
 How to Reset a Tripped Pressure Switch in a Well Pump