
- Identifying the Leak and Assessing the Damage
- Tools You’ll Need for Pipe Repair
- Step-by-Step Guide to Repairing a Leaky Pipe
- Common Mistakes to Avoid When Repairing Pipes
- When to Call a Plumber for a Pipe Repair
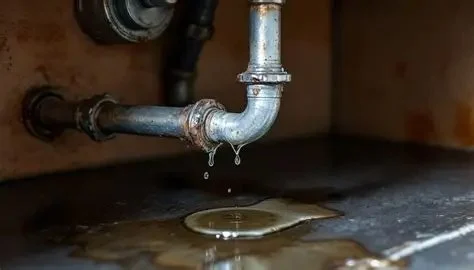
1. Identifying the Leak and Assessing the Damage
The first step in repairing a leaky pipe is identifying the source of the leak. If you notice water pooling around your pipes, dripping sounds, or higher-than-usual water bills, it's likely that you have a leaky pipe. To fix the issue, you’ll need to locate the leak precisely and assess the damage.
Common signs of a leaky pipe include:
- Water stains on walls or ceilings
- Moisture around the base of fixtures
- Visible corrosion or mold growth on pipes
Once you’ve located the leak, turn off the water supply to avoid further water damage while you make the repair.
2. Tools You’ll Need for Pipe Repair
Before attempting to repair a leaky pipe, make sure you have the proper tools. For most DIY pipe repairs, you will need the following tools:
- Pliers: To grip and twist the pipe fittings.
- Pipe Cutter or Hacksaw: To cut the pipe cleanly if necessary.
- Pipe Sealant or Epoxy Putty: To seal the leak temporarily or permanently, depending on the severity.
- Plumber’s Tape (Teflon tape): To wrap around pipe threads to prevent leaks.
- Pipe Repair Clamp: To seal the leak by applying pressure around the damaged area.
- Adjustable Wrench: For tightening or loosening fittings.
Having these tools ready will make the repair process smoother and more efficient.
3. Step-by-Step Guide to Repairing a Leaky Pipe
Once you've identified the leak and gathered your tools, follow these steps to repair the pipe:
- Turn Off the Water Supply: This is the most important step. Ensure that the water supply to the affected area is turned off to prevent water from flowing while you work.
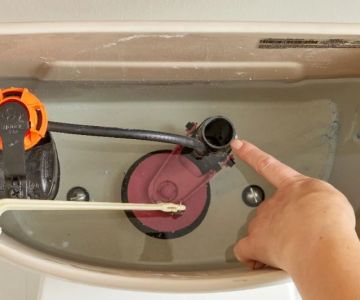
- Locate the Leak: Inspect the pipe carefully to find the exact location of the leak. If it's a small hole or crack, it might be difficult to spot without careful examination.
- Clean the Area Around the Leak: Use a cloth or rag to wipe off any moisture from the pipe. A clean surface is essential for applying sealant or making connections.
- Apply Pipe Sealant or Epoxy: For small leaks, you can apply a pipe sealant or epoxy putty over the crack. Follow the instructions on the product for the best results. Let the sealant cure before turning the water back on.
- Use a Pipe Repair Clamp: If the leak is too large for a simple sealant application, a pipe repair clamp may be necessary. Position the clamp around the damaged pipe and tighten it to stop the leak.
- Replace the Pipe Section (If Needed): For more extensive damage, you may need to cut out the damaged section and replace it. Use a pipe cutter or hacksaw to remove the affected portion, and then replace it with a new piece of pipe, securing it with fittings and pipe glue if necessary.
- Test the Repair: Once the repair is complete, turn the water supply back on and check for leaks. If there is still a leak, double-check the sealant or repair clamp to ensure it's properly applied.
This step-by-step process will help you fix many common leaky pipe issues on your own, saving you time and money.
4. Common Mistakes to Avoid When Repairing Pipes
While DIY pipe repair can be a cost-effective solution, there are common mistakes to avoid. These include:
- Not Turning Off the Water Supply: Forgetting to turn off the water supply can lead to further flooding and damage.
- Using the Wrong Sealant: Not all sealants are designed for pipe repair. Make sure you're using a product specifically made for plumbing.
- Not Checking for Other Leaks: After making the repair, always check for other leaks in the same area. A small leak can sometimes lead to more significant issues if not properly addressed.
- Improperly Tightening Fittings: Over-tightening or under-tightening can cause further issues. Use the right amount of torque and check for leaks.
Avoiding these mistakes will ensure a more successful and long-lasting pipe repair.
5. When to Call a Plumber for a Pipe Repair
While many minor leaks can be fixed with DIY methods, there are situations where calling a professional plumber is the best option:
- Major Pipe Damage: If the pipe is severely cracked or broken, it's best to call a plumber for replacement.
- Complex Plumbing Systems: If the leak is in a hard-to-reach or complex area, a plumber’s expertise will be required.
- Repeated Leaks: If leaks keep occurring after repairs, it could indicate an underlying issue that needs professional attention.
- Lack of Confidence in Your Ability: If you're unsure about the repair process, it's always safer to call a plumber to avoid further damage.
Knowing when to tackle a repair yourself and when to call a professional is key to maintaining a well-functioning plumbing system in your home.

 California United Plumbing4.0 (13 reviews)
 PHCC Central Indiana Associates3.0 (2 reviews)
 Clark Plumbing & Heating3.0 (10 reviews)
 Randy's Electric & Plumbing4.0 (59 reviews)
 V-Max Plumbing Torrance5.0 (118 reviews)
 Hudson Plumbing4.0 (466 reviews)
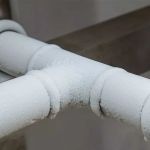 What Causes Frozen Pipes and How You Can Prevent It - Expert Tips
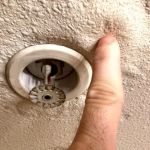 How to Find and Fix Hidden Water Leaks in Your Home
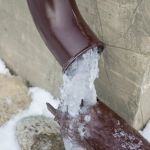 How to Prevent Frozen Pipes During the Winter
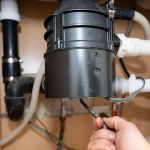 Why Your Garbage Disposal Is Jamming and How to Fix It
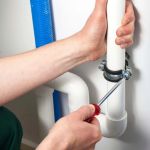 How to Repair a Broken Plumbing Pipe in Your Basement
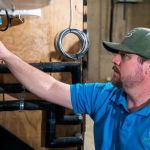 How to Inspect Plumbing Connections in an Addition: A Step-by-Step Guide