
- -Understanding Hidden Plumbing Leaks and Their Impact
- -Common Signs of Plumbing Leaks in Your Home
- -How to Detect Plumbing Leaks Using Simple Tools
- -Step-by-Step Guide to Repairing Plumbing Leaks
- -Real-life Stories of Hidden Leak Discoveries
- -Preventing Future Plumbing Leaks in Your Home
1. Understanding Hidden Plumbing Leaks and Their Impact
Hidden plumbing leaks are one of the most common household issues that can lead to significant water damage if not addressed promptly. These leaks may occur behind walls, under floors, or in ceilings, making them difficult to spot. However, even a small leak can escalate into a much larger problem if left unchecked.

1.1 Why Hidden Leaks Are Dangerous
Water damage caused by undetected leaks can result in mold growth, structural damage, and increased water bills. Furthermore, the longer a leak goes unnoticed, the more expensive and extensive the repairs will be.

1.2 The Hidden Nature of Plumbing Leaks
Unlike obvious leaks where water pools on the floor, hidden leaks are not immediately visible. They can slowly drip over time, accumulating moisture inside walls or under flooring. The key to avoiding damage is early detection and prompt repair.
1.2.1 Consequences of Ignoring Hidden Leaks
If a leak goes unnoticed for months, you may end up dealing with costly repairs, such as replacing rotting wood, repairing damaged flooring, or replacing mold-infested drywall. Detecting plumbing leaks early can save you from these expensive consequences.
2. Common Signs of Plumbing Leaks in Your Home
Understanding how to identify plumbing leaks early is crucial in preventing damage. Below are common signs that you might have a hidden leak in your home.
2.1 Unexplained Increase in Water Bills
A sudden spike in your water bill can indicate a plumbing leak. Even if you haven’t used more water than usual, a slow leak may cause your meter to run higher than normal.
2.2 Damp or Discolored Walls, Ceilings, or Floors
Water seeping through walls, ceilings, or floors can cause visible signs like damp spots, water stains, or peeling paint. If you notice these signs, it’s important to investigate further for possible leaks.
2.2.1 Musty Odors
A musty smell or the presence of mold or mildew often points to hidden moisture caused by a leak. This is especially common in areas like bathrooms, basements, or under sinks where leaks are common.
2.3 Sounds of Running Water
If you hear the sound of running water when no faucets or appliances are in use, it could mean there’s a hidden leak somewhere in your plumbing system.
3. How to Detect Plumbing Leaks Using Simple Tools
Once you suspect a hidden plumbing leak, the next step is detection. There are several simple tools and techniques you can use to locate the source of the leak without tearing apart your home.
3.1 Checking Your Water Meter
One of the easiest ways to detect a leak is by monitoring your water meter. First, turn off all water fixtures in your home. Wait for an hour and then check the meter again. If it has moved, you likely have a leak somewhere in your plumbing.
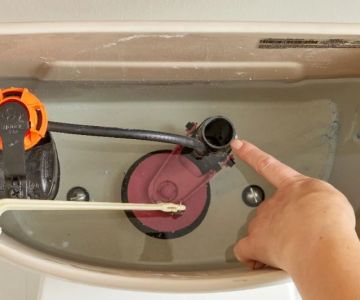
3.2 Using Food Coloring in Toilets
A common plumbing issue is a leak in the toilet’s flapper valve. To check for this, add a few drops of food coloring into your toilet tank. If the color appears in the toilet bowl without flushing, there is a leak in the tank that needs to be repaired.
3.2.1 Listening for Water Sounds
You can also listen for sounds of running water. Use a stethoscope or a pipe locator tool to trace the source of the sound along the pipes. If you hear water running behind walls or under floors, it may be an indication of a hidden leak.
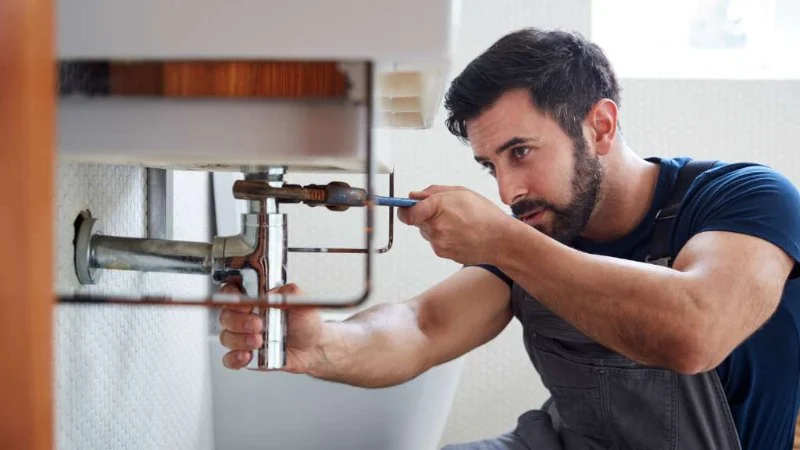
4. Step-by-Step Guide to Repairing Plumbing Leaks
Once you’ve detected a plumbing leak, the next step is to repair it. Below is a general guide to help you fix common plumbing leaks. However, for more complex issues, always consider hiring a professional plumber.
4.1 Shut Off the Water Supply
Before starting any plumbing repair, make sure to turn off the main water supply to your home. This will prevent further water damage while you work on the leak.
4.2 Locate the Leak
Once the water supply is off, identify the leak's location. This may involve removing panels, accessing pipes under sinks, or using the methods mentioned above to pinpoint the source.
4.2.1 Patching Small Leaks
For small leaks, you can apply pipe repair tape or epoxy putty to seal the leak temporarily. However, it’s important to replace the damaged pipe as soon as possible to prevent further issues.
4.3 Replace Damaged Pipes or Fixtures
For larger leaks, you may need to replace a section of damaged pipe or fixture. Use a pipe cutter to remove the damaged section, then install a new pipe or connector, ensuring all fittings are tight and secure.
5. Real-life Stories of Hidden Leak Discoveries
Sometimes, it’s the stories of homeowners dealing with hidden plumbing leaks that make the process of detection and repair feel more relatable.
5.1 A Basement Leak That Caused Extensive Damage
One homeowner shared how they discovered a hidden leak in their basement after noticing musty odors and water stains on the ceiling. They traced the leak to a burst pipe behind the drywall, which led to significant damage. The repair, which could have been avoided with earlier detection, cost thousands of dollars.
5.2 A Kitchen Sink Leak That Went Unnoticed
Another homeowner noticed that their water bill had increased but couldn’t figure out why. After checking their kitchen sink and nearby plumbing, they found a small but persistent leak behind the cabinet, causing damage to the wood and leading to mold growth.
5.2.1 Lessons from These Stories
These stories show the importance of checking for hidden leaks regularly and promptly addressing any signs of water damage. Early intervention can save significant costs in repairs and water damage mitigation.
6. Preventing Future Plumbing Leaks in Your Home
Once you've dealt with a hidden plumbing leak, it's important to take steps to prevent future issues. Regular maintenance can keep your pipes in top condition and avoid costly repairs down the road.
6.1 Regularly Inspect Plumbing Systems
Make it a habit to inspect your plumbing every few months. Look for signs of wear on pipes, faucets, and fixtures. Tighten any loose connections and replace worn seals or gaskets.
6.2 Insulate Pipes to Prevent Freezing
In colder climates, frozen pipes are a common cause of leaks. Make sure to insulate any exposed pipes, especially in unheated areas like attics or basements, to prevent freezing and bursting.
6.2.1 Maintain Proper Water Pressure
Ensure your home’s water pressure is within the recommended range. High water pressure can cause stress on pipes and fixtures, leading to leaks over time.
By understanding How to Detect and Repair Hidden Plumbing Leaks in Your Home and taking proactive steps, you can protect your property from water damage and avoid expensive repair costs. If you’re unsure about your DIY skills or dealing with complex plumbing issues, don’t hesitate to consult with a professional plumber.


 Southern Minnesota Mechanical5.0 (4 reviews)
 Heim Plumbing4.0 (12 reviews)
 Guzman Plumbing5.0 (1 reviews)
 Test Business Profile0.0 (0 reviews)
 Danks Hydro-Jetting Llc5.0 (6 reviews)
 Figueroa Plumbing4.0 (20 reviews)
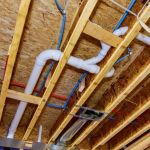 How to Route a New Plumbing Run in a Finished Basement – Step-by-Step Guide
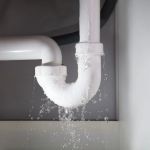 How to Fix a Sink That Rattles When Water Runs: Troubleshooting Guide
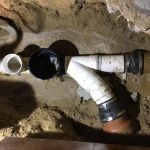 How to Test a Backwater Valve in Your Sewer Line: A Step-by-Step Guide
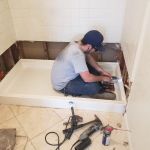 How to Replace a Shower Pan or Base | Plumbers Supply Hub
 How to Troubleshoot a Noisy Toilet: Common Causes and Solutions
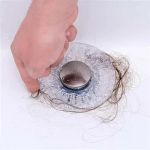 How to Replace a Tub Drain With Hair Trap Feature