
- Introduction
- Common Causes of Broken Pipes in Basements
- Tools You’ll Need to Repair a Broken Pipe
- Step-by-Step Guide to Repairing a Broken Plumbing Pipe
- Real-World Experiences: How to Handle a Plumbing Emergency
- Tips to Prevent Future Plumbing Pipe Issues
- Conclusion
How to Repair a Broken Plumbing Pipe in Your Basement
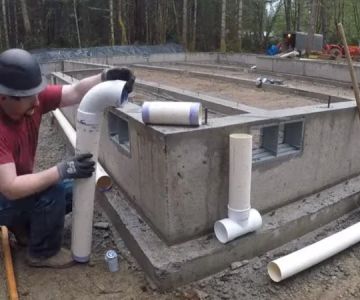
If you discover a broken plumbing pipe in your basement, it can be a stressful and urgent situation. Water leaks not only cause immediate damage but can also lead to long-term issues like mold, mildew, and structural damage. The good news is that repairing a broken plumbing pipe can often be a manageable DIY task, as long as you have the right tools and know the steps involved. In this guide, we’ll walk you through how to repair a broken plumbing pipe in your basement, providing step-by-step instructions, essential tips, and helpful recommendations to ensure a successful repair.
B & B Johnson Plumbing Company
HuntingtonCabell CountyWest Virginia
886 Norway Ave, Huntington, WV 25705, USA
Common Causes of Broken Pipes in Basements
Before diving into the repair process, it's helpful to understand some of the most common causes of broken plumbing pipes in basements. This can help you identify the root of the problem and prevent future issues.
1. Freezing Temperatures
During winter, freezing temperatures can cause the water inside pipes to expand, putting immense pressure on the pipe walls. This can result in cracks or breaks in the pipes. Basements, especially those that are not well insulated, are especially susceptible to frozen pipes.
2. Age and Wear
Older pipes, especially those made of galvanized steel or cast iron, are more prone to corrosion, rust, and weakening over time. If you live in an older home, it’s important to regularly inspect your plumbing to ensure it’s in good condition.
3. Tree Root Intrusion
Tree roots can grow into underground pipes, causing pressure on the pipes and leading to cracks or breaks. This is particularly common in homes with older plumbing systems that are located near large trees.
4. Physical Damage
Physical damage can occur from construction work, accidents, or even simply moving heavy objects around your basement. Impact from these activities can crack or break pipes, leading to leaks and flooding.
Tools You’ll Need to Repair a Broken Pipe
To repair a broken plumbing pipe in your basement, you’ll need the following tools and materials:
- Pipe Cutter or Hacksaw: For cutting the damaged section of pipe.
- Pipe Repair Clamp: A temporary solution to stop leaks until permanent repairs can be made.
- Plumber's Tape (Teflon Tape): To ensure a tight seal around threaded connections.
- PVC or Copper Replacement Pipe: Depending on the type of pipe you're repairing.
- Pipe Wrench: To help tighten or loosen pipe fittings.
- Epoxy Putty or Pipe Sealant: For temporary fixes or sealing small cracks.
- Bucket or Towels: To catch any water leaking from the pipe during repair.
- Gloves and Safety Glasses: To protect your hands and eyes during the repair process.
Step-by-Step Guide to Repairing a Broken Plumbing Pipe
Once you’ve gathered your tools, follow these step-by-step instructions to repair your broken plumbing pipe:
1. Turn Off the Water Supply
Before starting any plumbing repair, the first step is to turn off the water supply to prevent further flooding. Locate the main water shut-off valve in your home (often found in the basement or near the water meter) and turn it off.
2. Drain the Remaining Water
Once the water is off, open any faucets or valves to drain any remaining water in the pipes. This will reduce the risk of spills and make the repair process easier.
3. Locate the Damage
Inspect the broken pipe to locate the damaged area. If the break is large, you may need to cut out the damaged section using a pipe cutter or hacksaw. Make sure to cut a few inches away from the break to ensure that you’re working with solid, undamaged pipe sections.
4. Prepare the Replacement Pipe
Cut the new piece of pipe to match the length of the section you removed. Use a pipe cutter or hacksaw to make a clean, straight cut. If you're replacing metal pipes, use the appropriate fittings for the new pipe type (e.g., PVC or copper).
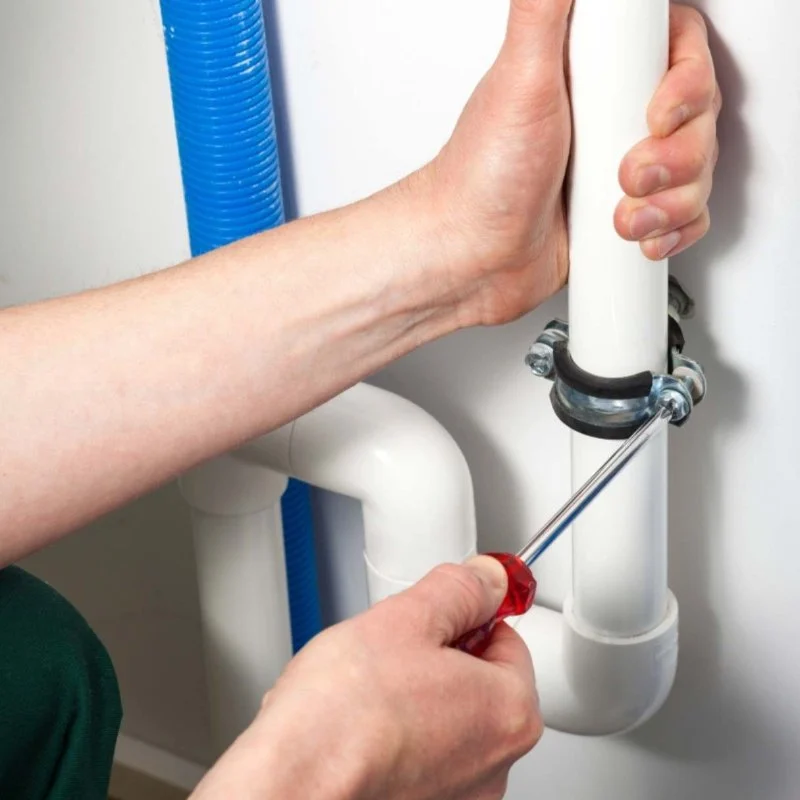
5. Install the Replacement Pipe
Fit the new pipe into place, ensuring that the connections are tight and secure. If necessary, apply Teflon tape to threaded areas to create a better seal. Tighten all fittings using a pipe wrench, being careful not to overtighten and damage the pipe.
6. Test for Leaks
Once the new pipe is installed, turn the water supply back on slowly and check for leaks. If you notice any dripping, tighten the connections further or use additional pipe sealant to seal any small cracks.
Real-World Experiences: How to Handle a Plumbing Emergency
Many homeowners have faced plumbing emergencies, including broken pipes in their basements. Take Sarah, for example, who had to deal with a burst pipe during a cold snap in her home in Chicago. “The water started pooling in the basement, and I knew I had to act fast. I followed some DIY advice online, turned off the water, and was able to fix the pipe using a repair clamp and some PVC pipe. It wasn’t perfect, but it held long enough for me to call in a professional plumber.”
Similarly, Mark, a homeowner in New York, faced a plumbing issue when tree roots infiltrated his pipes. “I had noticed a slight dampness in the basement, but didn’t realize the full extent of the damage until I checked. I was able to temporarily seal the cracks with epoxy putty while waiting for the plumber to replace the section of pipe that was broken,” he shared. His quick response helped avoid more serious water damage to his home.
Tips to Prevent Future Plumbing Pipe Issues
Once you’ve repaired your broken plumbing pipe, consider these tips to prevent future issues:
1. Insulate Pipes
If freezing temperatures caused your broken pipe, adding insulation around pipes in vulnerable areas like basements and attics can help prevent freezing in the future.
2. Regularly Inspect Plumbing
Regularly inspecting your plumbing system can help you spot early signs of damage, such as leaks, rust, or corrosion. Addressing minor issues early can prevent bigger problems down the line.
3. Avoid Tree Roots Near Pipes
If you live in an area with large trees, make sure to have your plumbing checked regularly to avoid root infiltration. You may need to install protective barriers to prevent tree roots from damaging your pipes.
Conclusion
Repairing a broken plumbing pipe in your basement doesn’t have to be a daunting task. With the right tools and a little bit of knowledge, many homeowners can handle the repair themselves. Always remember to turn off the water supply, assess the damage, and use the correct materials to ensure a successful fix. For more tips, supplies, and professional assistance, be sure to check out Plumbers Supply Hub for all your plumbing needs.
 Copeland Contracting, Inc.5.0 (10 reviews)
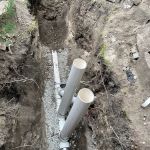 Rescue Plumbing4.0 (48 reviews)
 Mr. Rooter Plumbing of Buncombe & Henderson Counties4.0 (560 reviews)
 Harold Zeiger Plumbing3.0 (1 reviews)
 Bob White Plumbing Co4.0 (3 reviews)
 ABC Plumbing, Sewer, Heating, Cooling & Electric5.0 (8 reviews)
 How to Fix a Leaky Sink Drain: A Step-by-Step Plumbing Guide
 What to Know About Plumbing Permits for Home Renovations
 How to Install a Garbage Disposal: A Step-by-Step Guide for Beginners
 Why Your Water Pressure Is Low and How to Fix It
 How to Repair a Junction That Is Leaking Under Slab
 Why Your Sump Pump Runs Excessively and How to Limit It