
- 1. Why You Might Need to Install a New Pipe System
- 2. Tools and Materials Needed for Pipe Installation
- 3. Steps to Installing a New Pipe System
- 4. Common Mistakes to Avoid When Installing Pipes
- 5. Case Study: Successful Pipe Installation in a Home Renovation
1. Why You Might Need to Install a New Pipe System
There are many reasons why you might need to install a new pipe system in your home. Over time, old pipes can become corroded, cracked, or blocked, leading to water damage, low water pressure, or leaks. In some cases, a remodel or home renovation may require the installation of new pipes to meet updated plumbing codes or to accommodate a new bathroom or kitchen layout.
Installing a new pipe system can also be a proactive way to improve water quality by replacing old pipes that may contain lead or other harmful materials. Regardless of the reason, a properly installed plumbing system ensures efficient water flow and reduces the risk of expensive repairs down the line.
2. Tools and Materials Needed for Pipe Installation
Before you start installing your new pipe system, it's important to gather the necessary tools and materials. Here's a list of what you will need:
2.1 Tools
- Pipe cutter or hacksaw
- Pipe wrench
- Pipe bender (if working with copper pipes)
- Plumber’s tape or pipe joint compound
- Measuring tape
- Marker or pencil
- Level
- Safety goggles and gloves
2.2 Materials
- Type of pipes (PVC, copper, PEX, etc.)
- Pipe fittings (elbows, couplings, tees, etc.)
- Pipe hangers and supports
- Sealant or pipe adhesive (if necessary)
- Pipe insulation (optional for certain areas)
3. Steps to Installing a New Pipe System
Installing a new pipe system requires careful planning and execution. Follow these steps to ensure a smooth installation process:
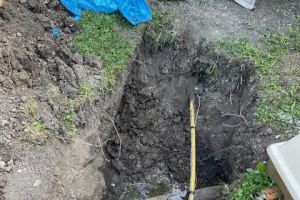
3.1 Plan the Layout
The first step in any pipe installation is to plan the layout of the pipes. Consider the layout of your home and the location of water fixtures, such as sinks, toilets, and appliances. Ensure that pipes are routed in the most efficient way, minimizing bends and unnecessary lengths to reduce water pressure loss.
3.2 Measure and Cut the Pipes
Once you have a layout, measure the length of each pipe segment carefully, and mark where cuts will be made. Use a pipe cutter or hacksaw to cut the pipes to the correct length. Ensure that each cut is straight and clean to ensure proper fitting with connectors.
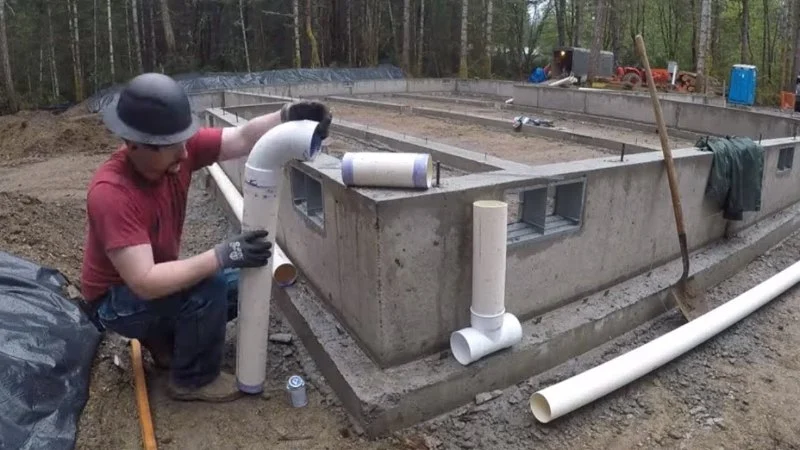
3.3 Assemble the Pipe Sections
Begin assembling the pipes by connecting them with the appropriate fittings. Depending on the type of pipe material you’re using (PVC, copper, or PEX), you may need to use adhesive, heat, or compression fittings to secure the joints. Use plumber’s tape or joint compound to ensure leak-free connections.
3.4 Secure the Pipes with Hangers
To prevent pipes from moving or sagging, use pipe hangers or brackets to secure them in place. This will ensure that the pipes remain aligned and prevent damage due to shifting or pressure changes.
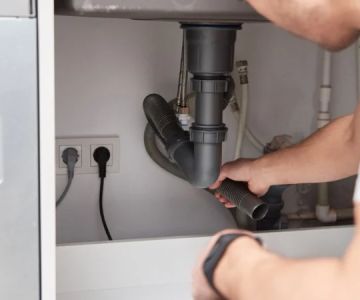
3.5 Test the System
After the pipes are installed, it’s important to test the system for leaks. Turn on the water supply and check all connections for any signs of leakage. If any leaks are detected, tighten the fittings or apply more sealant to secure the joints.
4. Common Mistakes to Avoid When Installing Pipes
Even with a clear plan, DIY plumbing installations can go wrong. Here are some common mistakes to avoid:
4.1 Incorrect Pipe Sizing
One of the most common mistakes is using the wrong size pipe for your home’s water system. Make sure to select the appropriate pipe diameter to handle the required water flow and pressure. Too small of a pipe can cause reduced water pressure, while too large a pipe may be more expensive and harder to install.
4.2 Improper Pipe Support
Failing to secure pipes properly can lead to sagging, misalignment, and potential damage. Ensure that you use proper pipe hangers and supports to keep your pipes in place and prevent long-term issues.
4.3 Ignoring Local Plumbing Codes
Always check local plumbing codes before installing your new pipe system. These codes ensure that your system is safe, efficient, and compliant with regulations. Failure to follow these codes can lead to fines, unsafe installations, and costly repairs in the future.
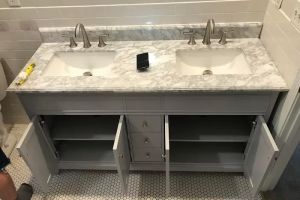
5. Case Study: Successful Pipe Installation in a Home Renovation
During a recent home renovation project, we needed to install a new pipe system to accommodate a new kitchen and bathroom. The home’s original plumbing was outdated, and the pipes were prone to leaks and clogs. We planned the new pipe layout, choosing PEX pipes for their flexibility and ease of installation.
After gathering all the necessary tools and materials, the installation process went smoothly. We carefully cut and assembled the pipes, using proper support to prevent sagging. After testing the system for leaks and making a few minor adjustments, the new plumbing system was up and running without any issues. The homeowners were thrilled with the new, efficient system that saved them both time and money on repairs.
If you're planning your own pipe installation, check out Plumbers Supply Hub for all the supplies and expert advice you need to get started. Whether it’s tools, materials, or guidance, we’ve got you covered.


 L & H Plumbing0.0 (0 reviews)
 R&T Plumbing LLC5.0 (11 reviews)
 Prestige Plumbing4.0 (196 reviews)
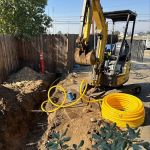 Re-pipe plumbing5.0 (8 reviews)
 Semingson Aberle Plumbing LLC4.0 (18 reviews)
 Charles E Mc Clure Plumbing3.0 (2 reviews)
 How to Locate Hidden Water Leaks in Walls or Ceilings: Tips for Homeowners
 How to Replace a Water Heater Anode Rod - Step-by-Step Guide
 How to Replace a Bathtub Spout with Diverter
 Step-by-Step Guide to Installing a Radiant Floor Heating Plumbing Loop
 How to Inspect Plumbing After a Flood Event | Essential Steps for Homeowners
 How to Replace a Broken Drain Elbow | Plumbers Supply Hub