
 Step-by-Step Guide to Installing a Radiant Floor Heating Plumbing Loopradiant floor heating, plumbing loop installation, radiant heat installation, floor heating system, radiant heating plumbing, how to install a radiant floor heating loop, plumbing tips for radiant heatingLearn how to install a radiant floor heating plumbing loop with this step-by-step guide. Discover expert tips for a successful radiant heat installation, and ensure your home stays warm and comfortable throughout the year.
- Why Choose Radiant Floor Heating?
- Preparing for Radiant Floor Heating Installation
- Steps to Install a Radiant Floor Heating Plumbing Loop
- Common Installation Mistakes to Avoid
- How Plumbers Supply Hub Can Help
Why Choose Radiant Floor Heating?
Radiant floor heating is an energy-efficient, effective way to warm your home. Unlike traditional heating methods that rely on air circulation, radiant heat works by warming the floor, which then radiates heat upwards. This provides a more consistent, comfortable heat throughout the room.
One of the key advantages of radiant floor heating is its ability to save energy by warming the space from the ground up, reducing the need for high thermostat settings. Additionally, radiant heating systems are quiet, invisible, and require little maintenance once installed, making them an attractive option for many homeowners.

Preparing for Radiant Floor Heating Installation
Before installing your radiant floor heating plumbing loop, proper preparation is essential to ensure a smooth installation process. Here are the critical steps:
Strong's Plumbing & Heating Inc
Fond du LacFond du Lac CountyWisconsin
219 W 9th St, Fond du Lac, WI 54935, USA
1. Assess the Space
Start by determining which areas of your home will benefit most from radiant floor heating. The most common rooms are bathrooms, kitchens, and living spaces. Make sure the room is free of obstacles like furniture or fixtures that might interfere with the installation process.
2. Select the Right System
There are two main types of radiant floor heating systems: hydronic (water-based) and electric. Hydronic systems are ideal for larger spaces and provide more efficient heating, while electric systems are easier to install and work best in smaller areas. Depending on the size and layout of your home, choose the system that best fits your needs.
3. Gather Necessary Tools and Materials
Before starting the installation, make sure you have the following tools and materials on hand:
- Pex tubing (for the hydronic system)
- Manifold
- Pipe insulation
- Flooring adhesive or staples
- Concrete mix (for embedded systems)
- Temperature sensors and thermostats
Steps to Install a Radiant Floor Heating Plumbing Loop
Installing a radiant floor heating plumbing loop involves several steps. Here's a general overview of the process:
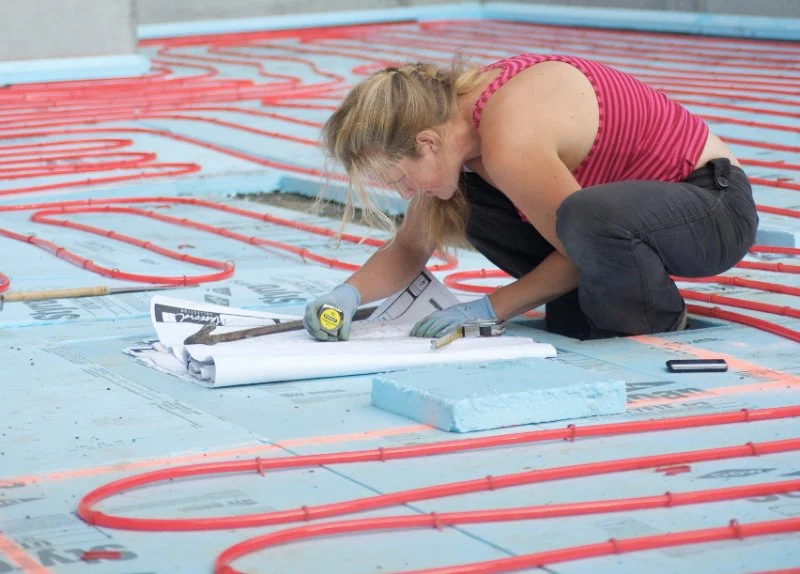
1. Lay Out the Manifold
The manifold is the heart of your radiant floor heating system, distributing warm water to the pipes. Install the manifold in a central location within the home, ensuring it is easily accessible for future maintenance. The manifold should be installed close to the boiler or water heating system.
2. Install the Pex Tubing
Begin by laying the Pex tubing over the floor in the desired pattern. There are several different methods for laying the tubing, such as the spiral or serpentine method. The tubing should be spaced evenly to ensure optimal heat distribution. Use floor staples or adhesive to secure the tubing to the subfloor. Be sure to follow the manufacturer’s recommendations for tubing spacing.
3. Connect the Tubing to the Manifold
After the tubing is in place, connect the ends of the Pex tubing to the manifold. Ensure all connections are tight and secure, as leaks can lead to system inefficiencies or damage. If using a hydronic system, make sure the manifold is connected to the boiler or water heating system as well.
4. Test the System
Once the system is connected, it’s essential to test it before sealing everything in place. Turn on the system and check for any leaks or irregularities. Make sure the flow rate and pressure are correct to ensure the system will perform efficiently.
5. Install the Floor Covering
Once the plumbing loop is tested, the next step is to install your floor covering. Whether you're using tile, hardwood, or carpet, make sure the flooring material is compatible with radiant floor heating systems. Some flooring materials, such as ceramic tile or engineered wood, work better with radiant heat than others.
Common Installation Mistakes to Avoid
While installing a radiant floor heating plumbing loop can be a rewarding project, it’s important to avoid common mistakes that can lead to inefficient heating or costly repairs:
- Improper Spacing of Tubing: Spacing the tubing too far apart can lead to uneven heat distribution, reducing the system's efficiency.
- Not Testing the System: Skipping the testing phase can result in unnoticed leaks or malfunctions that can cause significant damage over time.
- Incorrect Flooring Materials: Not all flooring materials are compatible with radiant heat. Ensure your flooring choice is designed for radiant heating systems.
How Plumbers Supply Hub Can Help
Installing a radiant floor heating plumbing loop requires expertise and the right materials. At Plumbers Supply Hub, we provide all the tools, plumbing materials, and expert advice you need to ensure your installation is successful. From high-quality Pex tubing and manifolds to temperature sensors and thermostats, we have everything you need to create an efficient and reliable heating system.
Visit Plumbers Supply Hub for the best products and guidance on radiant floor heating installations. Whether you're a DIY enthusiast or working with a professional plumber, we offer the resources you need to make your home more comfortable and energy-efficient.


 Aladdin's Plumbing3.0 (61 reviews)
 Greene County Plumbing Solutions4.0 (13 reviews)
 HOP Hands On Professional5.0 (13 reviews)
 Z & H Plumbing and Water Heaters5.0 (22 reviews)
 Hagen Plumbing Inc1.0 (5 reviews)
 Proline Plumbing & Rooter4.0 (7 reviews)
 Steps to Unclog a Toilet That Won’t Flush Properly
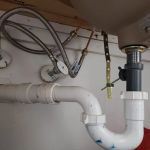 How to Repair a Sink That Drains Faster Than Faucet: Fixing Plumbing Issues Efficiently
 How to Clean Lime Scale from Shower Doors
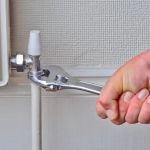 Why Your Pipes Rattle at Night and What to Fix
 Signs You Need to Replace Old Plumbing Pipes
 How to Reset a Tripped Pressure Switch in a Well Pump