
- 1. Understanding the Pipe Saddle
- 2. Signs of a Leaking Pipe Saddle
- 3. Tools You Need for Repairing a Pipe Saddle
- 4. Step-by-Step Guide to Repairing a Pipe Saddle
- 5. Common Mistakes to Avoid During the Repair
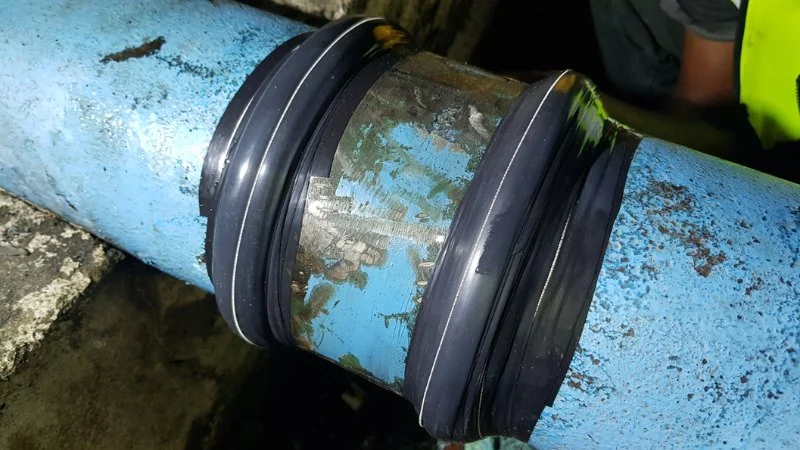
1. Understanding the Pipe Saddle
A pipe saddle is a critical component in plumbing systems used to secure pipes to surfaces or other structures. It's commonly used to hold pipes in place while providing a secure, leak-resistant seal. This component is often found in situations where a pipe intersects with another pipe or needs to be mounted onto a wall. Pipe saddles are made from a variety of materials, including plastic and metal, depending on the application.
Despite its simple design, a pipe saddle plays an essential role in maintaining the integrity of your plumbing system. Over time, however, they can develop leaks due to wear and tear, poor installation, or external damage. Understanding the function of a pipe saddle is the first step in repairing it correctly.

2. Signs of a Leaking Pipe Saddle
Identifying a leaking pipe saddle early is crucial to preventing further water damage. Here are some common signs that your pipe saddle might be leaking:
- Water stains: Discoloration on the surrounding wall or ceiling where the pipe is mounted is often a clear indicator of a leak.
- Visible drips: If you notice water dripping from the saddle area, it’s a sure sign that the saddle is not providing a proper seal.
- Reduced water pressure: A leak around the saddle can result in decreased water pressure, as the system is losing water.
- Rust or corrosion: Over time, rust or corrosion may build up around the saddle, which is another indication of a potential leak.
Early detection is key in preventing more serious plumbing issues, such as water damage to your property or mold growth.

The Plumbing & Air Service Co.
GreensboroGuilford CountyNorth Carolina
717 Green Valley Rd Suite 200-PMB 178, Greensboro, NC 27408, USA
3. Tools You Need for Repairing a Pipe Saddle
To successfully repair a leaking pipe saddle, you will need a few basic tools. Here’s what you’ll need:
- Adjustable wrench: For loosening and tightening the nuts on the saddle.
- Pipe sealant or plumber’s tape: To create a watertight seal and prevent future leaks.
- Replacement saddle: If the current saddle is damaged beyond repair, you’ll need a new one to secure the pipe properly.
- Pipe cutter: In case the damaged section of the pipe needs to be removed.
- Clean cloth: For cleaning the pipe surface before applying any sealant.
Make sure to have these tools on hand before beginning the repair process to ensure a smooth and efficient fix.
4. Step-by-Step Guide to Repairing a Pipe Saddle
Now that you have the right tools, follow these steps to repair a leaking pipe saddle:
- Turn off the water supply: Before starting any repair, ensure that the water supply to the affected pipe is turned off to prevent further leaks and water damage.
- Locate the leak: Inspect the area around the saddle for visible water drips or dampness. This will help you identify the exact location of the leak.
- Loosen the saddle: Use an adjustable wrench to loosen the bolts or screws holding the saddle in place. Be careful not to damage the surrounding pipe or components.
- Clean the pipe: Use a clean cloth to wipe away any dirt, rust, or debris from the pipe surface. This will ensure a better seal when you reattach the saddle.
- Apply sealant: If the saddle is still in good condition, apply plumber’s tape or pipe sealant around the pipe where the saddle will be mounted. This will help create a waterproof seal.
- Install a new saddle (if necessary): If the original saddle is damaged, replace it with a new one. Make sure to align the saddle correctly on the pipe.
- Tighten the saddle: Secure the saddle by tightening the bolts or screws with an adjustable wrench. Ensure the saddle is firmly in place to avoid future leaks.
- Test the repair: Turn the water supply back on and check for any leaks around the saddle. If the area remains dry, the repair is successful.
By following these steps, you can effectively repair a leaking pipe saddle and restore the integrity of your plumbing system.
5. Common Mistakes to Avoid During the Repair
While repairing a pipe saddle is relatively simple, there are a few common mistakes you should avoid:
- Not turning off the water supply: Always make sure to turn off the water supply before starting any repair to prevent further leaks.
- Using the wrong sealant: Make sure to use the right pipe sealant or plumber’s tape designed for the type of pipe you’re working with to ensure a secure, watertight seal.
- Over-tightening the saddle: Tightening the saddle too much can damage the pipe or saddle, leading to future leaks.
- Neglecting to clean the pipe: Failing to clean the pipe surface before applying a new saddle or sealant can result in poor adhesion and future leaks.
Avoiding these mistakes will ensure that your pipe saddle repair is successful and long-lasting.
For more plumbing tips and the best tools for your repair projects, visit Plumbers Supply Hub to get expert recommendations and top-quality products.


 Bill Morewood Plumbing and Heating4.0 (30 reviews)
 ePanel Plus LTD5.0 (1 reviews)
 Ron's Plumbing & Heating Services2.0 (5 reviews)
 Cox Plumbing Co. Inc.4.0 (74 reviews)
 Roto-Rooter Plumbing & Water Cleanup4.0 (902 reviews)
 C C Drain & Sewer Cleaning Co4.0 (2 reviews)
 How to Replace a Kitchen Sink Sprayer Hose: Step-by-Step Guide
 How to Clear Stubborn Hair Clogs from Bathroom Drains – Effective Solutions
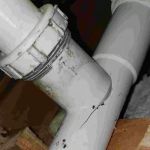 How to Prevent Leaks from Expanding Joints in Pipes: Tips for Homeowners
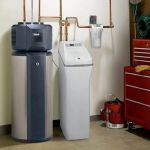 How to Install a Water Softener: DIY Plumbing Tips
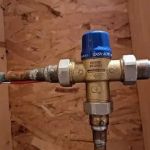 How to Replace a Mixing Valve for Tempered Water
 What to Do If Your Toilet Is Overflowing: Quick Steps to Take