
- -understanding-garbage-disposal-problems
- -safety-precautions-before-diy-repair
- -identifying-common-issues-and-causes
- -step-by-step-diy-repair-methods
- -using-tools-and-products-effectively
- -real-life-diy-repair-examples
- -leveraging-professional-resources-and-recommendations
1. Understanding Garbage Disposal Problems
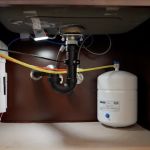
Garbage disposals are essential kitchen appliances, but like any mechanical system, they can break down or malfunction over time. Common issues include jamming, leaking, unusual noises, or complete failure to operate. Understanding the problem is the first step toward repair without calling a plumber.
For instance, a homeowner in Portland noticed that their disposal made loud grinding noises whenever it was turned on, indicating a possible jam. Identifying the exact cause of the malfunction—whether it’s foreign objects, misalignment, or electrical issues—prevents unnecessary replacements and guides appropriate DIY interventions.
2. Safety Precautions Before DIY Repair
Safety is paramount when attempting to repair a garbage disposal. Always disconnect the power supply before inspecting or working on the unit to prevent accidental injuries. Use insulated tools, wear protective gloves, and avoid placing hands inside the disposal chamber while it is powered.
In one case, a homeowner attempted to remove a stuck utensil from a disposal without unplugging it and sustained minor injuries. Following safety protocols—such as unplugging the unit and using a hex wrench or pliers—eliminates risk and ensures a safe repair process.
3. Identifying Common Issues and Causes
Garbage disposals may fail due to various reasons, including:
1. Jammed Blades: Small bones, utensils, or fibrous vegetables can cause jams.
2. Clogged Pipes: Grease buildup or food waste accumulation may block drainage.
3. Electrical Problems: Tripped circuits or faulty wiring can prevent the disposal from starting.
4. Leakage: Worn seals or loose connections can result in water escaping from the unit.
Identifying the exact cause allows for targeted solutions and prevents further damage.
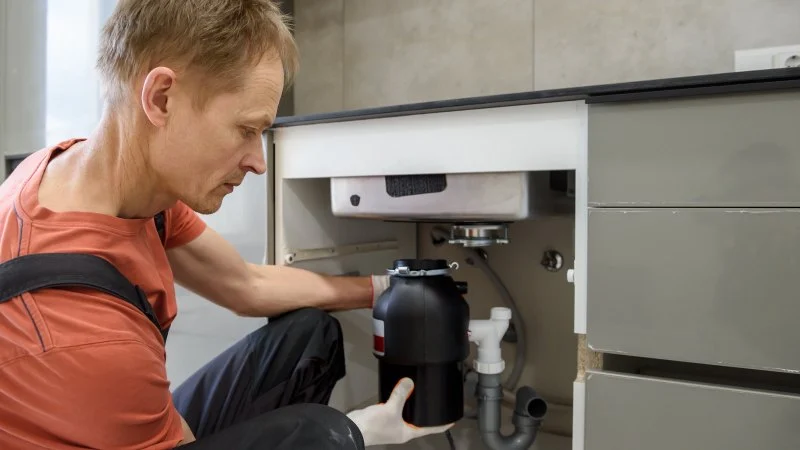
4. Step-by-Step DIY Repair Methods
Several DIY methods can address common garbage disposal issues:
1. Clearing a Jam: Insert an Allen wrench into the hex socket at the bottom of the disposal and rotate to free the impeller. Remove any visible debris using pliers, not hands.
2. Resetting the Unit: Press the reset button located at the base of the disposal after clearing jams or electrical interruptions.
3. Unclogging Drain Lines: Use a plunger or plumbing snake to remove blockages in the drain pipe connected to the disposal.
4. Addressing Leaks: Tighten mounting bolts or replace worn seals and gaskets to prevent water leakage.
These methods often restore functionality without professional intervention, saving time and money.
5. Using Tools and Products Effectively
Having the right tools and products is critical for a successful DIY repair. Essentials include an Allen wrench, pliers, bucket for water collection, and a flashlight for inspection. Some disposals may require lubricants or mild detergents to loosen stuck components safely.
For example, a homeowner in Denver used a combination of an Allen wrench and food-safe lubricant to free a stuck grinding plate. Following manufacturer guidelines ensures safe and effective use of tools and products, minimizing the risk of further damage.
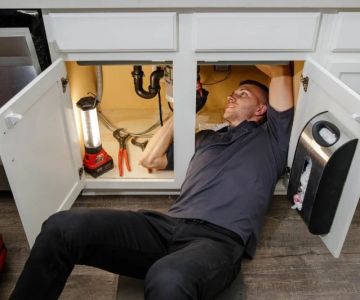
6. Real-Life DIY Repair Examples
Real-life examples demonstrate practical approaches. A homeowner in Seattle discovered their disposal had stopped due to a lodged chicken bone. By unplugging the unit, using an Allen wrench to turn the impeller, and removing the bone with pliers, they restored full operation within 15 minutes.
Another case involved a clogged drain where the disposal functioned but drainage was slow. Using a plumbing snake and mild dish detergent, a homeowner cleared the blockage without professional help, illustrating how simple interventions often resolve common issues.
7. Leveraging Professional Resources and Recommendations
While many issues can be addressed DIY, consulting professional resources can enhance safety and effectiveness. Platforms like Plumbers Supply Hub provide guides, tool recommendations, and product reviews for garbage disposal repair.
Additionally, instructional videos and troubleshooting guides from reputable sources can assist homeowners in following step-by-step procedures accurately. Combining expert advice with practical tools ensures a successful DIY repair, preventing unnecessary calls to a plumber while maintaining appliance longevity.
In conclusion, repairing a broken garbage disposal without calling a plumber is feasible with proper understanding, safety precautions, and step-by-step interventions. Identifying the cause, using the right tools, and following gradual DIY methods allow homeowners to restore functionality efficiently. Leveraging professional resources like Plumbers Supply Hub ensures access to expert guidance, making kitchen repairs manageable, safe, and cost-effective.

 Monkey Wrench Plumbing, Heating, Air & Electric4.0 (300 reviews)
 Wabash Valley Plumbing4.0 (140 reviews)
 Pretzantzin's plumbing5.0 (17 reviews)
 Code Blue Plumbing and Rooter2.0 (3 reviews)
 Walsh Plumbing5.0 (33 reviews)
 S & R Rooter Service & Plumbing Repairs.0.0 (0 reviews)
 How to Replace a Water Heater Anode Rod
 How to Choose the Right Pipe Insulation for Your Home
 Common Plumbing Problems in Mobile Homes and How to Fix Them
 How to Detect and Repair Hidden Leaks in Your Home’s Plumbing System
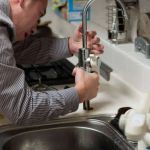 How to Fix a Sink That Squirts Water When Used
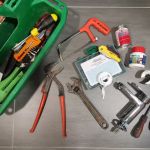 The Essential Plumbing Emergency Kit Every Homeowner Needs: Key Tools for Fast Fixes