
How to Replace a Water Heater Anode Rod
- 1. Why You Should Replace the Anode Rod
- 2. Signs It’s Time to Replace Your Anode Rod
- 3. Tools You’ll Need
- 4. Step-by-Step Guide to Replacing the Anode Rod
- 5. Common Issues and Troubleshooting
1. Why You Should Replace the Anode Rod
The anode rod in your water heater plays a vital role in preventing corrosion and extending the lifespan of your water heater. Over time, the anode rod can deteriorate, which may lead to the formation of rust in the tank. Replacing the anode rod regularly is one of the easiest ways to prevent expensive repairs and ensure the efficiency of your water heater.- Prevents corrosion of the tank, which can lead to leaks.
- Improves the lifespan of your water heater.
- Helps keep your water heater running efficiently by reducing sediment buildup.
2. Signs It’s Time to Replace Your Anode Rod
Replacing the anode rod in your water heater should be a part of your regular maintenance routine. Here are a few signs that it may be time to replace it:- Water quality issues: If your water has a strange taste or smell, it could indicate that the anode rod is failing.
- Rusty water: If you notice rust-colored water coming out of the tap, it’s likely that the anode rod is no longer protecting the tank from corrosion.
- Increased noise: A noisy water heater, often caused by sediment buildup, could also indicate that the anode rod is no longer effective.
- Age of the water heater: Anode rods should be replaced every 3 to 5 years, depending on the water quality and usage.
3. Tools You’ll Need
Replacing the anode rod in your water heater requires a few basic tools. Here’s a list of what you’ll need:- Pipe wrench or socket wrench: To remove the anode rod, you’ll need a wrench or socket wrench.
- Garden hose: To drain the water heater, a garden hose will be required.
- Bucket or container: For draining any residual water.
- Replacement anode rod: Make sure to get the correct size and type for your water heater model.
4. Step-by-Step Guide to Replacing the Anode Rod
Replacing the anode rod can be a DIY job if you have the right tools and follow these steps carefully. Here’s a simple, step-by-step guide:- Turn off the power and water supply: Before starting, ensure the water heater is turned off and the water supply is shut off.
- Drain the water heater: Attach a garden hose to the drain valve and empty the water heater until it's nearly empty.
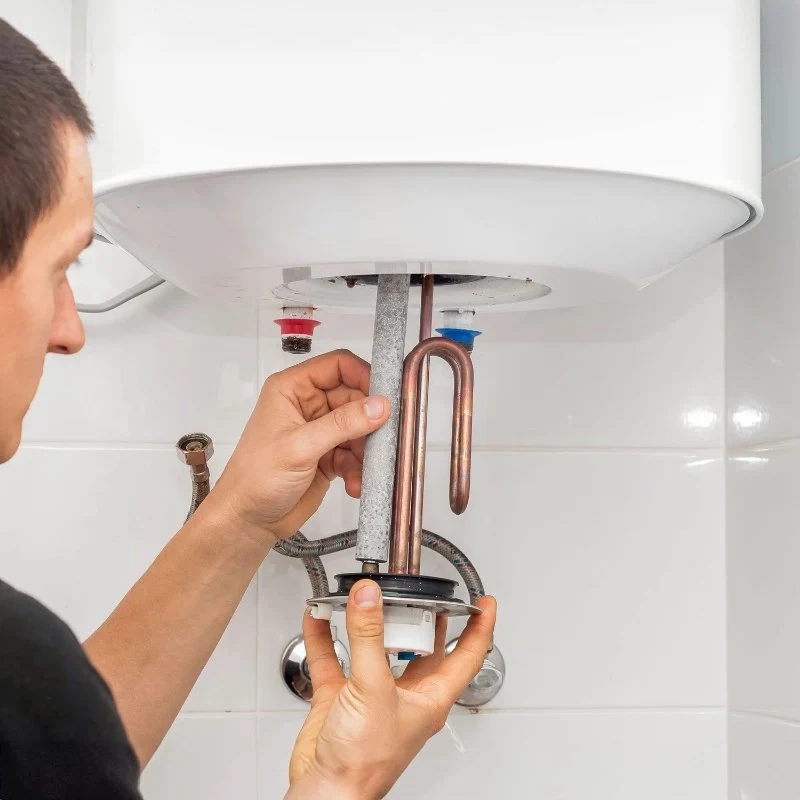
- Locate the anode rod: The anode rod is typically located on the top of the tank. Check the manufacturer’s instructions if you're unsure.
- Remove the anode rod: Use a pipe wrench or socket wrench to unscrew and remove the old anode rod. You may need to use a bit of force, as the rod can be tightly screwed in.
- Install the new anode rod: Place the new anode rod in the same position and tighten it securely with your wrench.
- Refill the tank: Close the drain valve and turn on the water supply. Allow the tank to fill up, checking for any leaks around the new anode rod.
- Turn the power back on: Once the tank is full, you can turn the power back on and let the water heater resume normal operation.
5. Common Issues and Troubleshooting
While replacing the anode rod is generally a straightforward process, you may encounter a few challenges along the way. Here are some common issues and how to troubleshoot them:- Difficulty removing the anode rod: If the anode rod is difficult to unscrew, try using a little penetrating oil and allow it to sit for a few minutes before attempting again.
- Leaks after installation: If you notice leaks around the anode rod after installation, check that it’s tightly screwed in. If the leak persists, the anode rod might not be the right size for your water heater.
- Power issues after installation: If the water heater isn’t heating properly after replacing the anode rod, ensure that the power supply is restored and functioning correctly.


 TJ's Plumbing & Heating Inc.4.0 (124 reviews)
 Lipson Plumbing & Heating Inc5.0 (9 reviews)
 Duty Calls Plumbing4.0 (318 reviews)
 Drain Doctor LLC4.0 (72 reviews)
 Lyle's Plumbing & Heating4.0 (2 reviews)
 Farr Plumbing and Heating4.0 (48 reviews)
 The Best Ways to Keep Your Plumbing System Efficient and Leak-Free
 How to Replace a Toilet Tank Gasket | Plumbers Supply Hub
 How to Test Backflow Preventers Annually
 How to Fix a Sink That Drains Slowly Over Time: Expert Tips for a Faster Drain
 How to Eliminate Odors Coming from Your Drains
 How to Test Backflow Preventers Annually: A Step-by-Step Guide