
- 1. Why You Should Replace a Leaky Shower Valve
- 2. Tools and Materials Needed
- 3. Step-by-Step Guide to Replacing Your Shower Valve
- 4. Common Mistakes to Avoid During Shower Valve Replacement
- 5. Maintenance Tips for Your Shower Valve
1. Why You Should Replace a Leaky Shower Valve
Replacing a leaky shower valve is not just about stopping water from dripping – it’s about improving your bathroom's overall efficiency. A faulty valve can lead to water wastage, increase your water bills, and even cause water damage over time. By replacing it yourself, you’ll save on expensive plumbing services and get the satisfaction of a successful DIY project. Plus, knowing how to fix a leaky shower valve is a great skill for homeowners to have!
2. Tools and Materials Needed
Before you start, gather the necessary tools and materials to ensure a smooth repair process. You’ll need:
- Adjustable wrenches
- Pipe wrench
- Plumber’s tape
- Replacement shower valve
- New rubber seals or washers
- Bucket or towels for water spillage
- Pipe cutter or hacksaw (if necessary)
Having the right tools on hand will save you time and frustration during the replacement process.

3. Step-by-Step Guide to Replacing Your Shower Valve
Now that you have everything you need, follow these steps to replace your leaky shower valve:
3.1 Step 1: Turn Off the Water Supply
Before doing any work, turn off the water supply to your shower. Locate the shut-off valves under the sink or near the water heater, and make sure the water supply is fully turned off.
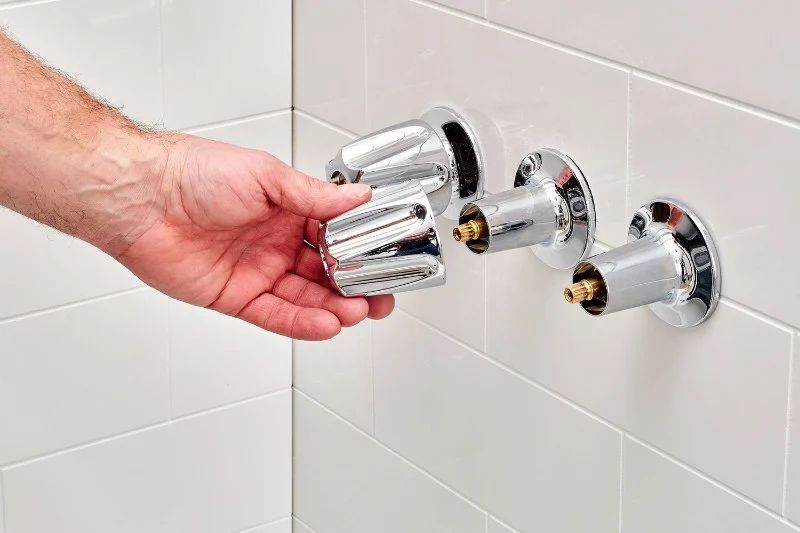
3.2 Step 2: Remove the Old Valve
Use your adjustable wrench or pipe wrench to remove the nuts holding the shower valve in place. Be careful not to damage the surrounding tiles or pipes. If the valve is stuck, use penetrating oil and give it some time to loosen.
3.3 Step 3: Install the New Valve
Install the new shower valve in place. Make sure it aligns properly with the existing plumbing. Use plumber’s tape around the threads to ensure a secure and leak-free connection. Tighten the nuts using the wrench, but avoid overtightening, as this can damage the valve or pipes.
3.4 Step 4: Test for Leaks
Once the new valve is installed, turn on the water supply and test the shower to make sure the leak has been fixed. If you notice any drips or leaks, tighten the connections a bit more. If everything is dry, congratulations – you’ve successfully replaced your shower valve!
4. Common Mistakes to Avoid During Shower Valve Replacement
While replacing your shower valve is a straightforward task, there are common mistakes homeowners make. Avoid these pitfalls:
4.1 Mistake 1: Not Turning Off the Water Supply
It’s crucial to turn off the water supply before starting any plumbing work. Failing to do so can result in water spilling everywhere, causing damage to your bathroom or even flooding the area.
4.2 Mistake 2: Using the Wrong Valve Size
Ensure that the replacement shower valve is the correct size for your plumbing setup. A valve that’s too small or too large may cause water flow problems or leaks.
4.3 Mistake 3: Overtightening Connections
While it’s important to tighten the valve connections, overtightening can cause damage. Use a gentle but firm hand when tightening the nuts to avoid damaging the valve or pipes.
5. Maintenance Tips for Your Shower Valve
To keep your new shower valve in good condition, follow these simple maintenance tips:
- Regularly inspect the valve for signs of wear or leaks.
- Keep the valve clean and free of mineral deposits by wiping it down periodically.
- Ensure that seals and washers are in good condition to avoid leaks.
- If the valve starts to leak again, check the connections and replace any worn parts immediately.
By following these maintenance tips, you can prolong the life of your shower valve and keep your bathroom in top shape.
For more plumbing supplies or to find the right tools and materials for your DIY project, visit Plumbers Supply Hub for great deals and expert advice!


 Roto-Rooter Plumbing & Water Cleanup4.0 (806 reviews)
 Hockers Home Services4.0 (1566 reviews)
 Dugger Jr Ernest M3.0 (2 reviews)
 Dan Wood Company4.0 (2965 reviews)
 AW Crooks Plumbing, Heating & Cooling4.0 (780 reviews)
 Hutson Plumbing3.0 (93 reviews)
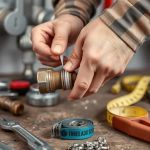 How to Repair a Broken Thread on a Pipe
 How to Choose Fixtures for a Water-Smart Bathroom
 What to Check When You Have Low Water Pressure in Your Home
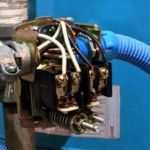 How to Reset a Tripped Pressure Switch in a Well Pump
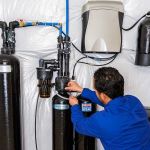 Why Your Water Softener Isn’t Working and How to Fix It
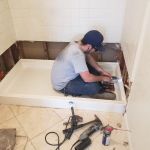 How to Replace a Shower Pan or Base | Plumbers Supply Hub