

- 1-Assessing-Your-Home-Plumbing-Needs
- 2-Gathering-Tools-And-Materials
- 3-Understanding-Pipe-Types-And-Materials
- 4-Planning-The-Pipe-Layout
- 5-Shutting-Off-Water-Supply
- 6-Preparing-Old-Pipes-For-Replacement
- 7-Cutting-And-Fitting-New-Pipes
- 8-Joining-And-Sealing-Connections
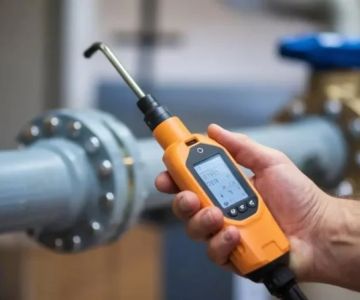
- 9-Testing-For-Leaks
- 10-Installing-Drains-And-Vent-Pipes
- 11-Insulating-And-Protecting-Pipes
- 12-Final-Checks-And-Adjustments
- 13-Maintenance-Tips-For-Pipe-Systems
- 14-Safety-Considerations
- 15-Troubleshooting-Common-Issues
- 16-Veteran-Plumber-Advice
- 17-Case-Study-Home-Pipe-Replacement
- 18-Selecting-Quality-Piping-Materials
- 19-Avoiding-Common-Mistakes
- 20-Documenting-Your-Work
- 21-Preparing-For-Future-Expansion
- 22-Budgeting-And-Cost-Estimates
- 23-Using-Specialty-Tools
- 24-Ensuring-Compliance-With-Codes
- 25-Integrating-With-Existing-Plumbing
- 26-Considering-Water-Pressure-And-Flow
- 27-Protecting-Pipes-From-Freezing
- 28-Working-With-Soldering-And-Fittings
- 29-Using-Correct-Sealants
- 30-Labeling-Pipes-For-Ease-Of-Maintenance
- 31-Handling-Emergency-Repairs
- 32-Coordinating-With-Other-Home-Systems
- 33-Cleaning-Up-After-Installation
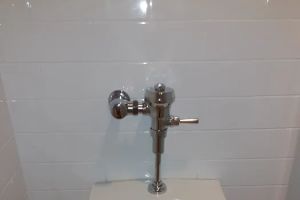
- 34-Checking-Valves-And-Faucets
- 35-Monitoring-New-Pipe-System-Performance
- 36-Educating-Family-Members
- 37-Planning-For-Renovations-Or-Additions
- 38-Choosing-Durable-Materials
- 39-Using-Professional-Services
- 40-Maintaining-Pipe-Cleanliness
- 41-Optimizing-Water-Efficiency
- 42-Following-Up-On-Installation-Quality
- 43-Recommended-Supplies-And-Products
1. Assessing Your Home Plumbing Needs
Begin by evaluating your current plumbing system. Identify outdated, leaking, or insufficient pipes, and consider your household's water usage and potential expansion needs.
2. Gathering Tools and Materials
Collect essential tools such as pipe cutters, wrenches, soldering kits, pipe sealants, and appropriate safety gear. Quality materials ensure long-lasting performance.
Upeace plumbing and leak detection
WalnutLos Angeles CountyCalifornia
19029 Amber Valley Dr, Walnut, CA 91789, USA
3. Understanding Pipe Types and Materials
Learn the differences between copper, PEX, PVC, and galvanized pipes. Each material has advantages depending on cost, durability, and water type.
4. Planning the Pipe Layout
Create a detailed plan of the new pipe system, including routing, valve placement, and integration with existing fixtures. Accurate planning reduces installation errors.
5. Shutting Off Water Supply
Before installation, turn off the main water supply. Drain existing pipes to prevent water damage and ensure a safe working environment.
6. Preparing Old Pipes for Replacement
Remove or disconnect old pipes, clean connections, and inspect walls and floors for hidden damage that could affect new pipe installation.
7. Cutting and Fitting New Pipes
Measure accurately and cut pipes to fit the planned layout. Dry-fit pipes before permanent installation to confirm alignment and spacing.
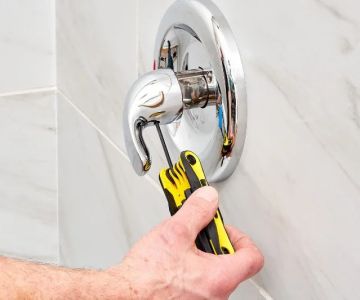
8. Joining and Sealing Connections
Use appropriate joining methods—soldering for copper, push-fit for PEX, solvent for PVC—to ensure leak-free, durable connections.
9. Testing for Leaks
Once installed, test the system under pressure. Check all joints, valves, and connections to confirm there are no leaks.
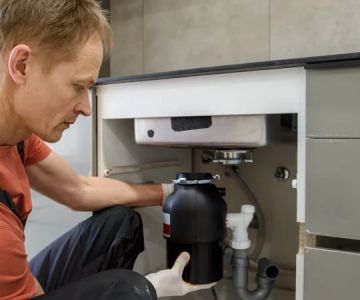
10. Installing Drains and Vent Pipes
Ensure proper drainage and venting for waste water. Correct slope and vent placement prevent blockages and sewer gas issues.
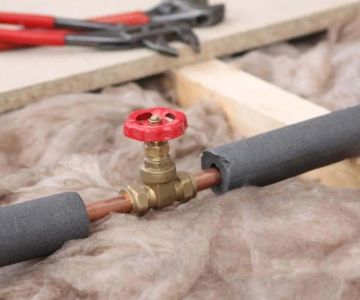
11. Insulating and Protecting Pipes
Apply insulation on exposed pipes to prevent freezing and reduce heat loss. Protect pipes from physical damage and environmental factors.
12. Final Checks and Adjustments
Inspect the entire system, verify flow rates, and adjust fittings as necessary to optimize performance before fully integrating with household plumbing.
13. Maintenance Tips for Pipe Systems
Regularly inspect for leaks, clean drains, and replace worn-out components. Preventive maintenance prolongs pipe lifespan and reduces emergencies.
14. Safety Considerations
Wear protective gear, use caution with power tools, and ensure electrical devices near water are properly insulated. Safety prevents accidents and injury.
15. Troubleshooting Common Issues
Address low pressure, leaking joints, and clogs promptly. Understanding common problems allows for quick fixes and avoids larger damage.
16. Veteran Plumber Advice
Experienced plumbers recommend precise measurements, high-quality materials, and thorough leak testing to ensure a professional-grade installation.
17. Case Study: Home Pipe Replacement
Review real-life examples of successful pipe system installations, highlighting planning, execution, and problem-solving strategies.
18. Selecting Quality Piping Materials
Invest in durable materials that meet building codes and withstand local water conditions. Quality pipes reduce long-term repair costs.
19. Avoiding Common Mistakes
Common mistakes include incorrect measurements, poor sealing, insufficient slope, and ignoring local plumbing codes. Careful planning prevents these issues.
20. Documenting Your Work
Keep records of pipe types, layouts, and installation dates. Documentation helps with future maintenance and troubleshooting.
21. Preparing for Future Expansion
Install extra pipe runs or valves for potential home additions. Planning ahead saves labor and materials later.
22. Budgeting and Cost Estimates
Estimate material, labor, and tool costs accurately. Allow a buffer for unexpected expenses to ensure a smooth project.
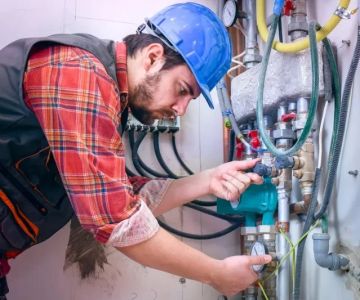
23. Using Specialty Tools
Tools like pipe benders, threading machines, and inspection cameras improve installation accuracy and efficiency.
24. Ensuring Compliance with Codes
Follow local building codes and obtain necessary permits. Compliance ensures safety, legality, and home resale value.
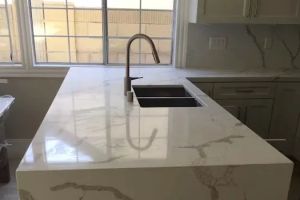
25. Integrating With Existing Plumbing
Connect new pipes carefully to old systems. Ensure compatibility and avoid introducing leaks or pressure issues.
26. Considering Water Pressure and Flow
Design the system to maintain optimal pressure throughout the house. Proper pipe diameter and layout prevent weak flow.
27. Protecting Pipes From Freezing
Use insulation, heat tape, or pipe sleeves in cold areas. Freeze protection prevents bursts and costly damage.
28. Working With Soldering and Fittings
Practice proper soldering techniques for copper and tight-fitting connections for all joints. Correct application ensures leak-free pipes.
29. Using Correct Sealants
Choose sealants appropriate for the pipe material, pressure, and temperature. Proper sealants improve longevity and reliability.
30. Labeling Pipes for Ease of Maintenance
Mark hot, cold, and waste lines to simplify future repairs and modifications. Clear labeling saves time and reduces errors.
31. Handling Emergency Repairs
Keep emergency tools, shut-off valves, and spare fittings accessible. Quick response prevents flooding or major damage.
32. Coordinating With Other Home Systems
Ensure pipes do not interfere with electrical, HVAC, or structural components. Coordination prevents conflicts and future maintenance issues.
33. Cleaning Up After Installation
Remove debris, flush water lines, and disinfect where needed. Proper cleanup ensures a safe, functional system.
34. Checking Valves and Faucets
Test all valves and faucets for smooth operation, proper sealing, and appropriate flow to verify system functionality.
35. Monitoring New Pipe System Performance
Observe pressure, leak signs, and water quality over time. Early detection of issues prevents costly repairs.
36. Educating Family Members
Teach household members how to operate shut-off valves, avoid clogging drains, and recognize potential plumbing issues.
37. Planning for Renovations or Additions
Coordinate pipe layout with future renovation plans to prevent rework and ensure seamless integration of new areas.
38. Choosing Durable Materials
Select materials resistant to corrosion, scaling, and wear to extend the life of your plumbing system.
39. Using Professional Services
When unsure, consult licensed plumbers. Professional expertise ensures correct installation, compliance, and safety.
40. Maintaining Pipe Cleanliness
Flush systems periodically, clean strainers, and prevent debris buildup to maintain optimal performance.
41. Optimizing Water Efficiency
Use low-flow fixtures and design piping for efficient distribution to reduce waste and lower utility bills.
42. Following Up on Installation Quality
Inspect all joints, test pressure, and verify installation standards. Address any minor issues immediately to maintain system integrity.
43. Recommended Supplies and Products
For reliable products, tools, and pipe materials, visit Plumbers Supply Hub. Expert-recommended supplies help achieve professional-quality home plumbing installations.

 NB Plumbing5.0 (9 reviews)
 Plumbing Concepts, Inc.4.0 (440 reviews)
 Royal Flush Plumbing3.0 (15 reviews)
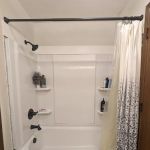 Peterson Plumbing4.0 (29 reviews)
 Helton Plumbing5.0 (219 reviews)
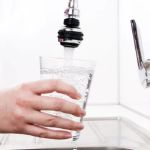 Holmes Water Treatment Co4.0 (49 reviews)
 How to Clear a Clogged Shower Drain: Effective Tips for Homeowners | Plumbers Supply Hub
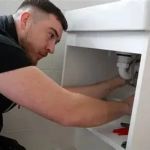 How to Prevent Plumbing Issues When Renovating Your Bathroom
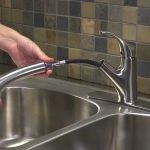 How to Install a New Sink Faucet with Pull-Out Sprayer
 The Ultimate Guide to Choosing the Right Plumbing Fixtures for Your Home
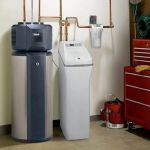 How to Install a Water Softener: DIY Plumbing Tips
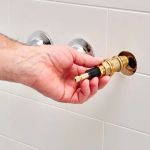 How to Replace an Outdated Plumbing Fixture Safely: A Step-by-Step Guide