
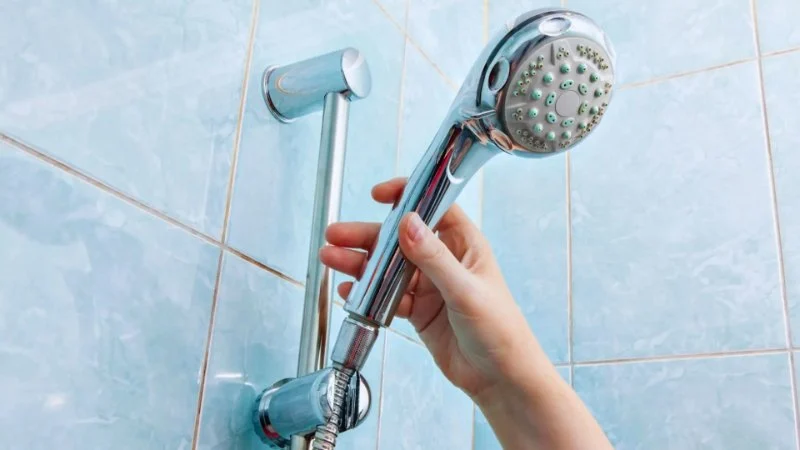
1. Why Should You Replace Your Showerhead?
Replacing your showerhead can greatly enhance your bathroom experience, whether you're upgrading to a modern showerhead with water-saving features or simply replacing a worn-out fixture. A new showerhead can improve water flow, increase energy efficiency, and even give your bathroom a fresh new look. Installing a showerhead is a simple DIY plumbing project that requires minimal tools and effort, making it an ideal project for homeowners who want to save money on plumbing services.
In this guide, we’ll walk you through the process of installing a new showerhead, covering everything from selecting the right model to ensuring a secure fit. With the right approach and tools, you can complete this project in no time!

2. Tools You’ll Need for Installing a New Showerhead
- Wrench: Essential for Removing the Old Showerhead
- Plumber's Tape: For Ensuring a Leak-Free Seal
- New Showerhead: Selecting the Right One for Your Needs
2.1 Wrench: Essential for Removing the Old Showerhead
A wrench is one of the most important tools for installing a new showerhead. You’ll need it to loosen and remove the existing showerhead. An adjustable wrench is ideal because it can fit different sizes of shower arm threads. If your old showerhead is particularly tight, you may need to apply some extra force, but be careful not to damage the plumbing underneath.
If the old showerhead is stuck, try using a cloth or rubber strap to give you better grip, or use a lubricant like WD-40 to loosen it before attempting again.

Cisneros Brothers Plumbing, Heating & AC Repair, Water Damage Restoration & Flood Services
TemeculaRiverside CountyCalifornia
28822 Old Town Front St #304, Temecula, CA 92590, USA
2.2 Plumber's Tape: For Ensuring a Leak-Free Seal
Plumber’s tape, also known as Teflon tape, is a must-have when installing a new showerhead. It helps create a watertight seal between the shower arm and the showerhead, preventing leaks. After removing the old showerhead, wrap plumber’s tape around the threads of the shower arm before installing the new one.
Simply wrap the tape in a clockwise direction around the threads, ensuring you cover the entire exposed surface. Be careful not to use too much tape, as that can make it difficult to screw on the new showerhead.
2.3 New Showerhead: Selecting the Right One for Your Needs
When selecting a new showerhead, consider factors such as water flow, design, and features like water-saving capabilities or different spray settings. Some showerheads are designed to conserve water while still providing excellent pressure, which is perfect for eco-conscious homeowners. Others come with adjustable spray settings for a more customized shower experience.
Popular types of showerheads include handheld showerheads, rain showerheads, and high-pressure showerheads. Each type offers a unique experience, so choose the one that best fits your needs and bathroom aesthetic.
3. Step-by-Step Guide to Installing Your New Showerhead
- Step 1: Remove the Old Showerhead
- Step 2: Prepare the Shower Arm
- Step 3: Install the New Showerhead
- Step 4: Check for Leaks and Test the Showerhead
3.1 Step 1: Remove the Old Showerhead
Start by using your wrench to unscrew the old showerhead from the shower arm. Be sure to protect the surrounding area with a cloth to avoid scratching the finish. Turn the showerhead counterclockwise until it comes loose. If there is any debris or mineral buildup on the threads, clean them off with a cloth or an old toothbrush to ensure a smooth installation for the new showerhead.
3.2 Step 2: Prepare the Shower Arm
Once the old showerhead is removed, inspect the shower arm for any damage or debris. If necessary, clean the threads with a cloth or brush. Apply plumber’s tape to the threads of the shower arm, wrapping it clockwise in a few layers. This tape will help seal the connection and prevent any leaks once the new showerhead is installed.
3.3 Step 3: Install the New Showerhead
Now, take your new showerhead and screw it onto the shower arm. Be sure to tighten it by hand first, then use the wrench to gently tighten it further. Be careful not to overtighten, as this could damage the threads or cause cracks in the showerhead. Once the new showerhead is securely attached, you’re almost done!
3.4 Step 4: Check for Leaks and Test the Showerhead
Turn on the water to check for leaks. If you notice any water leaking around the showerhead, turn off the water and check the connection. You may need to apply more plumber’s tape or tighten the showerhead a little more. Once you’re confident that there are no leaks, test the water pressure and spray settings to make sure everything is working properly.
4. Real-Life Example: How Jane Successfully Installed Her New Showerhead
Jane, a DIY enthusiast from California, decided to replace her old showerhead with a sleek, high-pressure model. After watching a quick tutorial online, she followed the steps outlined above and installed the new showerhead herself in just under 30 minutes. The result was a powerful shower experience and a sense of accomplishment that made her more confident in handling other simple plumbing projects around the house.
Jane’s success shows that with the right tools and a little bit of patience, installing a new showerhead is a project that almost anyone can complete on their own, saving both time and money.
If you’re ready to replace your showerhead, visit Plumbers Supply Hub for a wide range of showerheads, plumbing tools, and expert advice to help you get the job done right!


 All Rooter Inc.4.0 (80 reviews)
 Fossler Plumbing5.0 (66 reviews)
 Orange Coast Plumbing4.0 (408 reviews)
 Bluegrass Plumbing4.0 (9 reviews)
 Mr Drain Saver Plumbing & Rooter.5.0 (56 reviews)
 TN Plumbing Solutions4.0 (554 reviews)
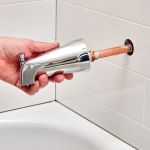 How to Replace a Bathtub Spout with Diverter
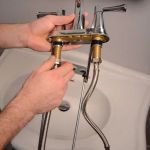 How to Install a New Sink Faucet: A Complete DIY Guide
 How to Repair a Junction That Is Leaking Under Slab
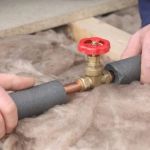 How to Insulate Exposed Pipes Without Blocking Access
 How to Detect Hidden Damage After a Plumbing Leak
 How to Replace a Sink Overflow Tube: A Complete Step-by-Step Guide