
- 1-Why-Early-Leak-Detection-Matters
- 2-Common-Signs-Your-Plumbing-May-Be-Leaking
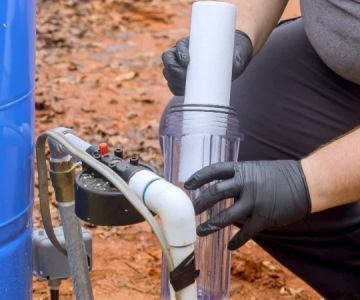
- 3-Simple-Tools-You-Can-Use-for-Leak-Testing
- 4-Step-by-Step-Plumbing-Leak-Inspection-Process
- 5-How-to-Find-Hidden-Leaks-Behind-Walls-and-Floors
- 6-Real-Homeowner-Stories-and-Lessons-Learned
- 7-When-a-DIY-Test-Is-Not-Enough
- 8-Long-Term-Leak-Prevention-and-Maintenance
1. Why Early Leak Detection Matters
Water leaks are among the most common and expensive household issues faced by homeowners across the United States. What often begins as a tiny drip hidden behind a cabinet or inside a wall can gradually turn into structural damage, mold growth, flooring deterioration, and unexpectedly high water bills.
One of the biggest misconceptions among homeowners is that significant plumbing leaks are always obvious. In reality, many leaks remain undetected for weeks or even months. A slow leak under a sink may only release a few ounces of water each day, but over time, that moisture can damage cabinetry, drywall, and flooring.
Early detection offers two major benefits. First, it helps avoid costly repairs. Second, it protects the long-term value of the property. A leak discovered early may require nothing more than a new washer or pipe fitting, while a leak left untreated could result in thousands of dollars in restoration work.
Many professional plumbers agree that routine plumbing inspections are one of the most effective forms of preventive home maintenance. Fortunately, homeowners do not need expensive equipment to perform basic leak testing. Several simple tools and techniques can help identify problems before they become serious.
2. Common Signs Your Plumbing May Be Leaking
Before beginning any plumbing leak test, it is important to recognize the warning signs that often indicate hidden water loss.
510 Plumbing & Rooter Inc.
Los AngelesLos Angeles CountyCalifornia
8588 Telfair Ave, Sun Valley, CA 91352, USA
1. Unexpected Water Bill Increases
A sudden rise in monthly water usage is frequently one of the earliest indicators of a leak. If household water habits remain unchanged but utility costs continue increasing, an unseen leak may be the cause.
2. Damp or Discolored Surfaces
Water stains on ceilings, walls, or floors often suggest moisture accumulation behind finished surfaces. These stains may appear yellow, brown, or darker than surrounding materials.
3. Mold and Mildew Odors
Persistent musty smells frequently indicate hidden moisture. Mold thrives in dark, damp spaces and often develops before visible damage appears.
4. Reduced Water Pressure
A significant leak can affect water pressure throughout the plumbing system. While low pressure can have multiple causes, leaks should always be considered as a possibility.
5. Sounds of Running Water
If you hear water movement when all fixtures are turned off, it may signal a hidden leak inside the plumbing system.
Recognizing these early warning signs can save homeowners substantial time, money, and frustration.
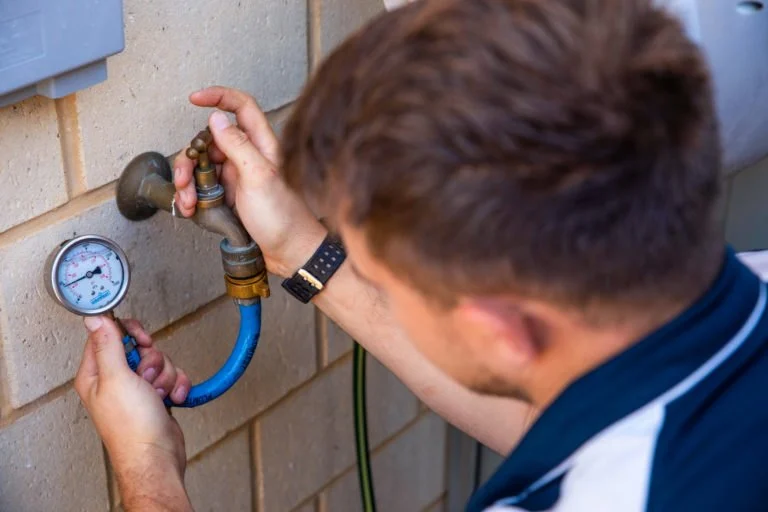
3. Simple Tools You Can Use for Leak Testing
You do not need advanced diagnostic equipment to perform an effective leak inspection. Many common household items can help identify potential plumbing issues.
1. Water Meter
Your home's water meter is one of the most powerful leak detection tools available. It can reveal hidden water usage that is otherwise impossible to notice.
2. Flashlight
A bright flashlight helps inspect dark spaces beneath sinks, behind appliances, inside crawl spaces, and around water heaters.
3. Food Coloring
Food coloring is commonly used to test toilet leaks. A few drops placed in the toilet tank can reveal whether water is silently leaking into the bowl.
4. Dry Paper Towels
Paper towels make it easy to detect small amounts of moisture around fittings, valves, and pipe joints.
5. Moisture Meter
While optional, an affordable moisture meter can identify elevated moisture levels behind walls and beneath flooring materials.
These simple tools provide surprisingly accurate results when used correctly and systematically.
4. Step-by-Step Plumbing Leak Inspection Process
A structured inspection process improves accuracy and reduces the chance of overlooking hidden leaks.
Step 1: Turn Off All Water Fixtures
Begin by shutting off faucets, showers, dishwashers, washing machines, irrigation systems, and any appliance connected to the plumbing system.
Step 2: Check the Water Meter
Locate your water meter and record the reading. Avoid using any water for at least one hour.
After waiting, compare the new reading to the original measurement. Any movement may indicate an active leak somewhere in the system.
Step 3: Inspect Visible Plumbing
Use a flashlight to examine exposed pipes under sinks, behind toilets, around water heaters, and near appliances.
Look for corrosion, moisture, discoloration, mineral deposits, or water droplets.
Step 4: Test Toilets
Add several drops of food coloring to the toilet tank. Wait approximately 15 to 20 minutes without flushing.
If color appears in the bowl, the flapper or internal valve may be leaking.
Step 5: Examine Outdoor Plumbing
Inspect hose bibs, irrigation systems, outdoor faucets, and exposed supply lines. Outdoor leaks are often overlooked but can waste significant amounts of water.
This systematic approach helps homeowners identify many common plumbing leaks without specialized training.
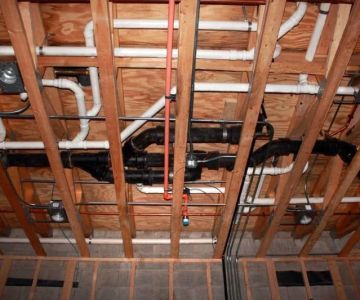
5. How to Find Hidden Leaks Behind Walls and Floors
Some of the most damaging leaks occur in locations that are difficult to access. Detecting these issues requires a combination of observation and simple testing methods.
Temperature and Moisture Clues
Touch walls and flooring in areas near plumbing lines. Unexpected dampness, cool spots, or warped materials may indicate hidden water accumulation.
Watch for Paint and Drywall Changes
Bubbling paint, peeling wallpaper, and soft drywall frequently signal moisture intrusion behind finished surfaces.
Monitor Flooring Conditions
Hardwood floors may begin cupping or buckling when exposed to long-term moisture. Laminate flooring can swell or separate at seams.
Inspect Crawl Spaces and Basements
These areas often reveal plumbing issues before they become visible elsewhere. Check for puddles, moisture buildup, and signs of mold growth.
Homeowners who consistently monitor these indicators are more likely to catch hidden leaks before major damage occurs.
6. Real Homeowner Stories and Lessons Learned
A homeowner in North Carolina noticed a slight increase in water bills over several months. Initially assuming utility rates had increased, he ignored the change. Eventually, a routine meter test revealed a slow leak beneath the home's crawl space.
The leak had been wasting water continuously for nearly six months. Fortunately, it was discovered before structural damage occurred.
In another case, a family in Arizona observed a faint musty odor in a guest bathroom. The room appeared completely dry, and no visible leaks were present. After using a moisture meter, elevated moisture levels were discovered behind the vanity wall.
A small pinhole leak inside a supply line had created ideal conditions for mold growth. Early detection prevented a much larger renovation project.
These examples illustrate how seemingly minor symptoms often indicate underlying plumbing issues that deserve investigation.
7. When a DIY Test Is Not Enough
While many leaks can be identified using simple tools, some situations require professional expertise.
Slab leaks beneath concrete foundations, underground pipe failures, and leaks hidden inside complex wall systems may not be accessible through basic inspection methods.
Professional plumbers use advanced technologies such as acoustic leak detection equipment, thermal imaging cameras, pressure testing systems, and specialized moisture analysis tools.
If your water meter indicates ongoing usage despite extensive inspections, professional evaluation is often the most efficient next step.
For homeowners seeking quality plumbing supplies, maintenance products, diagnostic tools, and professional recommendations, Plumbers Supply Hub provides valuable resources designed to simplify leak detection and plumbing maintenance projects.
Knowing when to transition from DIY troubleshooting to professional assistance can prevent unnecessary damage and costly repairs.
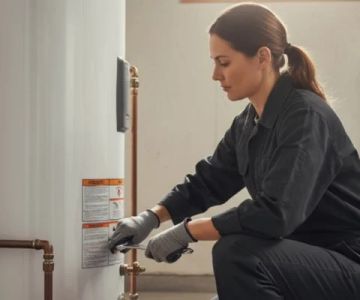
8. Long-Term Leak Prevention and Maintenance
Preventing leaks is often easier and less expensive than repairing them. Establishing a routine plumbing maintenance schedule can significantly reduce the risk of future problems.
Inspect High-Risk Areas Regularly
Pay special attention to water heaters, washing machine hoses, dishwashers, refrigerator water lines, and under-sink plumbing.
Replace Aging Components
Rubber supply lines, toilet flappers, and shutoff valves naturally wear over time. Replacing aging components before failure occurs can prevent unexpected leaks.
Monitor Water Pressure
Excessive water pressure places stress on pipes, fittings, and appliances. Installing a pressure regulator when necessary helps protect the plumbing system.
Perform Annual Leak Checks
Even if no problems are apparent, conducting a yearly water meter test and visual inspection provides peace of mind and supports long-term system reliability.
Successful leak prevention comes from consistency rather than complexity. Small inspections performed regularly often reveal issues long before they become expensive emergencies.
By learning how to test your plumbing for leaks using simple tools, homeowners gain greater control over maintenance costs, reduce water waste, and protect their property from preventable damage. A few basic inspections each year can make a remarkable difference in preserving the health and efficiency of an entire plumbing system.

 TruFlow Plumbing LLC5.0 (2 reviews)
 Herman & Goetz0.0 (0 reviews)
 Henley's Plumbing & Air4.0 (765 reviews)
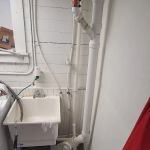 K2 Drain Cleaning, LLC5.0 (8 reviews)
 Viking Plumbing4.0 (742 reviews)
 Mr. Rooter Plumbing of Sioux Falls4.0 (789 reviews)
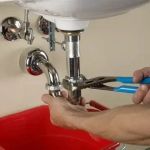 How to Replace a Sink Trap That Rusted Through
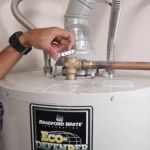 How to Fix a Leaky Water Heater: Step-by-Step Instructions
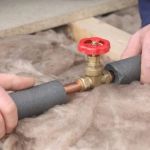 How to Insulate Exposed Pipes Without Blocking Access
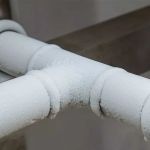 What Causes Frozen Pipes and How You Can Prevent It - Expert Tips
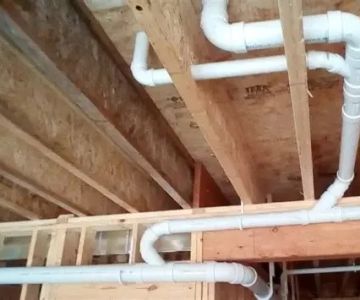
 How to Install a New Pipe System for Your Home
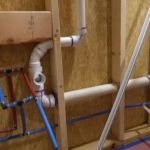 What to Know Before Doing Plumbing in a Tiny Home