

1. How to Replace a Shower Drain: A DIY Plumbing Project
- Why Replace a Shower Drain?
- Tools and Materials You’ll Need
- Step-by-Step Guide to Replacing a Shower Drain
- Common Mistakes to Avoid When Replacing a Shower Drain
- Get the Right Tools and Parts at Plumbers Supply Hub
2. Why Replace a Shower Drain?
Over time, shower drains can become clogged, corroded, or damaged due to the constant exposure to water, soap, and hair. Replacing a worn-out shower drain not only improves the functionality of your shower but also prevents future water damage and unpleasant odors. Whether your current drain is clogged or simply old and inefficient, replacing it with a new one can restore the flow of water and enhance the overall look of your bathroom.
3. Tools and Materials You’ll Need
Before you start replacing your shower drain, gather the necessary tools and materials. Having everything ready ensures a smooth and efficient project:
LA Plumbing Company | Plumber in Torrance Redondo Beach, CA
TorranceLos Angeles CountyCalifornia
609 Amapola Ave, Torrance, CA 90501, USA
3.1 Tools
- Plumber’s wrench or pipe wrench
- Flathead screwdriver
- Rubber gloves
- Bucket or towel to catch water
- Drill (optional, if needed for cutting through grout)
3.2 Materials
- Replacement shower drain (choose one that matches your shower's size and type)
- Plumber’s putty or silicone sealant
- Channel lock pliers (for tight spots)
- New drain cover or grate (if needed)
4. Step-by-Step Guide to Replacing a Shower Drain
Replacing a shower drain might sound complicated, but with the right tools and guidance, it's a manageable DIY project. Follow these steps to get it done:
4.1 Step 1: Turn Off the Water
Before starting any plumbing work, always ensure that the water supply to the shower is turned off. This prevents any water from flowing while you're working on the drain and keeps the area dry for repairs.
4.2 Step 2: Remove the Old Drain Cover
Using a flathead screwdriver or pliers, remove the drain cover from your shower. If the cover is screwed in place, simply unscrew it. In some cases, you may need to pry it out with a screwdriver if it’s stuck or corroded.
4.3 Step 3: Loosen the Drain Assembly
Once the cover is removed, use a plumber’s wrench or pipe wrench to unscrew the drain assembly from the shower floor. You may need to use some force if it’s stuck due to mineral buildup or rust. Have a bucket or towel ready to catch any excess water that might remain in the pipes.
4.4 Step 4: Clean the Area
Once the old drain is removed, clean the area around the drain thoroughly. Use a brush to remove any debris, old caulk, or soap scum that may have accumulated. This step is important for ensuring the new drain seals properly and doesn’t leak.
4.5 Step 5: Apply Plumber’s Putty
Apply a ring of plumber’s putty or silicone sealant around the edge of the new drain before installation. This will create a watertight seal that prevents leaks. If using silicone sealant, be sure to follow the manufacturer’s instructions for application.
4.6 Step 6: Install the New Drain
Place the new drain into the hole and tighten it into place with your wrench. Make sure it's securely fastened but be careful not to overtighten, as this could crack the shower floor.
4.7 Step 7: Attach the New Drain Cover
Once the drain is securely in place, attach the new drain cover or grate. This will give your shower a fresh, updated look while ensuring the functionality of the drain.
4.8 Step 8: Test the Drain
Finally, turn the water back on and test the new drain. Run water through the shower to ensure it's draining properly and check for any leaks around the edges. If you notice any leaks, re-tighten the drain assembly or apply more sealant as needed.
5. Common Mistakes to Avoid When Replacing a Shower Drain
While replacing a shower drain is a relatively straightforward process, there are a few common mistakes that DIYers often make. Avoid these pitfalls to ensure your project goes smoothly:
5.1 Using the Wrong Drain Size
Before purchasing a replacement drain, ensure it matches the size and type of your current drain. Choosing the wrong size can result in leaks and improper drainage.
5.2 Forgetting to Use Plumber’s Putty
Plumber’s putty is essential for creating a watertight seal between the drain and the shower floor. Skipping this step can lead to leaks and water damage.
5.3 Overtightening the Drain
While it’s important to securely tighten the drain, overtightening can crack the shower floor or damage the drain. Be sure to follow manufacturer instructions for proper torque settings.
6. Get the Right Tools and Parts at Plumbers Supply Hub
If you're looking for quality plumbing tools and parts for your DIY plumbing projects, visit Plumbers Supply Hub. We offer a wide selection of shower drains, plumber’s putty, and all the necessary tools to complete your plumbing repairs efficiently and correctly. Check out our store today for all your plumbing needs!


 Advantage Plumbing & Rooter5.0 (214 reviews)
 LP Quality Air and Plumbing5.0 (36 reviews)
 Bob's Plumbing & Drain Cleaning4.0 (36 reviews)
 AA Plumbing and Drain Cleaning2.0 (35 reviews)
 Generations Plumbing Co5.0 (55 reviews)
 Medley Plumbing4.0 (507 reviews)
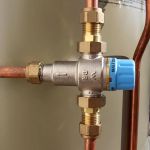 How to Replace a Mixing Valve for Tempered Water | Plumbers Supply Hub
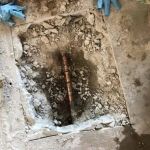 How to Detect a Hidden Slab Leak: A Complete Guide for Homeowners
 How to Replace a Bathtub Spout with Diverter: Step-by-Step Guide
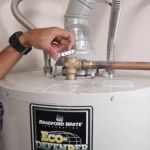 How to Fix a Leaky Water Heater: Step-by-Step Instructions
 Why Sometimes You Get No Hot Water in Certain Fixtures
 How to Detect and Stop Galvanic Corrosion in Pipes