
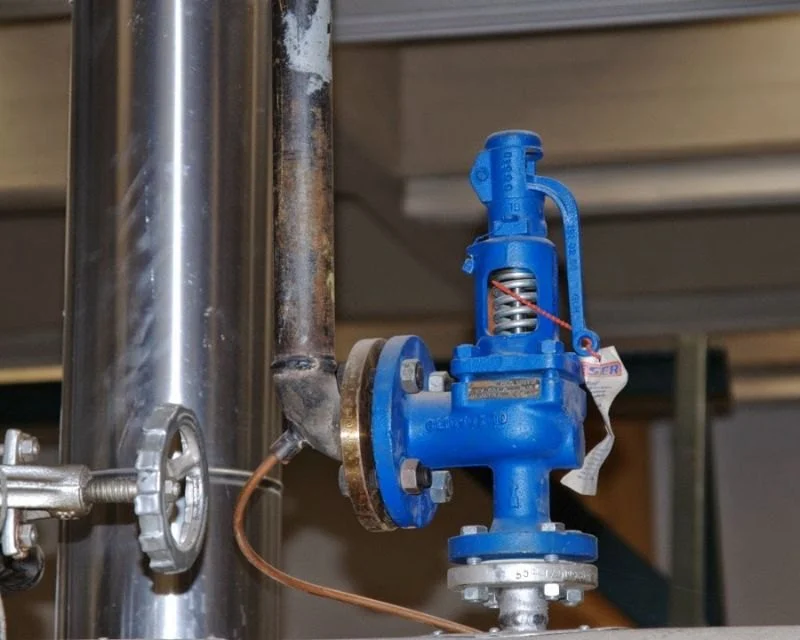
Understanding the Pressure Relief Valve
A pressure relief valve (PRV) is an essential component of your plumbing system, primarily used in water heaters and other pressurized systems. Its job is to prevent dangerous overpressure conditions that can lead to damage or even hazardous situations. If the PRV becomes faulty, it can cause water pressure issues, leaks, or even system failure. In this guide, we’ll explain how to identify a faulty PRV and provide a step-by-step process for replacing it, ensuring your plumbing system stays safe and efficient.
Evans Plumbing Inc.
Costa MesaOrange CountyCalifornia
1720 Whittier Ave suite b, Costa Mesa, CA 92627, USA
Common Signs of a Faulty Pressure Relief Valve
Before jumping into replacing a faulty valve, it’s important to recognize the signs that indicate your pressure relief valve needs attention. Below are the most common symptoms of a malfunctioning PRV:

1. Leaking Water
If you notice water pooling around the valve or from the drain pipe, it’s likely that the valve is leaking. This could mean the valve has become worn or its internal components are malfunctioning, causing water to escape unnecessarily.
2. No Pressure Relief
If your system is under excessive pressure but the valve isn’t triggering, it may not be functioning as intended. This could lead to dangerously high pressure in the system, increasing the risk of damage or even rupture.
3. Sudden Spikes in Water Temperature
When the pressure relief valve fails, it can result in sudden changes in water temperature, especially in water heaters. This could mean the valve isn’t regulating pressure properly, which can affect the efficiency of your heating system.
How to Replace a Faulty Pressure Relief Valve
Now that you know the common signs of a faulty pressure relief valve, let’s walk through the process of replacing it step by step. This job can typically be handled by a confident DIYer, but make sure to follow all safety procedures.
1. Gather Your Tools
Before starting the replacement process, make sure you have the necessary tools and materials. You’ll need:
- A new pressure relief valve (make sure it matches the specifications of your system)
- Wrenches (adjustable or pipe wrenches)
- Pliers
- Thread sealant or Teflon tape
- Bucket or towel for draining
- Safety gloves and goggles
2. Turn Off the Water Supply
Safety is the first step in replacing the valve. Start by turning off the water supply to your system. If you’re working with a water heater, ensure that it’s also turned off and cooled down to avoid any burns or accidents. It’s important to relieve any pressure in the system before attempting to replace the valve.
3. Drain the System
Once the water is turned off, drain the system to relieve pressure. For water heaters, use a hose connected to the drain valve to empty the tank. This will help reduce any residual pressure that may interfere with the valve replacement process.
4. Remove the Faulty Valve
Use your wrench or pliers to loosen and remove the faulty pressure relief valve. Be careful not to damage the surrounding pipes or components. It’s often helpful to rotate the valve counterclockwise to remove it from the threads. Make sure the old valve is completely detached before proceeding.
5. Install the New Valve
Take your new pressure relief valve and apply thread sealant or Teflon tape to the threads to ensure a tight, leak-free fit. Carefully screw the new valve into place, making sure it is aligned correctly. Use the wrench to tighten it, but avoid over-tightening, which can damage the threads or valve body.
6. Test the Pressure Relief Valve
Once the new valve is installed, turn the water supply back on slowly. Check the system for any leaks and ensure that the valve operates correctly. In some cases, you may need to manually test the valve by lifting the lever to ensure it opens and closes properly. If everything is functioning smoothly, you’ve successfully replaced the valve!
When to Call a Professional Plumber
While replacing a faulty pressure relief valve is a relatively simple process, there are times when it’s best to call in a professional. If you’re uncomfortable with the process, don’t have the proper tools, or if your plumbing system seems more complex, a licensed plumber can handle the replacement safely and effectively. They can also ensure that the new valve is correctly calibrated for your system.
Get the Best Plumbing Products from Plumbers Supply Hub
If you need to replace your pressure relief valve or any other plumbing components, visit Plumbers Supply Hub for high-quality products. We offer a wide selection of valves, tools, and plumbing accessories designed to meet your needs. Shop with us for reliable, durable products that will help you maintain your home’s plumbing system.


 Dale Hendricks Plumbing Inc4.0 (8 reviews)
 Roto-Rooter Plumbing & Water Cleanup4.0 (515 reviews)
 Charge Construction & Plumbing LLC5.0 (72 reviews)
 Blaylock Plumbing Co4.0 (57 reviews)
 De Araujo Mechanical5.0 (6 reviews)
 Hugunin Sewer & Plumbing, LLC4.0 (71 reviews)
 How to Replace an In-Wall Shower Drain
 The Complete Guide to Replacing a Kitchen Sink Drain
 How to Fix a Leaky Showerhead in Just a Few Steps
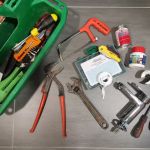 The Essential Plumbing Emergency Kit Every Homeowner Needs: Key Tools for Fast Fixes
 What to Do When a Toilet Overflows Frequently - Expert Tips
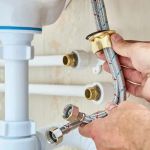 The Best Ways to Keep Your Plumbing System Efficient and Leak-Free