
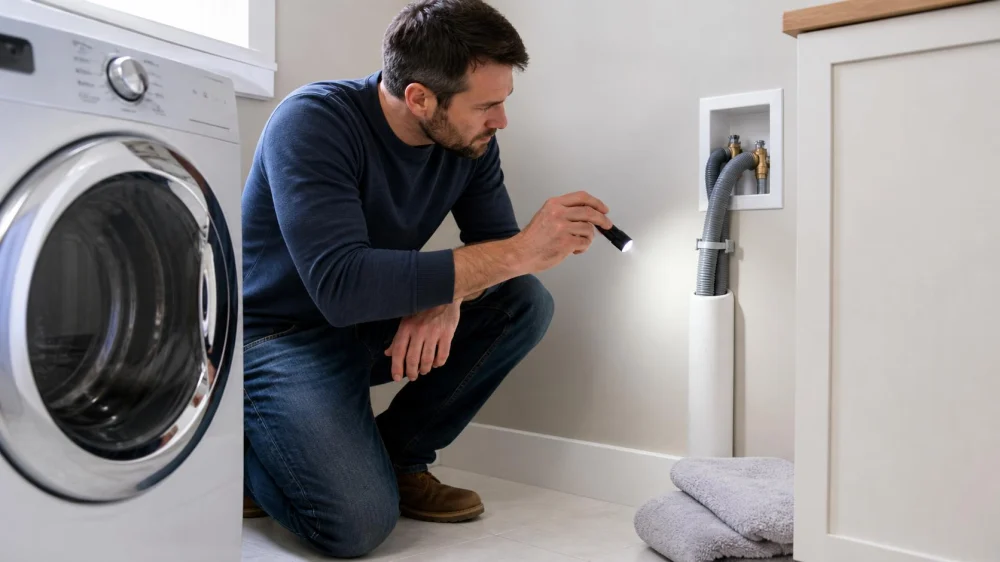
Washing Machine Drain Hose: Check Height, Fit, and Flow
On this page
Quick answer
Compare the washing machine drain hose with the appliance installation instructions and local plumbing requirements. Confirm the hose is undamaged, unkinked, secured against jumping out, inserted only as directed, and not sealed airtight into the standpipe. Keep the required drain height and air path, verify the standpipe handles pump-out without rising water, and stop the machine immediately if leaking, backing up, or electrical hazards appear.
This guide supports a visual homeowner check in the United States. It does not provide universal dimensions because appliance models, standpipes, laundry sinks, drain capacity, codes, and approved connection methods differ.
How the drain setup works
A washing machine drain system carries pumped wastewater through the appliance hose into an approved standpipe, laundry sink, or other connection while preventing spills, backflow, and unintended siphoning. The hose route and receiving drain must work together.
If the hose is too low, pushed too far, sealed improperly, kinked, or loosely placed, the washer may drain incorrectly or water may spill. If the household drain is restricted or undersized for the flow, water can rise in the standpipe even when the appliance hose is sound.
The washer manual identifies the permitted drain configurations, height range, insertion method, hose support, extension limits, and accessories for that model. Plumbing rules may add requirements for traps, vents, standpipe dimensions, air gaps, or fixtures.
City Plumbing Service Inc.
WhittierLos Angeles CountyCalifornia
14055 Lambert Rd, Whittier, CA 90605, USA
Inspect the hose and connection
- Make the area safe. Pause the appliance, keep the floor dry, and do not touch plugs or electrical controls while wet.
- Read the installation guide. Identify the approved drain route and required hose position before moving anything.
- Trace the hose. Look for crushing behind the machine, sharp bends, abrasion, bulges, splits, loose couplings, or unsupported weight.
- Check the receiving point. Confirm the hose is retained by the approved guide or support but is not sealed into the standpipe unless the documented system specifically requires a different fitting.
- Inspect the standpipe or sink. Look for stains, lint residue, slow drainage, loose fittings, movement, or prior overflow marks.
- Preserve access. Keep shutoffs, drain connection, plug, and service route reachable without pulling on hoses.
Do not pull the washer forward if it is heavy, stacked, tightly installed, or likely to strain water, drain, gas, electrical, or vent connections. Ask an appliance technician or plumber for safe access.
Test one cycle safely
Only test when the setup appears safe and the floor, plug, outlet, and controls are dry. Stay present for the drain portion of a small or manufacturer-approved test cycle. Use a flashlight from a dry position to observe the hose, standpipe, nearby connections, and floor.
Stop or pause according to the appliance instructions if the hose moves, water rises near the standpipe rim, the sink drains slowly, a leak appears, or unusual noise begins. Shut off water or power only when it is safe and you know the correct procedure.
Record whether the problem happens during filling, tumbling, pump-out, or after the cycle. Water appearing during fill may involve supply connections rather than the drain hose.
Match symptoms to likely areas
- Hose jumps out: retention may be missing, loose, or incompatible with the manual.
- Water rises in standpipe: the receiving drain may be restricted or unable to handle the pump rate.
- Washer fills and drains continuously: hose height or siphoning may need review.
- Leak behind machine: inspect both drain and supply routes; location alone does not identify the source.
- Odor near connection: trap, vent, sealing, or stagnant water conditions may require plumbing diagnosis.
- Drain error with no visible overflow: the appliance pump, filter, hose, or household drain may be involved.
These are observation categories, not diagnoses. More than one fault can produce the same symptom.
Prevent movement and overflow
Use the manufacturer-approved hose guide, clip, or restraint and keep the hose’s air path as designed. Avoid improvised airtight seals, screws through the hose, tight wire that cuts the hose, or heavy objects that crush it.
Keep lint, stored products, and laundry away from the standpipe. Do not pour chemical drain cleaners into the connection without confirming compatibility and label permission; chemicals can expose the next person who opens the drain.
Recheck the setup after moving the washer, replacing flooring, installing shelves, or servicing nearby plumbing. Consider a leak alarm or appropriate containment plan when allowed by the installation, but do not let a sensor replace inspection and maintenance.
Drain-hose checklist
- Current appliance installation instructions available
- Approved drain type, height, insertion, and support confirmed
- Hose free of kinks, crushing, abrasion, splits, and bulges
- Hose retained without an improvised airtight seal
- Standpipe or sink stable, open, and free of overflow marks
- Supply hoses checked separately from the drain
- Electrical connection and floor dry
- Test observed during pump-out
- Shutoffs and service access kept clear
Limitations and safety notes
- Do not use a generic height or insertion depth in place of model instructions and code.
- Do not run the washer unattended while investigating an overflow.
- Keep away from wet electrical equipment; call appropriate emergency or professional help when needed.
- Do not disassemble pumps, panels, traps, or concealed drains without the required skill and authority.
- Stop using the machine for recurring overflow, sewage backup, damaged hose, unstable standpipe, burning smell, or electrical concern.
Frequently asked questions
Should the drain hose be sealed into the standpipe?
Many systems need an open air path and prohibit an airtight improvised seal. Follow the appliance documentation and local plumbing requirements for the exact connection.
How far should the hose enter the drain?
Use the model-specific instructions. Too little can allow movement; too much can contribute to siphoning or restriction in some setups.
Why does the standpipe overflow only during pump-out?
The washer releases water quickly during that stage. A restricted or unsuitable drain can fail then even if it handles slower flows.
Can I extend the drain hose?
Only with a method and total length approved for the washer. An unsuitable extension can leak, kink, strain the pump, or change drainage.
Who should inspect the problem?
A plumber evaluates the household drain and connection; an appliance technician evaluates washer components. Some cases require both.
Sources and evidence notes
This article follows general appliance-installation and plumbing practice: use model instructions, preserve the intended air path, secure but do not crush the hose, observe pump-out, separate supply leaks from drain problems, and assign appliance or building-drain faults to the appropriate professional.
Next steps
Find the washer’s installation guide, photograph the current hose route, and compare the height, insertion, and restraint with the approved diagram. Correct only safe, documented issues. Then observe one small test cycle. If water rises, the hose moves, or a leak returns, stop use and give the photos and timing notes to a plumber or appliance technician.

 Jayco Plumbing Inc4.0 (45 reviews)
 AC Plumbing, Heating & Air Conditioning4.0 (66 reviews)
 Do Right Rooter Drain Specialists , 24/7 Drain & Plumbing Services4.0 (212 reviews)
 All mechanical0.0 (0 reviews)
 Mid-State Sewer Service5.0 (75 reviews)
 Done Right Plumbing Services4.0 (12 reviews)
 Understanding the Cost of Plumbing Repairs and Budgeting Tips
 The Importance of Professional Plumbing Inspections for Homeowners: Protect Your Home
 How to Repair a Pipe Saddle That Leaks: Complete Guide
 How to Test Backflow Preventers Annually
 How to Prevent Water Damage with Regular Plumbing Inspections
 How to Test Pressure Drop in a Long Pipe Run: Effective Methods for Accurate Results