
- Why-You-Need-to-Replace-the-Gasket-in-Your-Toilet-Tank
- What-You-Need-to-Replace-the-Gasket-in-Your-Toilet-Tank
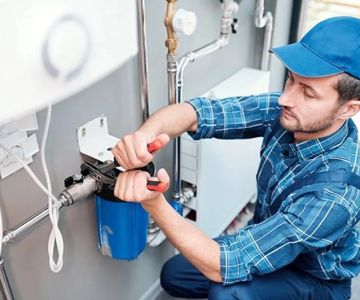
- Step-by-Step-Guide-to-Replacing-the-Gasket-in-Your-Toilet-Tank
- Common-Issues-That-Cause-Toilet-Tank-Leaks
- How-to-Prevent-Leaks-in-Your-Toilet-Tank
- Where-to-Find-The-Best-Gaskets-and-Plumbing-Supplies
Why You Need to Replace the Gasket in Your Toilet Tank
If you’ve noticed water pooling around the base of your toilet, or if your toilet tank seems to be constantly running, the culprit might be a worn-out gasket. The gasket in your toilet tank forms a seal between the tank and the bowl, preventing leaks that can waste water and cause unnecessary damage to your bathroom floors. Replacing this simple yet vital component can not only stop leaks but also improve the efficiency of your toilet.

1. Prevent Water Damage
Over time, the gasket in your toilet tank can deteriorate due to constant exposure to water and pressure. When this happens, it creates gaps that allow water to leak from the tank, which can eventually lead to water damage on the bathroom floor. Regularly replacing your toilet gasket helps prevent these leaks, saving you from costly repairs.
Rancho Cucamonga Plumbing Service
Rancho CucamongaSan Bernardino CountyCalifornia
12729 Jessie Ct, Rancho Cucamonga, CA 91739, USA
2. Save Water and Money
Leaky toilets can waste hundreds of gallons of water each month. This unnecessary water usage can lead to higher water bills. By replacing the gasket, you ensure that your toilet is functioning properly and not wasting water, which will save you money over time.
3. Increase Toilet Efficiency
When the gasket is properly sealed, the flushing mechanism in your toilet works more efficiently. A well-maintained toilet requires fewer repairs and lasts longer, which is a win-win for both your wallet and your home.
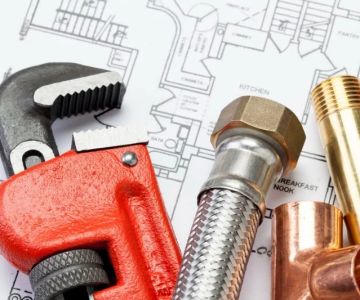
What You Need to Replace the Gasket in Your Toilet Tank
Replacing the gasket in your toilet tank is a relatively simple task, but you will need a few basic tools and materials to get the job done. Here’s what you’ll need:
1. Replacement Gasket
The most important component is, of course, the replacement gasket. These are available at most hardware stores or plumbing supply shops. Be sure to get a gasket that is compatible with your specific toilet model. Most gaskets are made of rubber or silicone, which is durable and resistant to wear from water exposure.
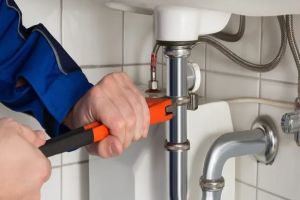
2. Adjustable Wrench
You’ll need an adjustable wrench to remove the bolts securing the tank to the toilet bowl. This tool will allow you to loosen and tighten the nuts without damaging the plumbing components.
3. Sponge or Towel
Before you begin the replacement process, make sure to soak up any excess water in the toilet tank using a sponge or towel. This will prevent water from spilling when you remove the tank from the toilet bowl.
4. Plumber’s Tape (Optional)
Plumber’s tape is optional but can be helpful for ensuring a tight seal between the tank and the bowl. You can wrap some plumber’s tape around the bolts if needed to prevent leaks from occurring when reassembling the toilet.
Step-by-Step Guide to Replacing the Gasket in Your Toilet Tank
Now that you’ve gathered the necessary materials, let’s walk through the process of replacing the gasket on your toilet tank:
1. Turn Off the Water Supply
Before you begin working on the toilet, it’s essential to turn off the water supply to prevent any accidental spills. Locate the shut-off valve behind the toilet and turn it clockwise to close it. Then, flush the toilet to drain as much water as possible from the tank.
2. Remove the Tank from the Toilet Bowl
Use your adjustable wrench to remove the nuts that are securing the toilet tank to the bowl. You may need to carefully lift the tank off the bowl once the nuts are loosened. Keep in mind that the tank can be heavy, so it’s best to have a second person to assist with this step if necessary.
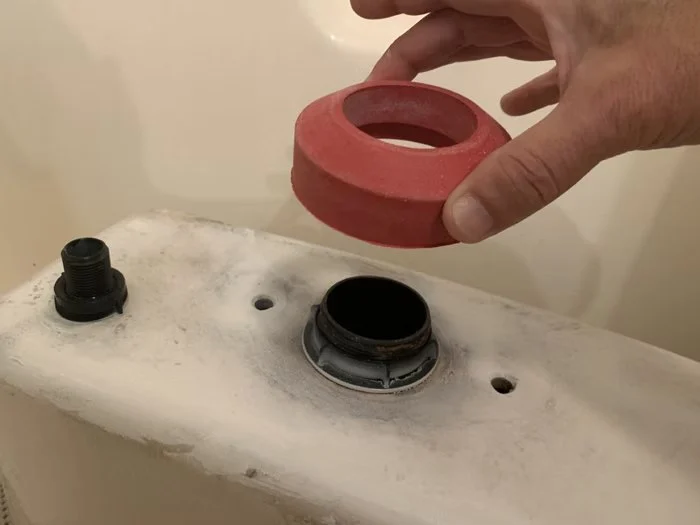
3. Remove the Old Gasket
Once the tank is removed, you’ll see the old gasket that’s sealing the tank to the bowl. Carefully peel away the old gasket, making sure not to leave any remnants behind. Clean the area where the gasket was seated to ensure a smooth surface for the new gasket.
4. Install the New Gasket
Place the new gasket onto the tank where the old one was. Make sure the gasket is properly aligned and sitting flat against the surface. Take care not to stretch or twist the gasket as you place it.
5. Reattach the Tank to the Toilet Bowl
Now that the new gasket is in place, carefully lift the tank back onto the toilet bowl. Align the bolt holes and secure the tank using the nuts you removed earlier. Tighten them with your adjustable wrench, but be careful not to over-tighten, as this could damage the gasket or crack the tank.
6. Turn the Water Supply Back On
After securing the tank, turn the water supply back on by opening the shut-off valve. Allow the tank to fill with water, then check for any leaks around the gasket or bolts. If you notice any leaks, gently tighten the nuts or re-adjust the gasket to ensure a proper seal.
7. Test the Toilet
Finally, flush the toilet a few times to make sure everything is working correctly. If you don’t notice any leaks and the flushing is functioning properly, then you’ve successfully replaced the gasket!
Common Issues That Cause Toilet Tank Leaks
Toilet tank leaks can be caused by several issues beyond just a worn-out gasket. Here are some common causes to look out for:
1. Cracked Tank or Bowl
Over time, the porcelain tank or bowl may develop cracks, leading to leaks. If your gasket is in good condition but you’re still seeing leaks, inspect the tank for any cracks that might need professional repair or replacement.
2. Faulty Flush Valve or Fill Valve
Sometimes leaks are caused by malfunctioning flush or fill valves, which can allow water to escape from the tank. If replacing the gasket doesn’t fix the issue, the problem may lie with one of these valves, and you may need to replace them as well.
3. Loose or Damaged Bolts
If the bolts securing the tank are loose or damaged, water may leak from the connection point. Tightening or replacing the bolts is an easy fix, but make sure not to overtighten, as this can cause other issues.
How to Prevent Leaks in Your Toilet Tank
To keep your toilet tank functioning well and prevent leaks, it’s important to maintain regular inspections and keep the components in good condition:
1. Regularly Check the Gasket
Every few months, inspect the gasket for signs of wear and tear. Replacing the gasket at the first sign of deterioration will help prevent leaks and water damage.
2. Perform Routine Maintenance on the Flush and Fill Valves
Check the flush and fill valves periodically to ensure they’re working properly. Clean any debris or mineral buildup to prevent malfunctions that can lead to leaks.
3. Tighten the Tank Bolts Periodically
Check the bolts securing the tank to the toilet bowl regularly to ensure they’re tight. Loose bolts can cause water to leak out from the connection point.
Where to Find the Best Gaskets and Plumbing Supplies
If you need a replacement gasket or any other plumbing supplies for your toilet, you can find high-quality products at Pet & Puppy. Whether you need a new gasket, wrench, or other parts for your toilet, they offer a wide selection of plumbing products to keep your home in top shape.
With the right tools and a bit of time, replacing the gasket on your toilet tank is a straightforward DIY task that can prevent leaks and improve your toilet’s performance. Regular maintenance will help keep your bathroom functioning smoothly and save you from future headaches!

 Kozik Plumbing Heating & Cooling4.0 (41 reviews)
 Roto Rooter of Greeneville TN4.0 (117 reviews)
 Eastern Plumbing Mechanical Contractors , Inc5.0 (8 reviews)
 Bea Day Plumbers4.0 (18 reviews)
 Pepper's Plumbing4.0 (35 reviews)
 Motor City Plumbing and Drain4.0 (2142 reviews)
 The Complete Guide to Replacing a Kitchen Sink Drain
 How to Fix a Clogged Dishwasher Drain in Your Kitchen
 htmlCopy codeHow to Repair a Loose Bathtub Overflow Plate
 How to Handle Plumbing in Mobile Homes: Essential Tips and Solutions
 How to Effectively Clean Residue and Scale from Faucets and Showerheads
 When to Call a Professional for Sewer Line Issues