
- 1- Tools and Materials You’ll Need
- 2- Preparing for Faucet Installation
- 3- How to Remove the Old Faucet
- 4- Installing the New Faucet
- 5- Troubleshooting Common Faucet Installation Problems
1- Tools and Materials You’ll Need
Before beginning the faucet installation process, gather the necessary tools and materials. Having everything ready will make the process much smoother. Here’s a list of what you’ll need:
- New Faucet: Make sure the new faucet is compatible with your sink type (kitchen or bathroom).
- Wrench or Adjustable Pliers: These will help loosen and tighten nuts and bolts during installation.
- Plumber’s Tape (Teflon Tape): Used to seal threaded connections and prevent leaks.
- Pipe Wrench: For removing any stubborn old fittings or pipes.
- Bucket and Towels: To catch any water that may drip from the pipes during installation.
- Caulk or Silicone Sealant: To prevent leaks around the base of the faucet.
- Plumber’s Putty: Optional, for sealing around the faucet base (usually for kitchen faucets).
2- Preparing for Faucet Installation
Before diving into the installation, take a few steps to prepare your workspace. Proper preparation will save time and prevent mistakes during the process.
- Turn Off the Water Supply: Ensure the water supply to the sink is turned off. Locate the shut-off valves under the sink and turn them clockwise to close them. Turn on the faucet to relieve any remaining pressure in the pipes.
- Clear the Area: Remove any items under the sink to give yourself enough room to work comfortably.
- Inspect the New Faucet: Check the new faucet to ensure it has all the necessary parts, including mounting hardware, hoses, and washers. Review the manufacturer's installation instructions to familiarize yourself with the process.
3- How to Remove the Old Faucet
If you are replacing an old faucet, you’ll need to remove it before installing the new one. Here’s how to do it safely:
- Disconnect the Water Lines: Use an adjustable wrench to loosen the nuts connecting the water supply lines to the faucet. Have a bucket or towels ready to catch any water that may spill out.
- Loosen the Mounting Nuts: Use the wrench or pliers to remove the nuts holding the faucet in place under the sink. If the nuts are tight or rusted, apply some penetrating oil to help loosen them.
- Remove the Faucet: Once the nuts are removed, carefully lift the old faucet out of the sink. You may need to gently wiggle it if it’s stuck. Clean the area around the faucet base to remove any old caulk or debris.
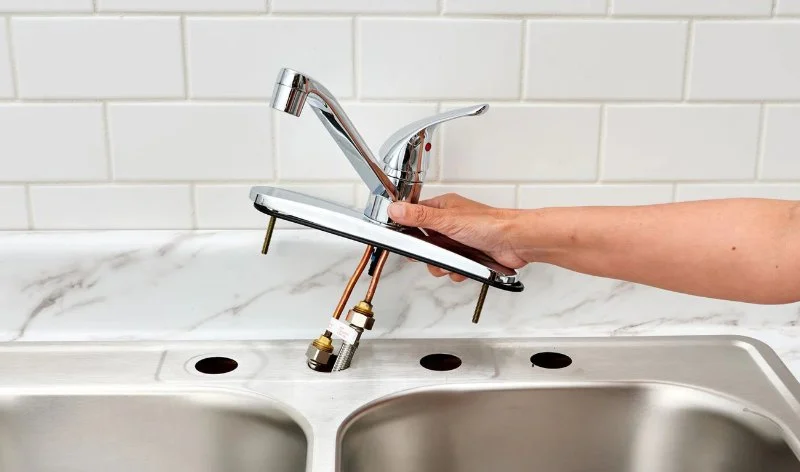
4- Installing the New Faucet
Now that the old faucet is out, it’s time to install the new one. Follow these steps for a secure and leak-free installation:
- Install the Mounting Hardware: Place any necessary mounting hardware (such as washers, nuts, and brackets) onto the faucet base, according to the manufacturer's instructions.
- Position the Faucet: Place the faucet into the holes on your sink. Make sure it’s aligned properly before tightening it in place.
- Tighten the Nuts: Under the sink, use a wrench to tighten the mounting nuts that secure the faucet. Be careful not to overtighten, as this could damage the sink or faucet.
- Connect the Water Supply Lines: Attach the water supply lines to the faucet. Use plumber’s tape on the threaded connections to ensure a secure, leak-free seal. Tighten the nuts with a wrench, but avoid overtightening.
- Seal the Base: Apply a thin layer of plumber’s putty or silicone sealant around the base of the faucet to prevent water from seeping underneath. Smooth it out with your finger to ensure an even application.
5- Troubleshooting Common Faucet Installation Problems
Even with careful installation, you might run into a few issues. Here’s how to handle some common problems:
- Leaking Water Lines: If you notice water leaking from the supply lines, check the connections. Tighten the nuts, and if necessary, remove the lines and reapply plumber’s tape to ensure a proper seal.
- Loose Faucet: If the faucet feels loose after installation, double-check the mounting nuts and ensure they are securely tightened. You may need to use a wrench to tighten them more.
- Uneven Water Flow: If the water flow is uneven, check the faucet’s aerator for blockages. Clean it thoroughly and reinstall it to restore smooth water flow.


 Victor's Plumbing & Water Heater Repair5.0 (1 reviews)
 Reliable Clog-Rod-Drain Specialists4.0 (64 reviews)
 Angry Dave's Plumbing4.0 (51 reviews)
 HRI Plumbing4.0 (13 reviews)
 Crystal Clear Plumbing5.0 (316 reviews)
 Ramco Plumbing Heating & Air5.0 (250 reviews)
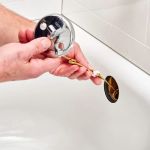 How to Repair a Broken Overflow Pipe in Tub - Step-by-Step Guide
 How to Replace a Bathtub Spout with Diverter: Step-by-Step Guide
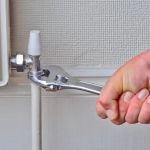 Why Your Pipes Rattle at Night and What to Fix
 How to Fix a Dripping Faucet Without Calling a Plumber | Plumbers Supply Hub
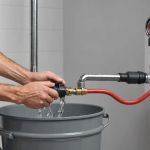 How to Safely Drain a Water Heater Before Moving
 How to Replace a Kitchen Sink Sprayer Hose: Step-by-Step Guide