
- Understanding-Slab-Leaks
- Signs-of-a-Slab-Leak
- How-to-Repair-a-Slab-Leak
- Tools-and-Materials-Needed-for-Repair
- When-to-Call-a-Professional
Understanding Slab Leaks
A slab leak occurs when there is a leak in the pipes running under the concrete floor of a building. These leaks are often difficult to detect because they are hidden beneath the floor and may not present obvious signs at first. Slab leaks can be caused by various factors, including corrosion of the pipes, poor installation, shifting of the foundation, or even ground movement. When left untreated, they can cause serious water damage and even structural issues.
Knowing how to repair a slab leak under the floor is crucial for homeowners who want to protect their property and prevent costly damage. In this guide, we’ll walk you through the signs of a slab leak, the repair process, and when it’s time to call in a professional plumber for help.
Signs of a Slab Leak
Detecting a slab leak early is important to prevent significant damage. While slab leaks may not always be obvious, there are several signs that homeowners can watch for:

1. Warm Spots on the Floor
If you notice warm spots on your floor, it could be a sign that a hot water pipe is leaking beneath the slab. This is especially common in areas with concrete flooring. If the hot water pipe is leaking, the floor will feel warmer than the surrounding areas, which may be noticeable to the touch.
2. Sounds of Running Water
If you hear the sound of running water when no taps are on, it could indicate a leak under the floor. Slab leaks may cause the water to flow continuously through the pipes, even if no one is using the water fixtures.
3. Increased Water Bills
An unexplained increase in your water bill is another sign of a slab leak. Since water is constantly leaking from the pipes, it can result in higher water usage, even if you're not using more water than usual.
4. Cracks in the Foundation or Walls
Slab leaks can cause the foundation of your home to shift, which may result in visible cracks in the floor, walls, or ceiling. If you notice cracks that seem to appear suddenly, it could be due to water seeping from a leaking pipe under the slab.
5. Damp or Wet Floors
One of the most obvious signs of a slab leak is water pooling on the floor. If you see areas of your floor that are consistently damp or wet, even though there’s no visible source of the water, it could be coming from a leak beneath the slab.
How to Repair a Slab Leak
Repairing a slab leak is a complex process that requires the right tools, knowledge, and experience. Here are the basic steps for repairing a slab leak under the floor:
1. Shut Off the Water Supply
The first step in any plumbing repair is to shut off the water supply to prevent further water damage. Locate your home's main water shut-off valve and turn it off to stop the flow of water to the affected pipes.
2. Locate the Leak
Finding the exact location of the leak is essential for a successful repair. You may need to use specialized equipment such as listening devices, pressure testing, or even thermal imaging cameras to locate the leak accurately. In some cases, you may have to cut into the floor to access the pipes.
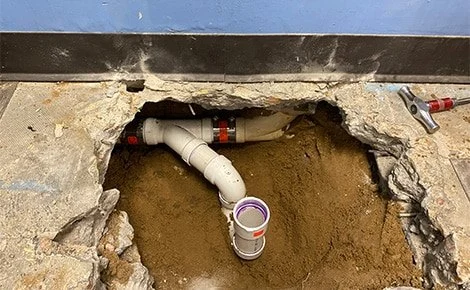
3. Access the Leaking Pipe
Once you’ve located the leak, you need to gain access to the pipes. This may involve breaking up the concrete floor in the area of the leak. Depending on the location and severity of the leak, this step can be time-consuming and may require professional equipment.
4. Repair the Pipe
There are several ways to repair a leaking pipe. For small leaks, you may be able to patch the pipe with a sealant or epoxy. However, for larger leaks or more complex issues, you may need to replace the damaged section of the pipe entirely. This typically involves cutting out the damaged pipe and replacing it with new pipe material, such as copper or PEX.
5. Seal the Area and Test the Repair
After repairing the leak, it’s important to seal the area properly to prevent further water intrusion. Once the repair is complete, turn the water back on and check for leaks to ensure that the issue has been resolved. It's also a good idea to monitor the area for any signs of recurring leaks in the future.
Tools and Materials Needed for Repair
To repair a slab leak, you will need the following tools and materials:
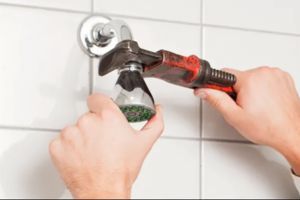
1. Pipe Wrench
A pipe wrench is essential for loosening and tightening pipe fittings during the repair process.
2. Concrete Cutting Tools
If you need to break through the concrete floor, you will need a concrete saw or jackhammer to access the leaking pipe.
3. Replacement Pipe
Depending on the damage, you may need to replace the section of pipe that is leaking. Make sure to have the appropriate type of pipe (such as copper or PEX) on hand.
4. Pipe Insulation
Once the repair is complete, using pipe insulation can help prevent future leaks by protecting the pipes from extreme temperatures or corrosion.
When to Call a Professional
While DIY repairs can be tempting, slab leaks are often complicated and can cause further damage if not properly fixed. If you're not comfortable with breaking into the floor, or if the leak is extensive, it's best to call a professional plumber. Experienced plumbers have the tools and expertise to detect and repair slab leaks safely and effectively, minimizing the risk of additional damage.
At Plumbers Supply Hub, we offer the tools and materials you need to tackle slab leak repairs, whether you're doing it yourself or need professional assistance. Check out our selection of products to find the right solutions for your plumbing needs.


 R & T Yoder Plumbing, Inc - Springfield5.0 (2 reviews)
 ACR Trenchless & Plumbing5.0 (18 reviews)
 Smith Plumbing & Heating5.0 (4 reviews)
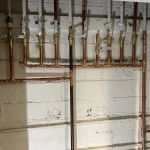 Corsillo Plumbing & Sewer Cleaning Co.4.0 (63 reviews)
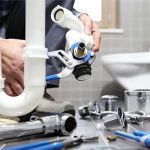 Royal Plumber Signal Hill5.0 (25 reviews)
 Leuthmers Plumbing LLC0.0 (0 reviews)
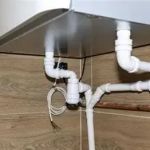 How to Repair a Condensation Issue on Cold Pipes
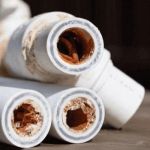 How to Clean Sediment Build-Up in Household Pipes: Effective Solutions for Clear Water Flow
 How to Replace a Damaged Floor Drain Cover Easily
 How to Install a Bidet Attachment Safely | Expert Plumbing Tips
 How to Replace an In-Line Check Valve
 How to Install a New Kitchen Sink Faucet: A Beginner’s Guide