

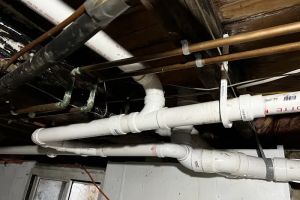
1. Understanding the Air Admittance Valve (AAV)
An air admittance valve (AAV) is an important component in modern plumbing systems, particularly in drain and vent systems. It allows air to enter the plumbing system when needed, ensuring that drains flow efficiently and preventing the buildup of harmful pressure. AAVs are commonly found in areas where a traditional vent pipe might be impractical, such as in kitchens, bathrooms, and laundry rooms.
However, like any plumbing part, AAVs can experience issues over time, such as leaks. A leaking air admittance valve can cause unpleasant odors, poor drainage, and even water damage. Knowing how to repair a leaking air admittance valve can save you from costly plumbing repairs and keep your system functioning smoothly.
2. Common Causes of a Leaking Air Admittance Valve
Before you attempt to repair a leaking air admittance valve, it’s important to understand why the valve may be leaking. Several factors can contribute to a malfunctioning AAV, including:

2.1. Wear and Tear
Over time, the rubber seals inside the air admittance valve can deteriorate, especially if the valve is exposed to extreme temperatures or frequent use. As the seal breaks down, air and moisture can escape, leading to leaks.
2.2. Improper Installation
If the AAV was not installed correctly or if the wrong type of valve was used for the system, leaks can occur. Improper sealing or an incorrectly sized valve may not properly regulate the air pressure, leading to leaks around the valve itself.
2.3. Debris or Blockages
Debris, grease, or other substances can block the internal mechanism of the valve, causing it to fail. If the valve gets clogged, it may not open and close as it should, which can create leaks or improper venting.
2.4. Aging Valve
Like any plumbing component, air admittance valves have a limited lifespan. Over time, the valve may simply wear out and need to be replaced. Older valves are more likely to leak due to the breakdown of internal parts.
3. How to Repair a Leaking Air Admittance Valve
Repairing a leaking air admittance valve is a relatively simple task for those with basic plumbing knowledge. Here’s a step-by-step guide to help you repair a leaking AAV:
3.1. Turn Off the Water Supply
Before beginning any plumbing repair, always ensure that the water supply is turned off. This will prevent any accidental water flow during the repair process and keep you safe while working on the system.
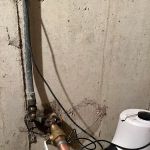
3.2. Locate the Leaking Valve
The next step is to locate the exact source of the leak. Check around the air admittance valve for any visible signs of leakage or water damage. If the valve is located inside a cabinet or behind a wall, you may need to remove access panels to fully inspect it.
3.3. Inspect the Valve for Damage
Once you’ve located the valve, inspect it closely for any obvious damage, such as cracks, broken seals, or debris buildup. If you notice any damaged parts, you may need to replace them. Common parts that can wear out include the rubber gasket or the valve cover.
3.4. Clean the Valve
If debris is the cause of the leak, clean the valve thoroughly. Use a soft brush or cloth to remove any build-up of grease, dust, or other materials that may be clogging the valve. Avoid using harsh chemicals, as they may damage the valve’s internal components.
3.5. Replace Damaged Parts
If you notice that the rubber gasket or any other part of the valve is damaged, it’s important to replace it. You can typically purchase replacement parts at most hardware or plumbing supply stores. Make sure the new parts are the correct size and type for your specific air admittance valve model.
3.6. Reassemble and Test
After replacing any damaged parts and cleaning the valve, reassemble the air admittance valve and check that it’s properly sealed. Turn on the water supply and check for any leaks. You should also test the valve by running water through the plumbing system and ensuring the valve is venting air properly.
3.7. Seal the Valve
If the valve is still leaking after replacing parts, check the seals around the valve and tighten any connections. If necessary, apply a small amount of plumber’s tape to the threads to help create a more secure seal. Be cautious not to overtighten any connections, as this could cause further damage.
4. When to Replace an Air Admittance Valve
Sometimes, a leaking air admittance valve cannot be repaired. If the valve is old or severely damaged, it may be more cost-effective and practical to replace it entirely. Here’s when you should consider replacing your air admittance valve:
4.1. Persistent Leaks After Repair
If the valve continues to leak despite your best efforts to repair it, this is a sign that the internal components may be too damaged to restore. In this case, replacing the valve with a new one is the best solution.
4.2. Age and Wear
If the valve is over 10-15 years old and has been subject to regular wear and tear, it might be time for a replacement. Over time, the internal parts of the valve degrade, making it more difficult to repair.
4.3. Ineffective Performance
If your air admittance valve is no longer functioning properly—meaning it’s not venting air as needed or is making strange noises—it’s likely time to replace it to prevent further plumbing issues.
5. Professional Help: When to Call a Plumber
While most homeowners can tackle minor repairs of a leaking air admittance valve, some situations may require the expertise of a professional plumber. If you’re unsure about the cause of the leak or if you’re dealing with a complex plumbing system, it’s a good idea to consult with a licensed plumber. A professional can quickly diagnose the issue and ensure that repairs are done correctly and safely.
6. Conclusion: Fixing a Leaking Air Admittance Valve
Repairing a leaking air admittance valve is a straightforward task for anyone with basic plumbing skills. By understanding the common causes of leaks and following the steps outlined in this guide, you can restore your AAV and prevent further plumbing issues. However, if you encounter complications or if the valve needs to be replaced, don’t hesitate to reach out to a professional for assistance.
For all your plumbing needs, including tools, parts, and expert advice, visit Plumbers Supply Hub to find the best products and services for your home repairs.


 Hometown Plumbing, LLC4.0 (55 reviews)
 Jeff Caudill Plumbing3.0 (12 reviews)
 Alert Plumbing & Sewer Cleaning4.0 (3 reviews)
 Plumbing Boys4.0 (42 reviews)
 Cova Plumbing& Rooter4.0 (19 reviews)
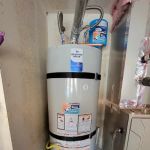 5 Star Plumbing, Heating, & Air5.0 (32 reviews)
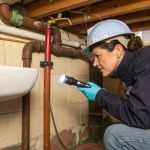 How to Detect and Repair Hidden Leaks in Your Home’s Plumbing System
 How to Prevent Tree Roots from Damaging Sewer Lines
 How to Clear a Clogged Sewer Line: What Every Homeowner Should Know
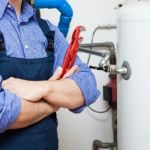 Why Your Water Heater Is Making Noise and How to Fix It
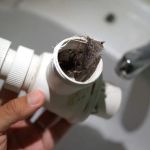 How to Repair a Swollen P-Trap After a Clog
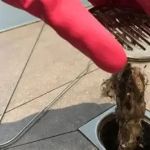 How to Repair a Hairball Clog Without Harsh Chemicals